 StoreJet Cloud Manual
1. Getting Started
Package Contents
- StoreJet Cloud device
- Ethernet cable
- AC power adapter
- Quick Start Guide
- Warranty Card
Requirements
Operating System
- Windows 10 / 8.1 / 8 / 7
- macOS 10.7 or later
Web Browsers
- Microsoft Edge 41 or later on Windows
- Safari 9.0 and later on Mac
- Firefox 29 and later on Windows and Mac
- Google Chrome 31 and later on Windows and Mac
Local Network
- Router/switch (Gigabit is suggested to maximize performance)
Internet
- Broadband Internet connection is required for remote access with mobile Apps.
Diagrams
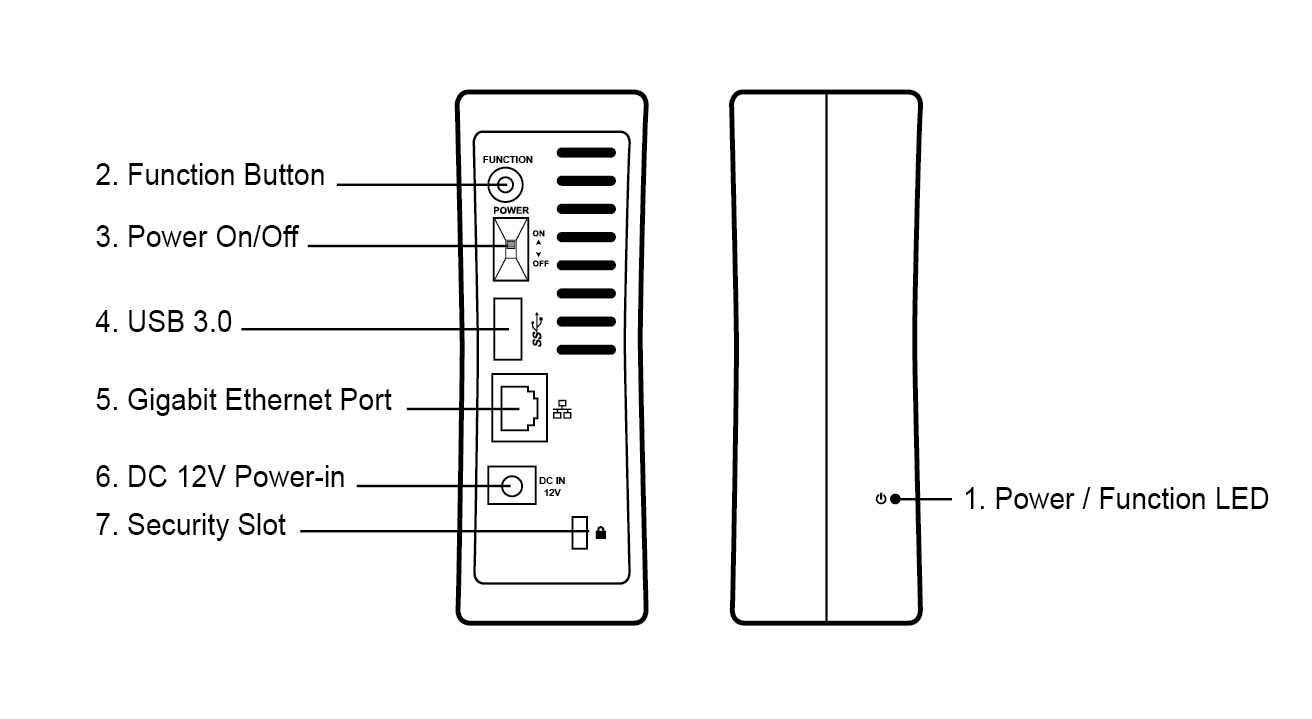
StoreJet Cloud 110
StoreJet Cloud 210
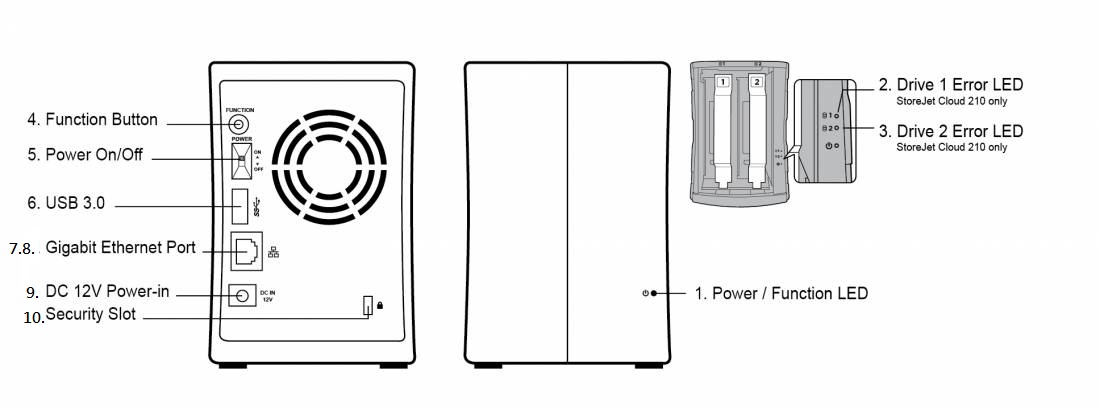
| StoreJet Cloud 110 / 210 Function |
|---|
| 1. Power / Function LED |
| 2. Drive 1 Error LED - StoreJet Cloud 210 Only |
| 3. Drive 2 Error LED - StoreJet Cloud 210 Only |
| 4. Function Button |
| 5. Power Switch |
| 6. USB 3.0 Port |
| 7. Gigabit Ethernet Port |
| 8. Ethernet Link and Activity LED |
| 9. Power Connector |
| 10. Security Slot |
Front Panel LED
| State | Color | Appearance | Description |
|---|---|---|---|
| Power Off | None | None | Displays if the device is unplugged |
| Power On | White | Solid | Device is powering on |
| Booting | White | Flashing | System is booting |
| Shutting down | White | Flashing | System is shutting down |
| Sleep mode | Orange | Flashing | System is under sleep mode |
| USB plugged in | Blue | Solid | USB port has been plugged in |
| Format HDD | Blue | Flashing | System is being initialized (formatting HDD) |
| Update firmware | Blue | Flashing | Updating firmware |
| Resetting to default | Blue | Flashing | Resetting to default |
| One touch backup | Blue | Flashing | One touch backup |
| High temperature | Red | Flashing | System temperature may have exceeded the allowable safety value |
| HDD reached a dangerous level | Red | Flashing | The bad sectors in the internal HDD have reached a dangerous level |
| Unable to find HDD | Red | Flashing | Unable to find HDD |
| HDD failed | Red | Flashing | Mount HDD failed |
| HDD error | Red | Flashing | HDD error occurred |
| (SJC210) Unable to find HDD 1~2 | Red | Flashing | Unable to find HDD 1~2 |
| (SJC210) Mount HDD 1~2 failed | Red | Flashing | Mount HDD 1~2 failed |
| (SJC210) HDD 1~2 error occurred | Red | Flashing | HDD 1~2 error occurred |
| (SJC210) FAN error | Red | Flashing | FAN error occurred |
Back Panel LED
| State | Color | Appearance | Description |
|---|---|---|---|
| Link up | Green | Solid | Cable is plugged in, and network link has successfully established communications. |
| Link Busy | Green | Flashing | The Network communication is in progress. |
Hard Drive Installation (for TS-SJC210N only)
Notes:
- Recommended Hard Drives.
- The total capacity of system is up to 16TB.
- To avoid damaging the StoreJet Cloud with static electricity, ground yourself by touching something made of metal before handling any sensitive electronic parts.
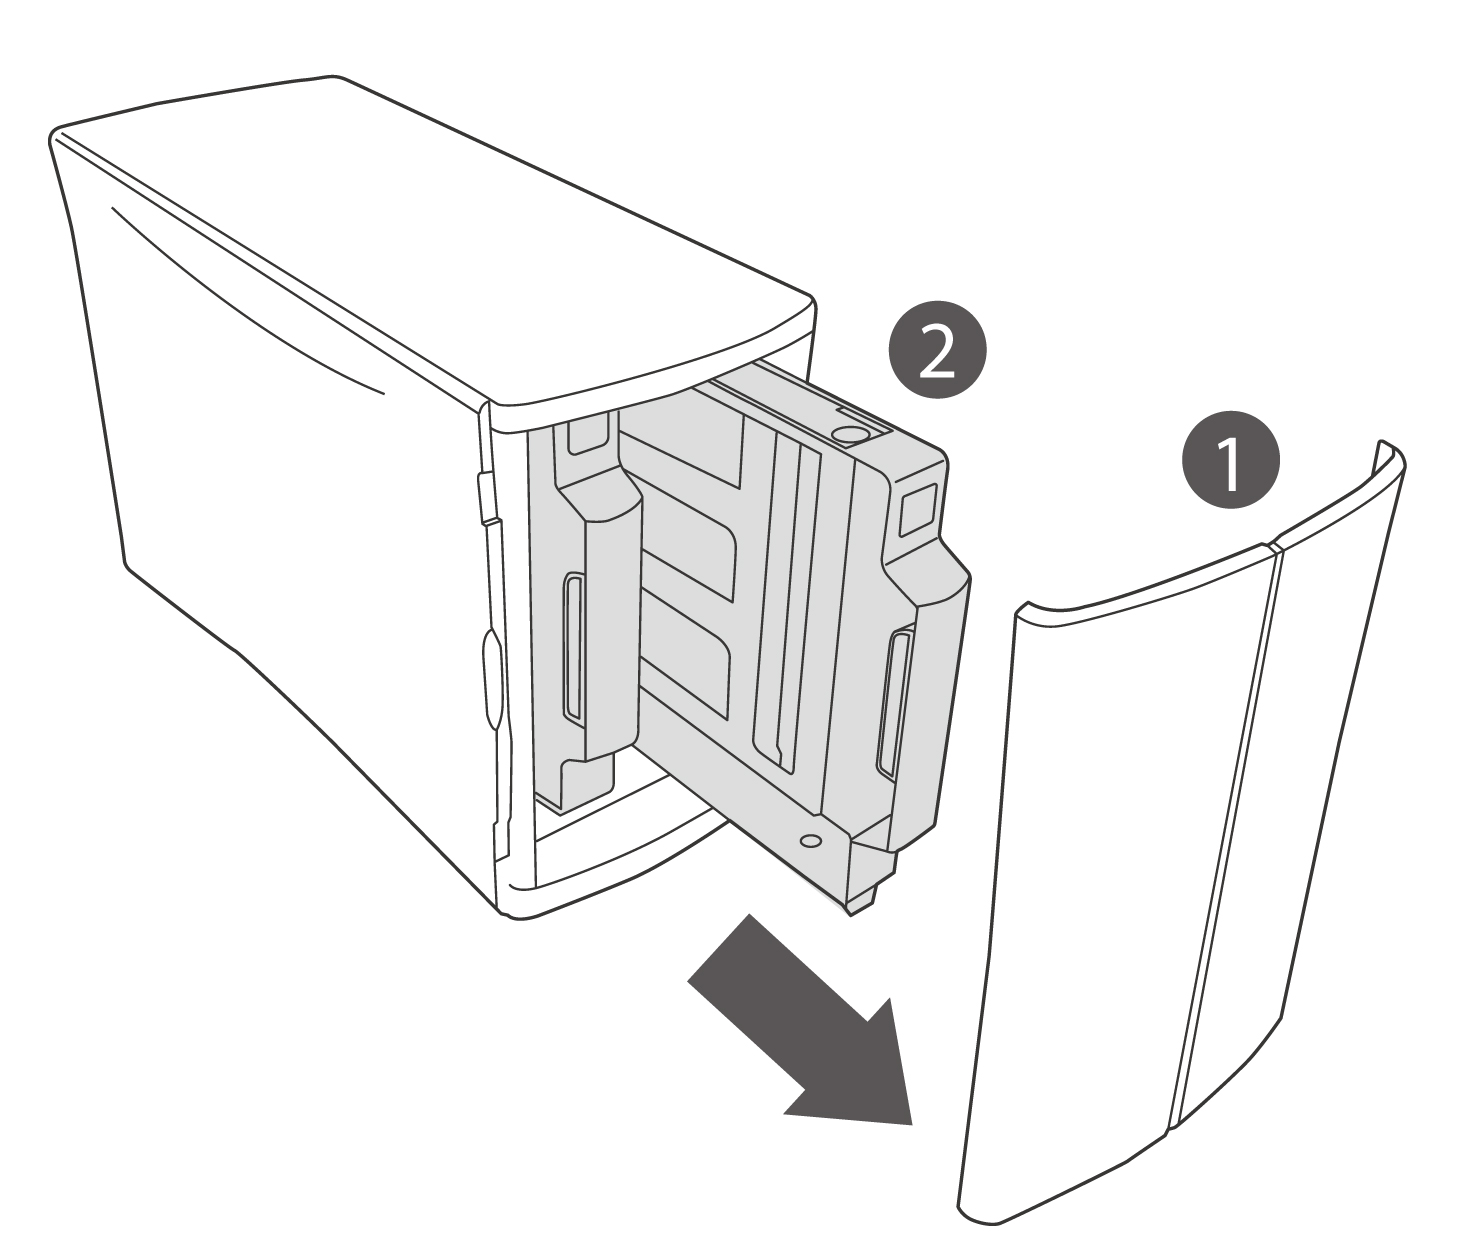
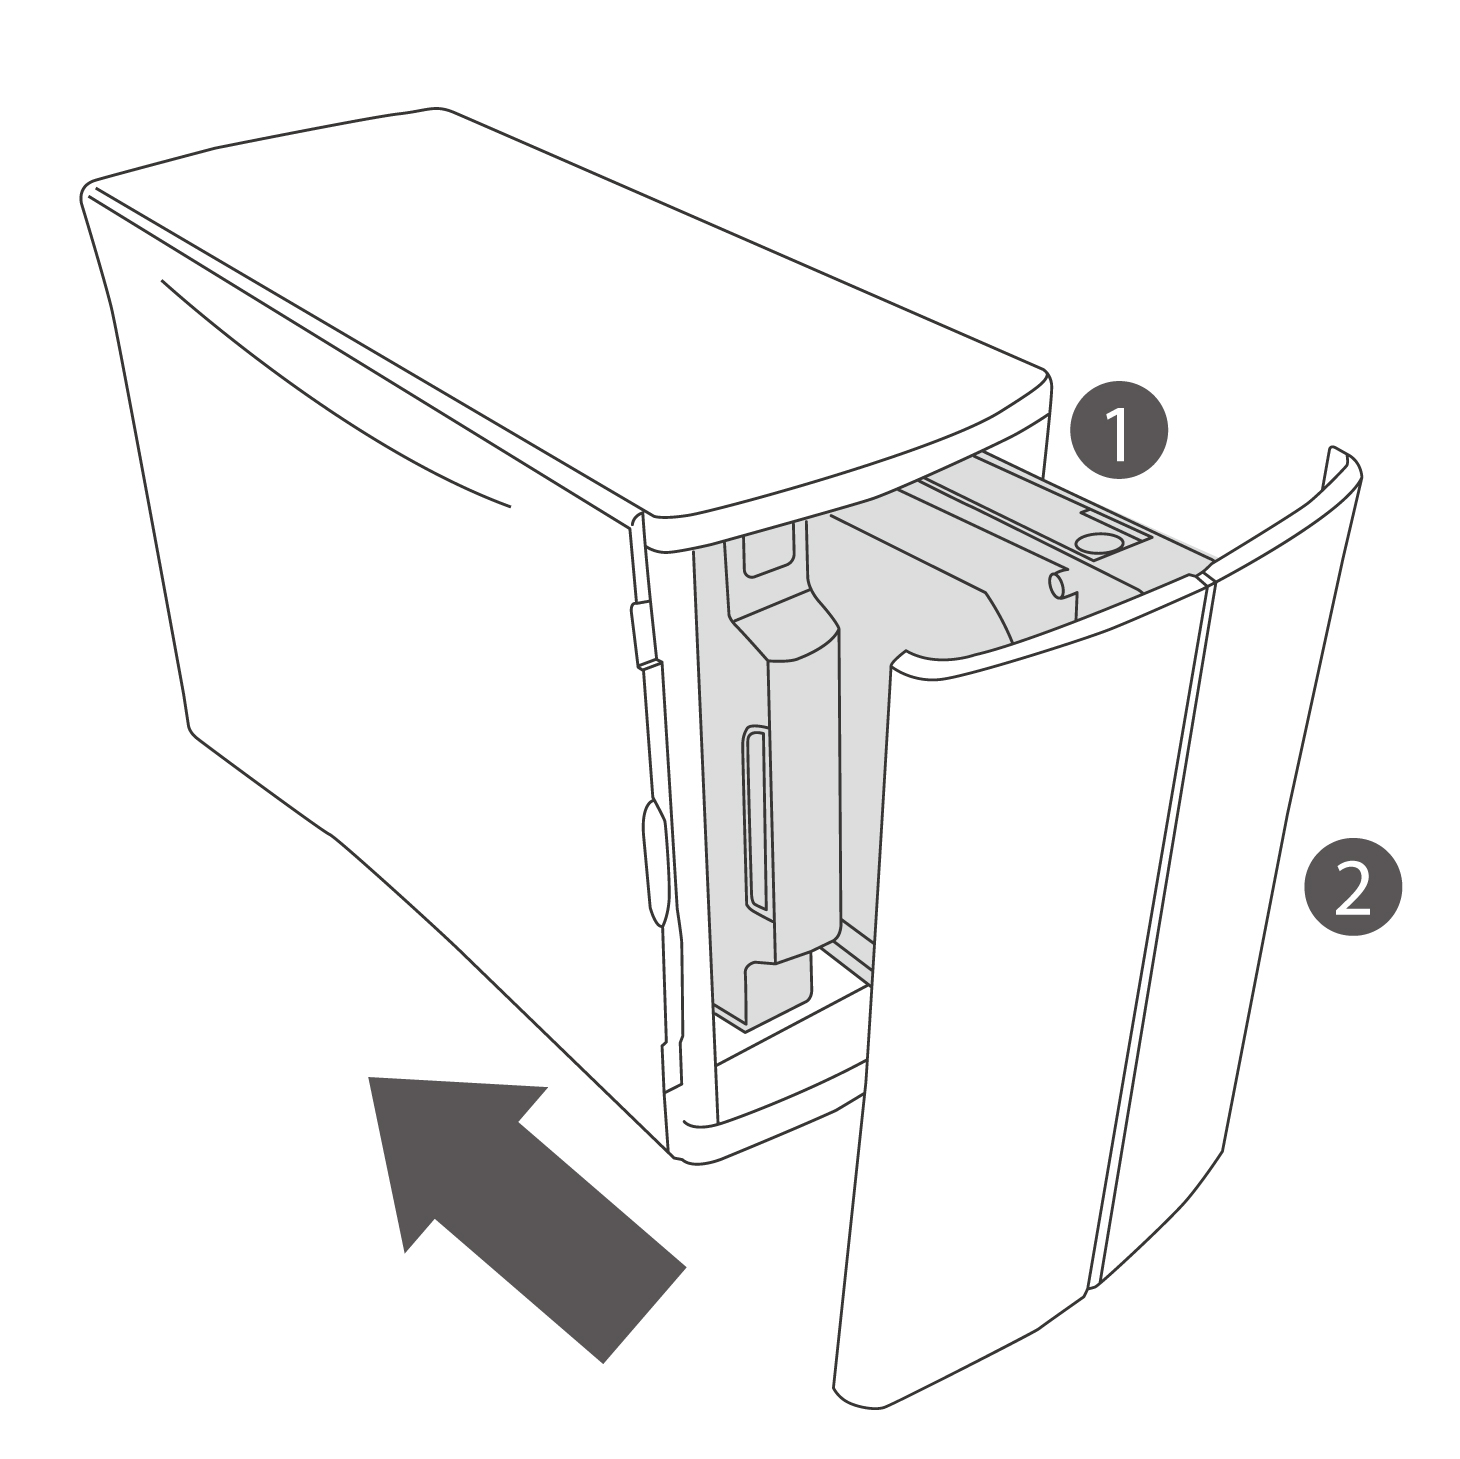
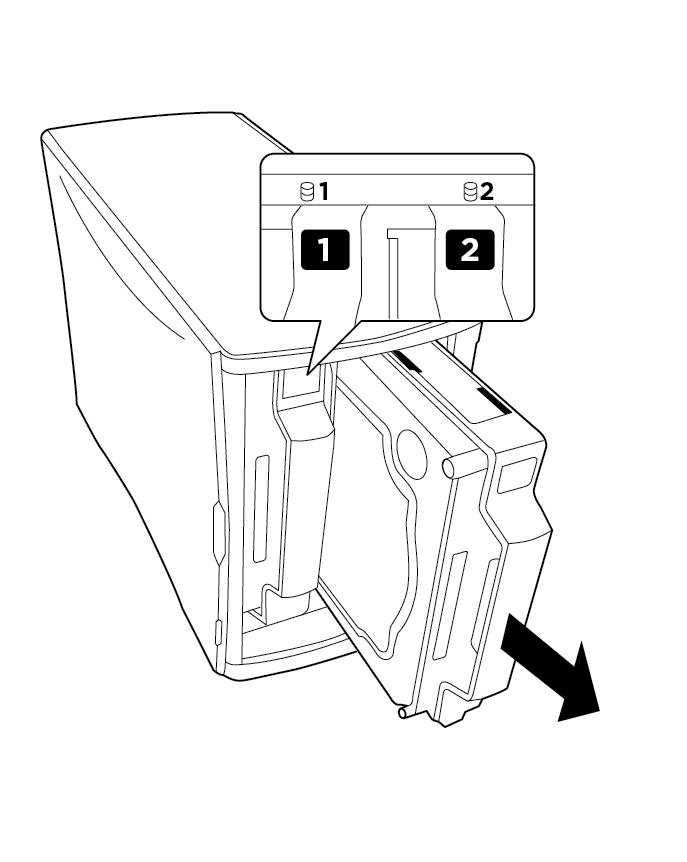
- Remove the front panel by pulling it forward from both sides.
-
Pull out the two drive trays. (Note: Do not apply excessive pressure to the top of the unit.)
-
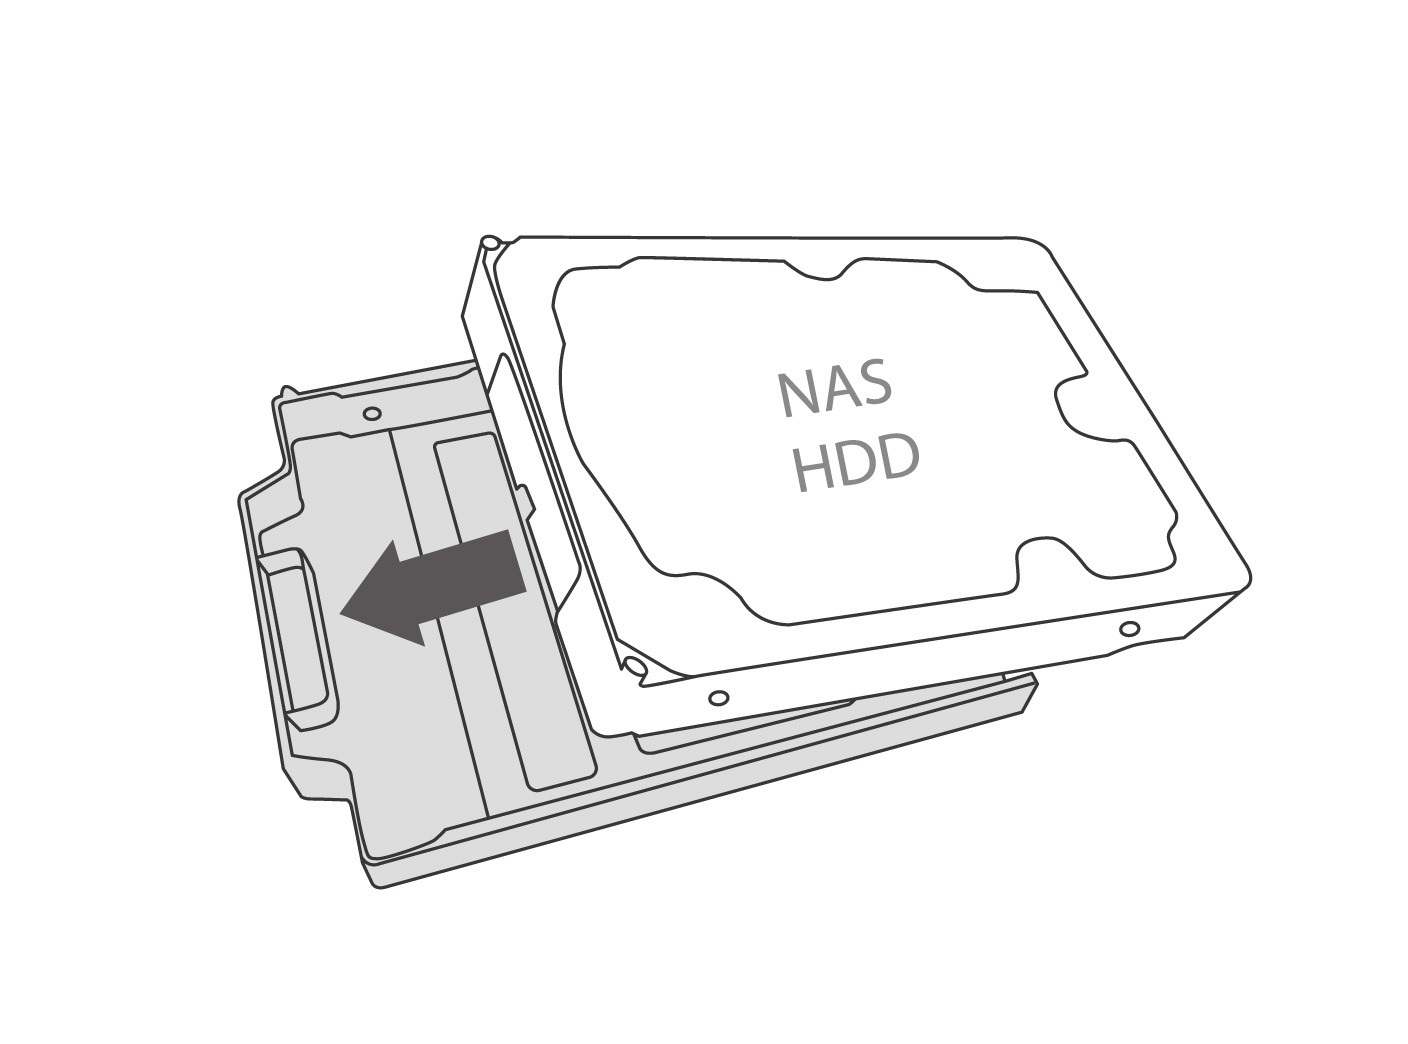
Install NAS-grade hard drives (same capacity recommended) into the drive trays.
-
Affix the two front screws.
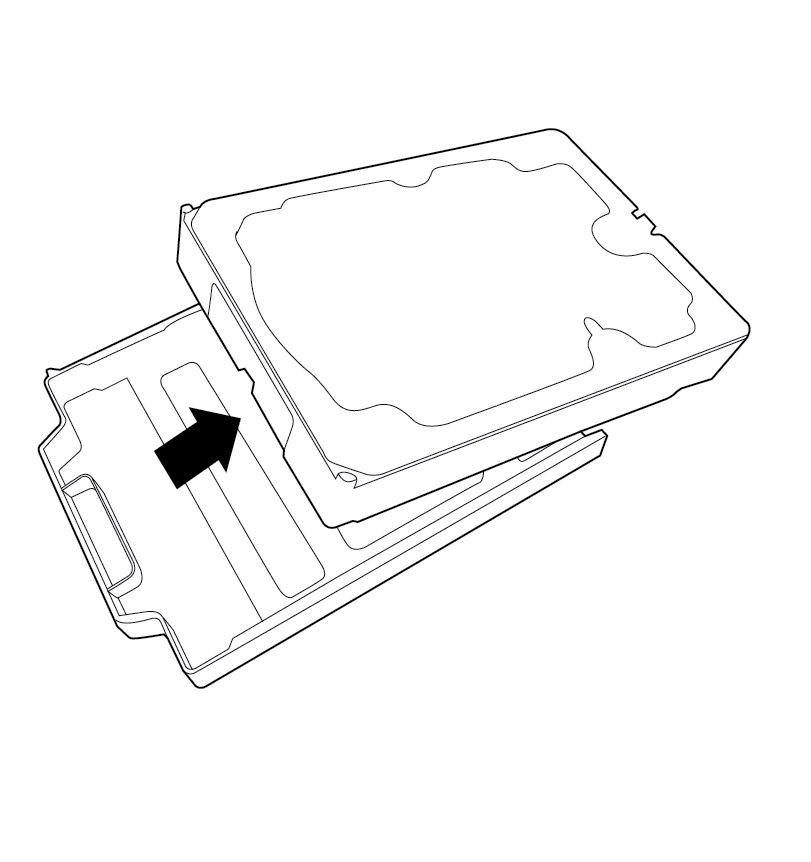
- Insert the steel plate in the correct direction.
-
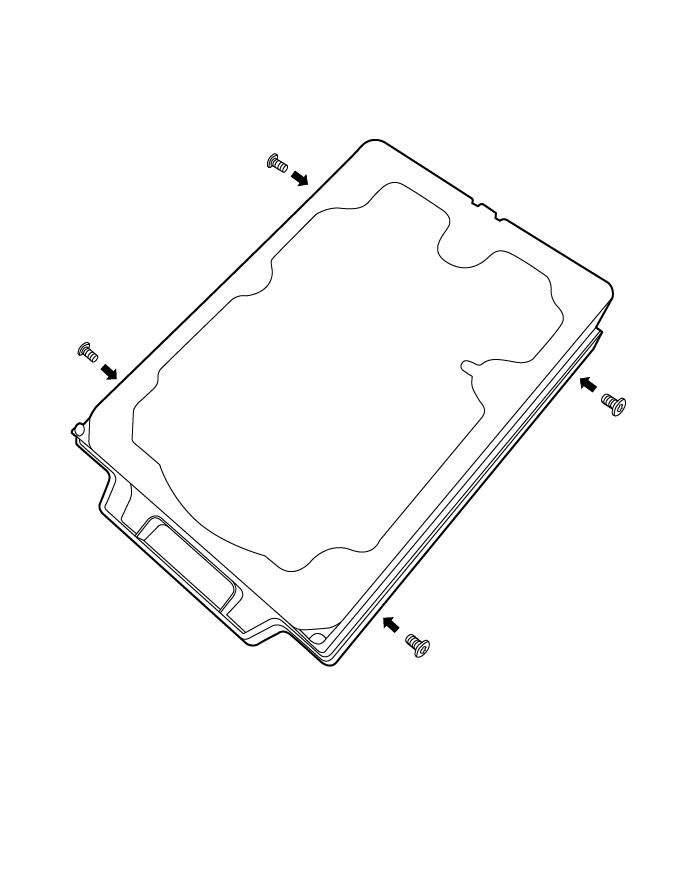
Affix the rear screw.

-
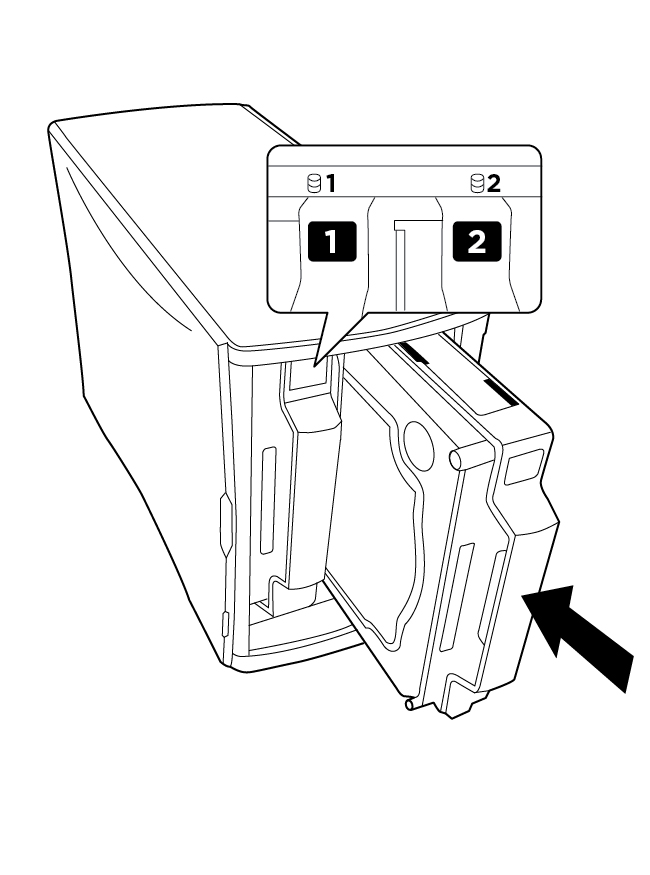
Reinsert the drive trays back into the empty drive slots.
-
Replace the front panel.
Preparing StoreJet Cloud for Use
Please follow the steps below:
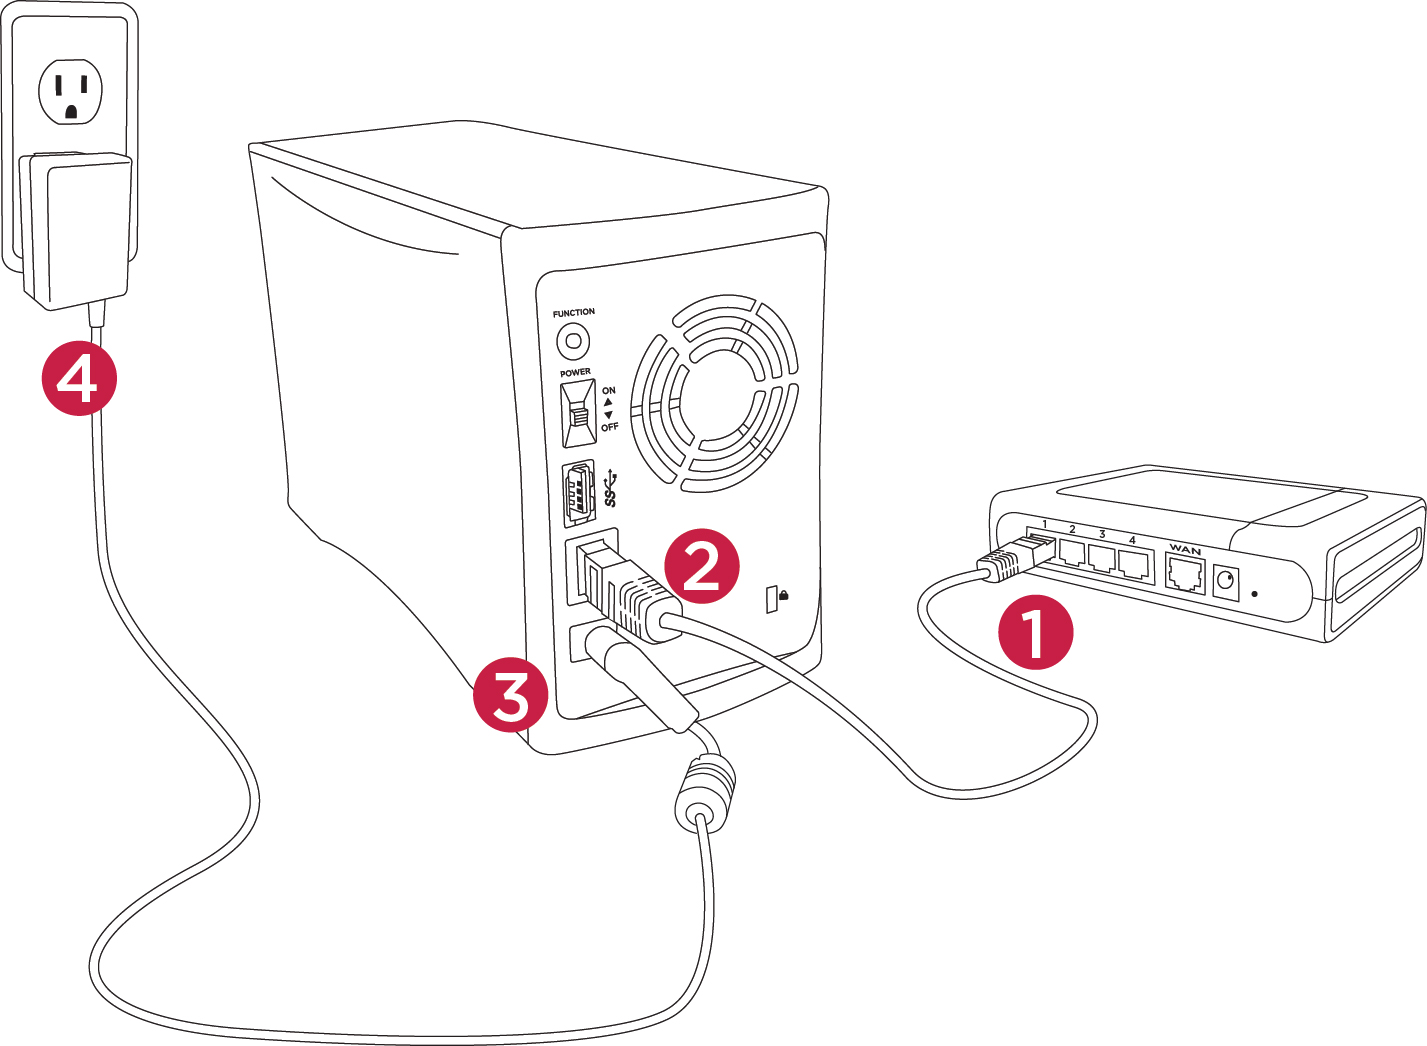
-
Using the included Ethernet cable, connect one end of the Ethernet cable into a router.
-
Connect the other end of the Ethernet cable into the Ethernet port located on the back of the StoreJet Cloud.
-
Connect one end of the power adapter into the power supply socket on the back of the StoreJet Cloud.
-
Plug the other end of the power adapter into a power outlet.
-
Move the power switch on the back of the StoreJetCloud to the "on" position to power on.
-
When the power LED on your device turns solid white, you can proceed to set up StoreJet Cloud.
Setting up StoreJet Cloud (Windows/macOS)
-
Open web browser and enter http://find.storejetcloud.com to the StoreJet Cloud finder page.
-
The setup page begins searching for your StoreJet Cloud device. When your StoreJet Cloud is found, a page will display your device and its IP and MAC addresses.
If you still cannot find your StoreJet Cloud to complete the connection, please install StoreJet Cloud Finder Win/ Mac APP to help you find your StoreJet Cloud device.


-
Click Connect. It will take you to the StoreJet Cloud Setup page.
-
For SJC110/210
-
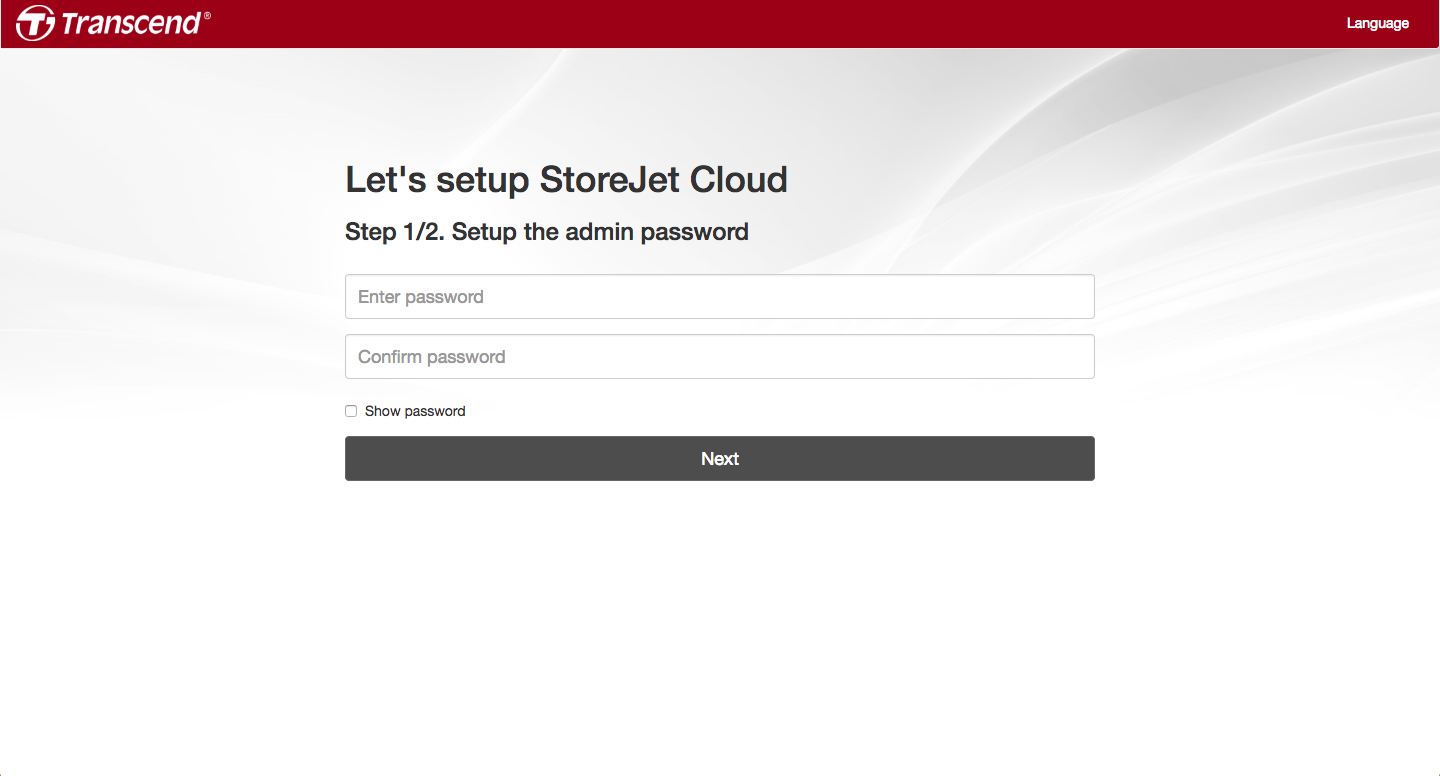
On Setup page, there are 2 steps to set up your administrator password and the timezone of your location.
-
For Step 1, enter a password for the administrator account of your StoreJet Cloud and then confirm the password. Click Next.
-
For Step 2, choose the timezone of your StoreJet Cloud location. Click Next.

-
-
For TS-SJC210N (Diskless)
-
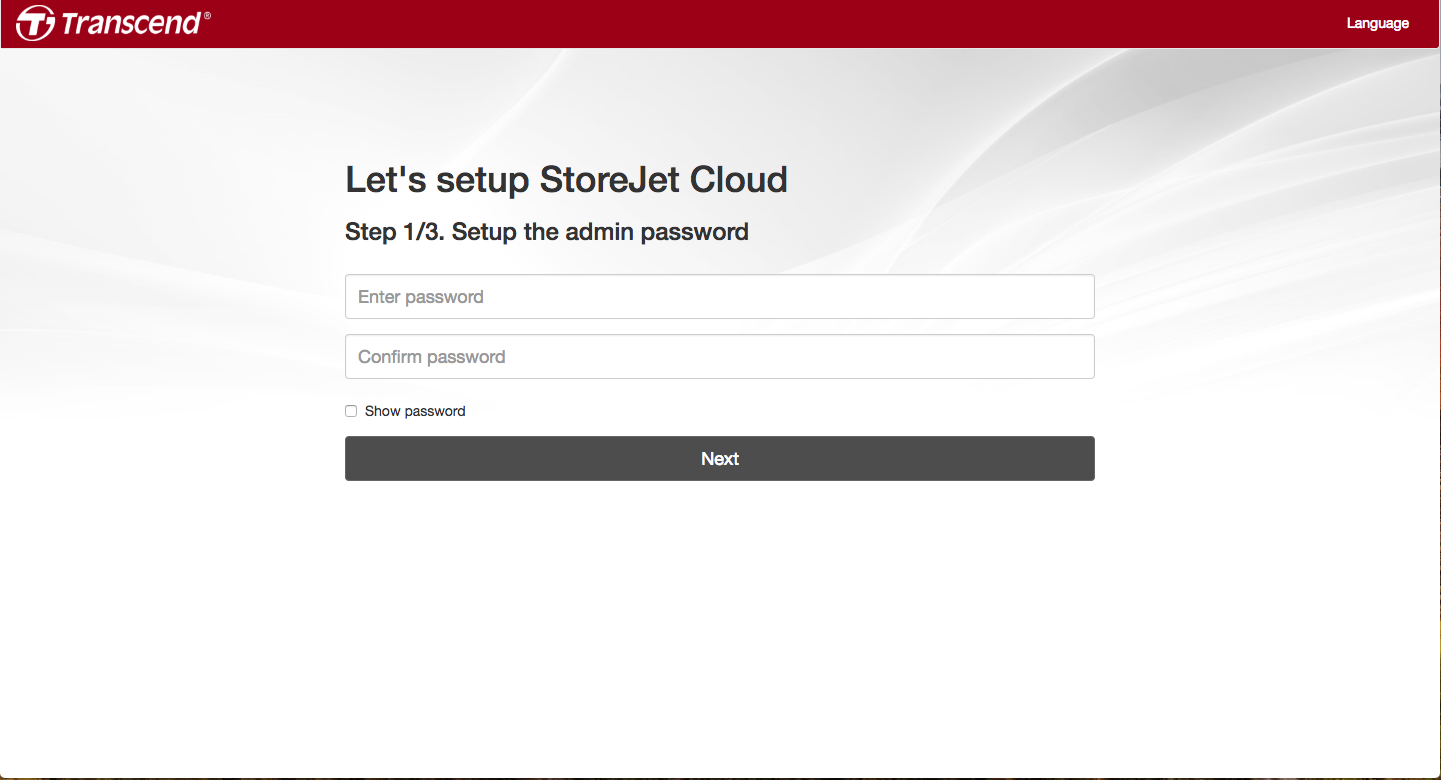
On Setup page, there are 3 steps to set up your administrator password, the timezone of your location, and the hard drives.
-
For Step 1, enter a password for the administrator account of your StoreJet Cloud and then confirm the password. Click Next.
-
For Step 2, choose the timezone of your StoreJet Cloud location. Click Next.

-
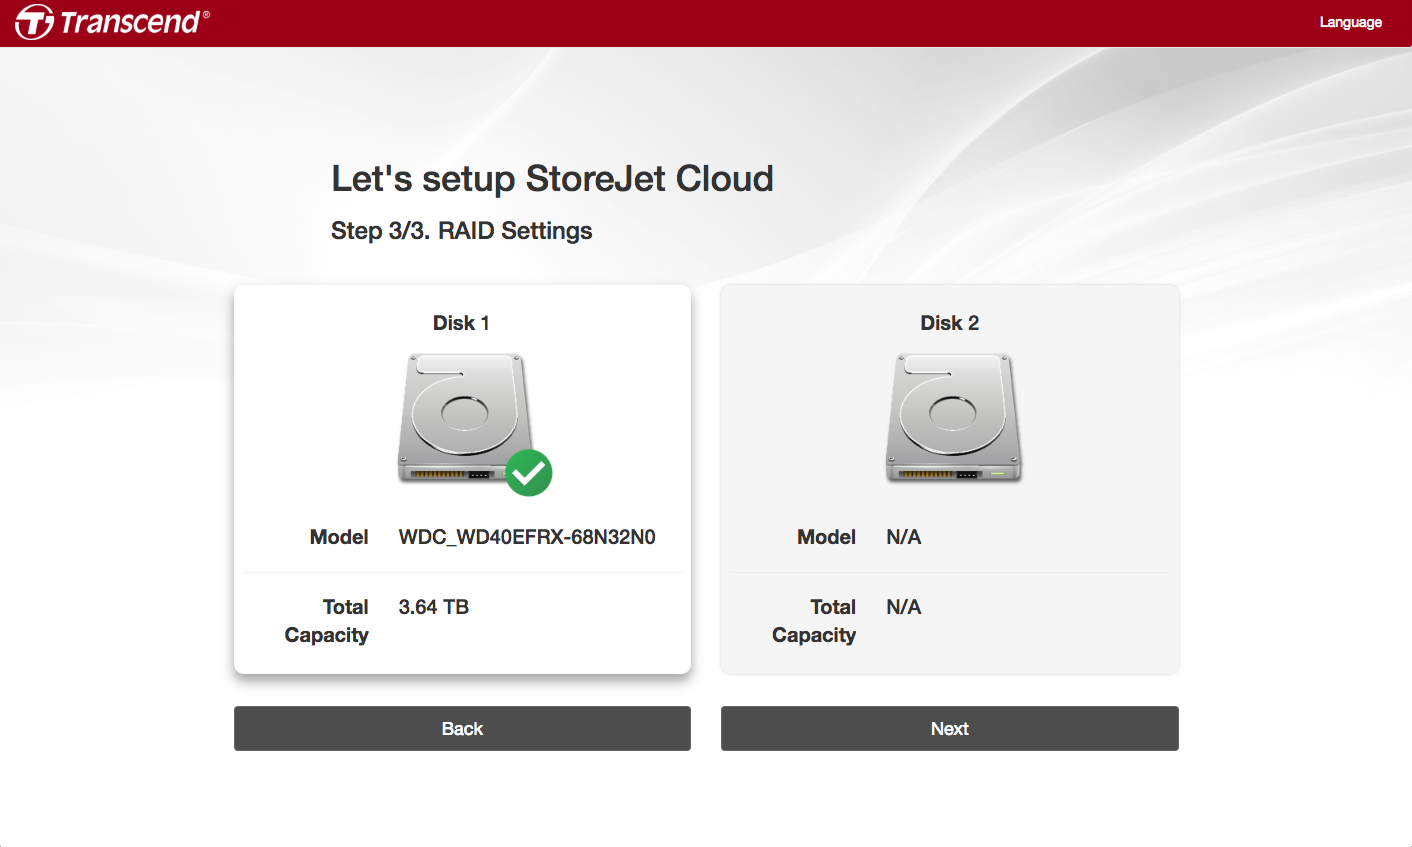
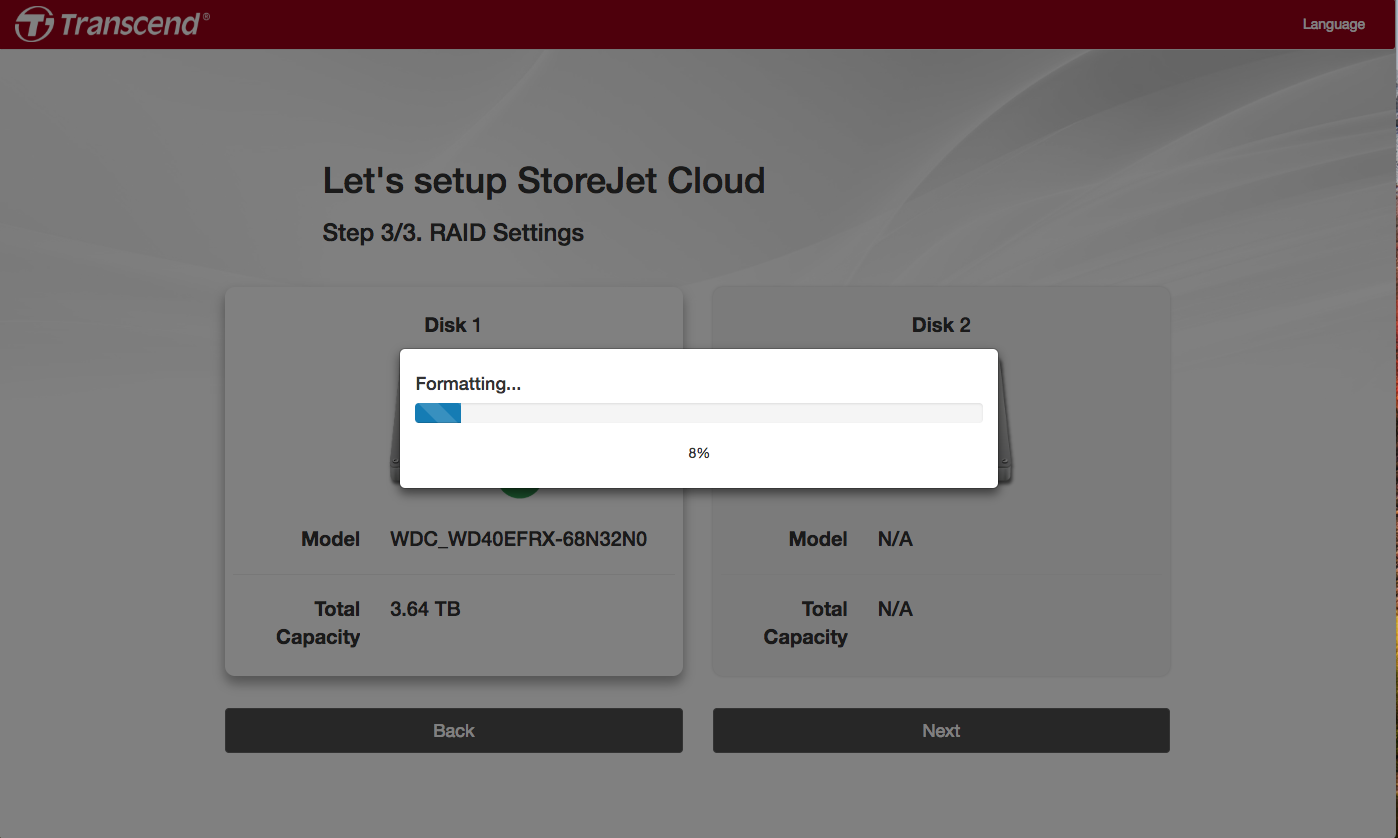
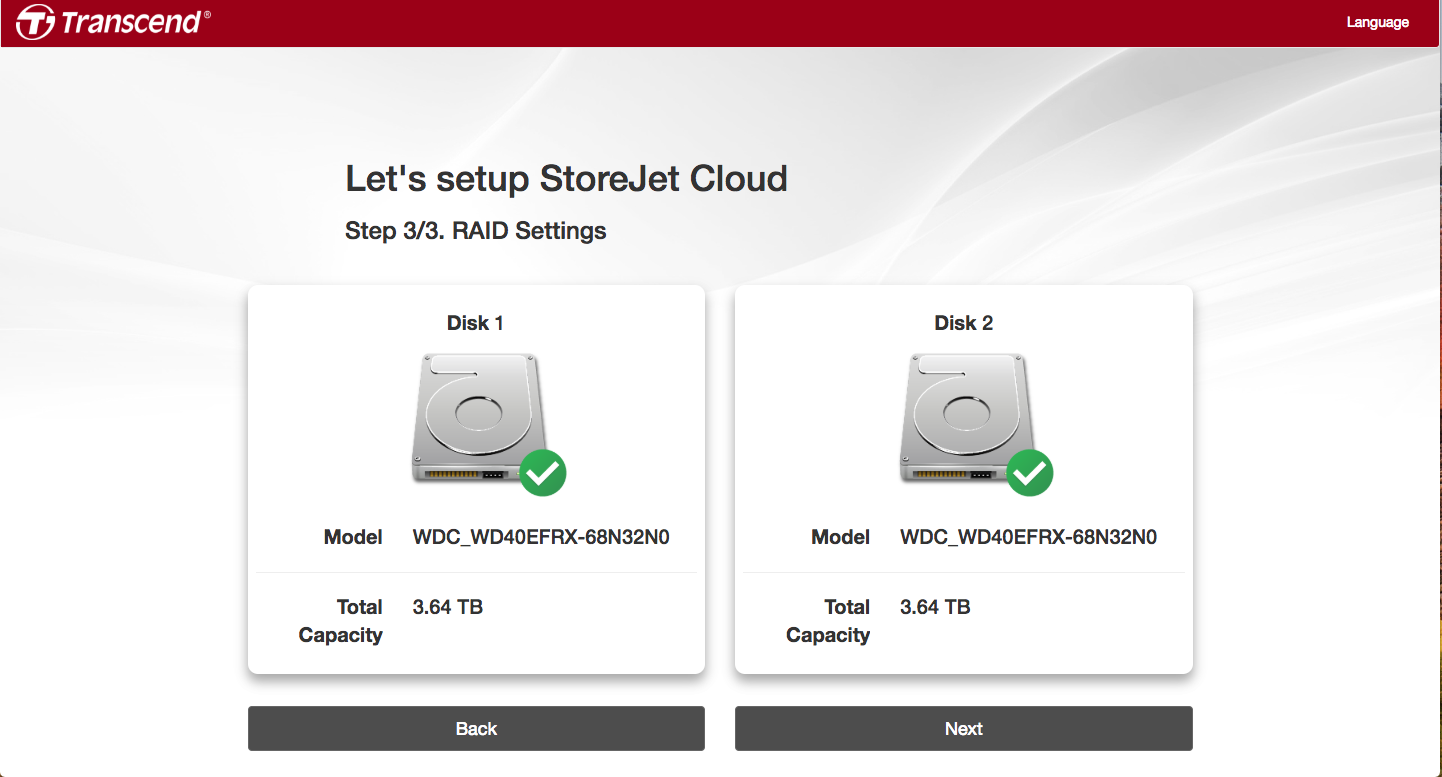
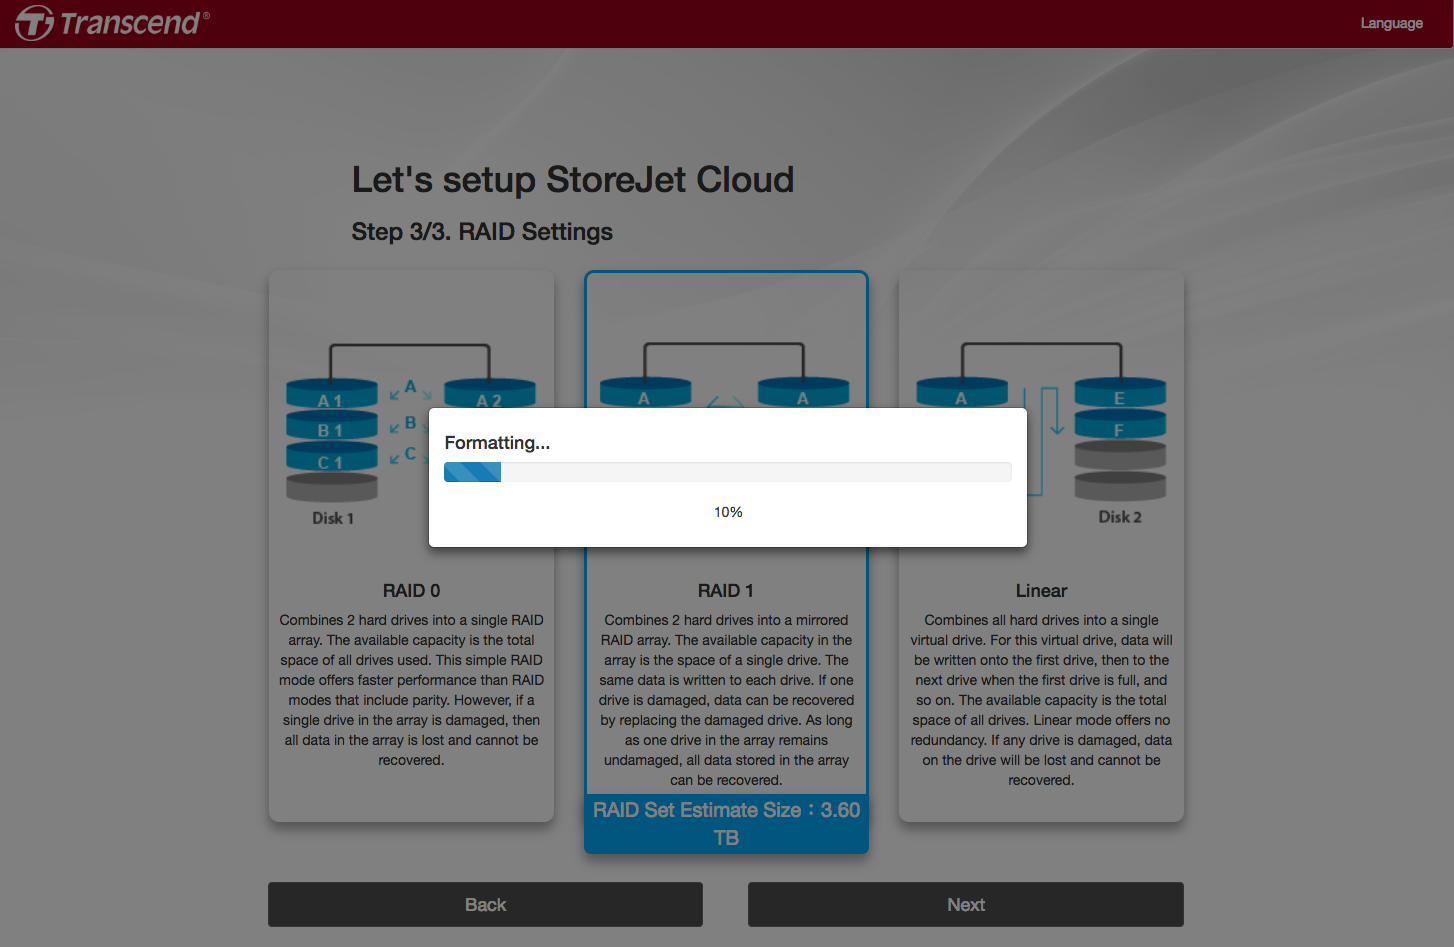
For Step 3, check the information of the hard drives and set the hard drives.
-
1 hard drive : format
-
2 hard drives : select the RAID mode
-
-
-
-
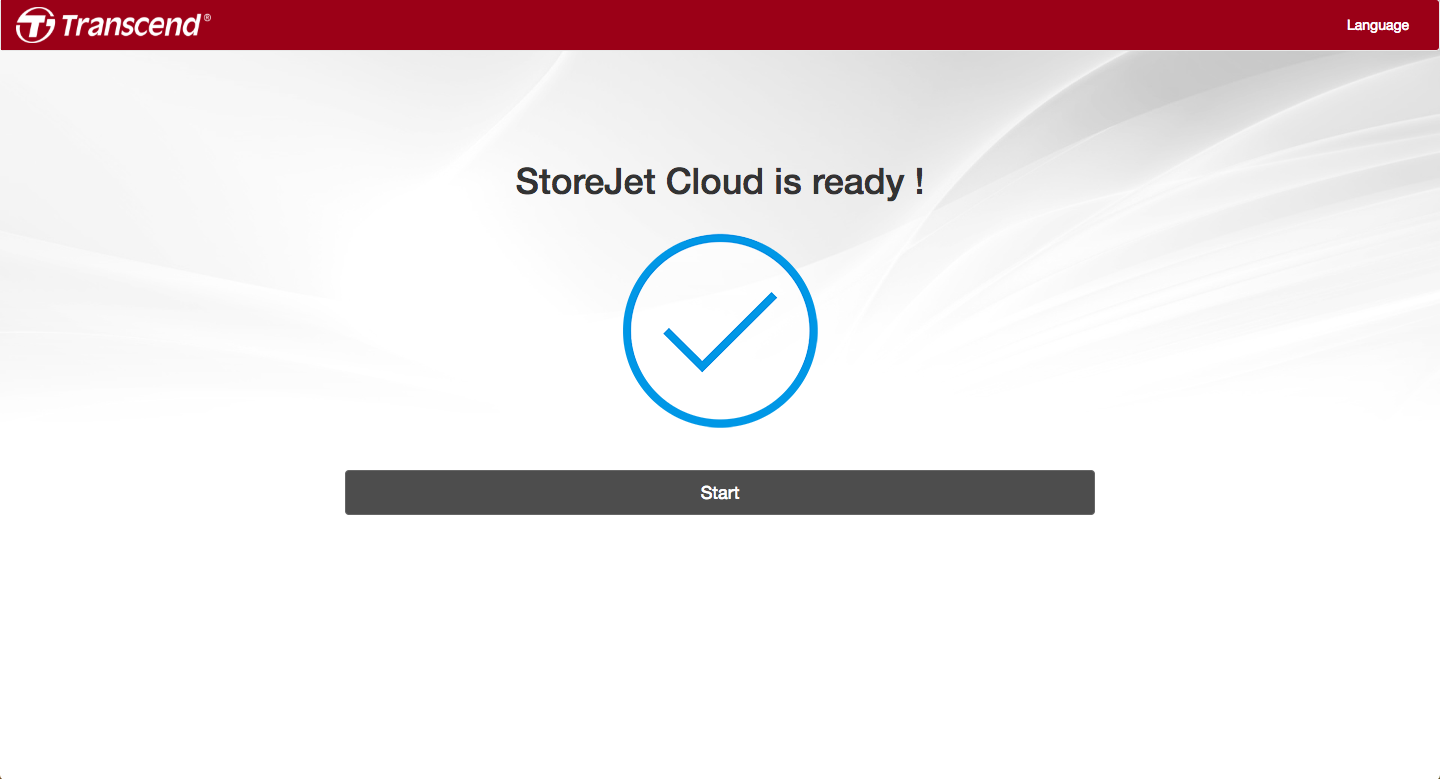
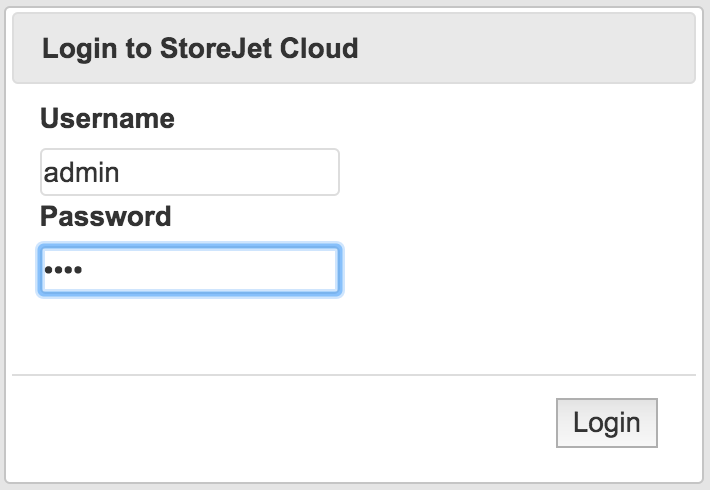
Finally, your StoreJet Cloud is ready. Click Start to explore your personal cloud storage.
-
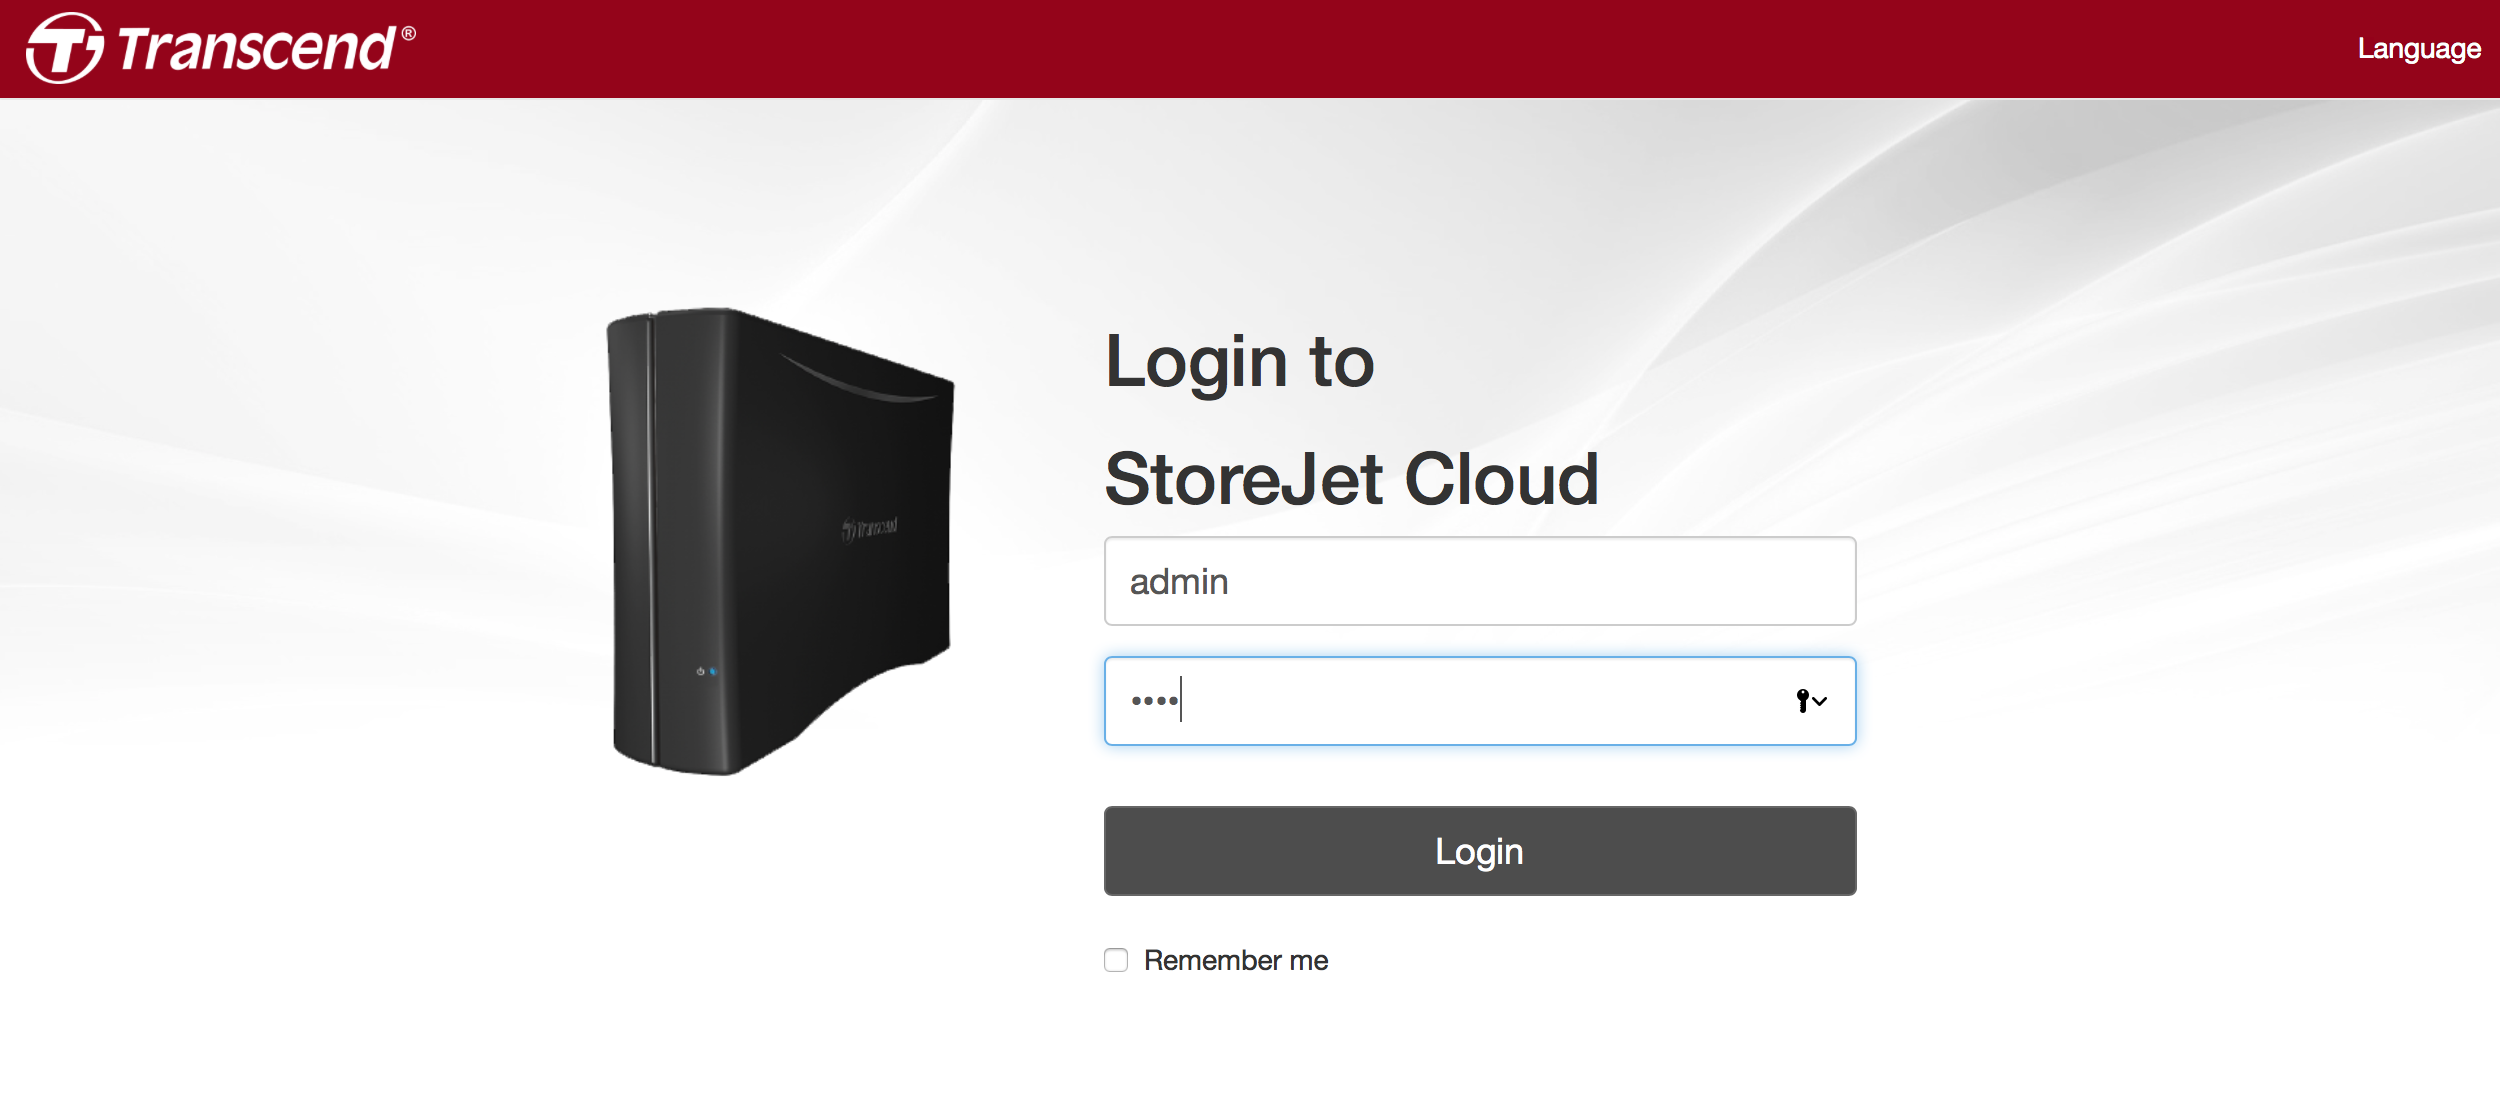
Login StoreJet Cloud (account name : admin)
Setting up StoreJet Cloud (iOS/Android)
-
Please install StoreJet Cloud App from App Store or Google Play.


-
Connect your mobile device to the same Wi-Fi network as the StoreJet Cloud, and open StoreJet Cloud App.
-
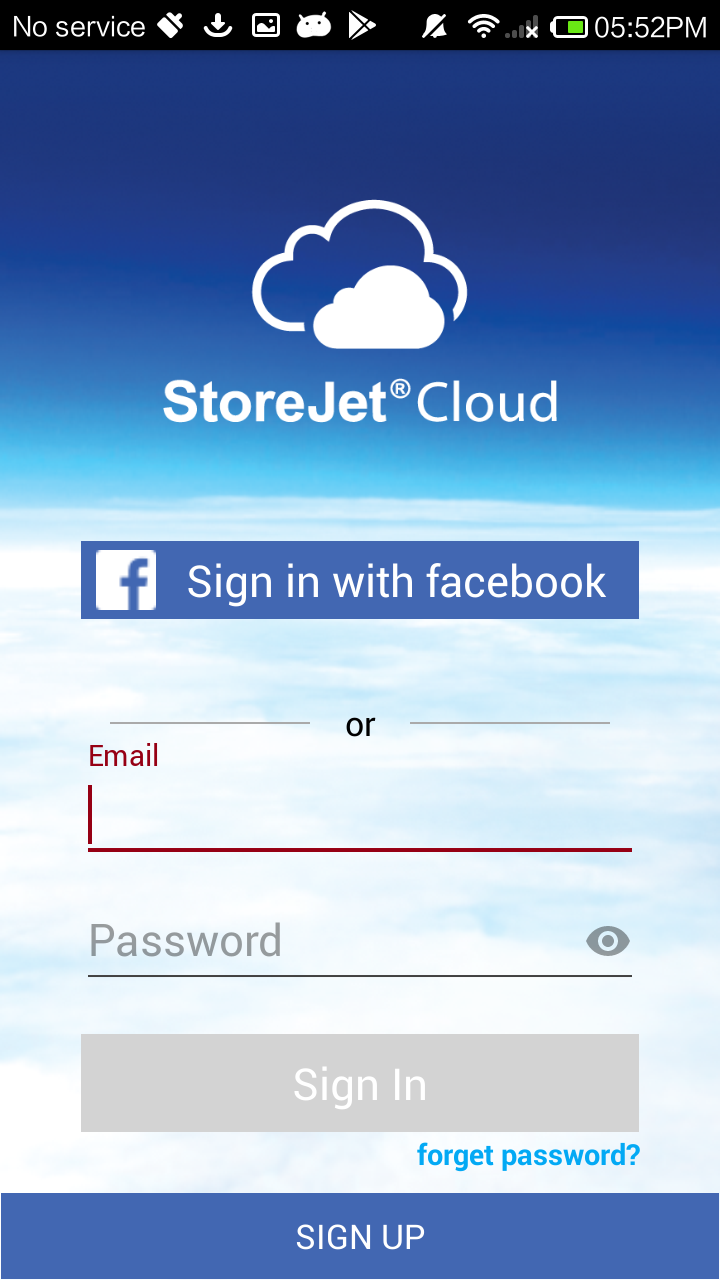
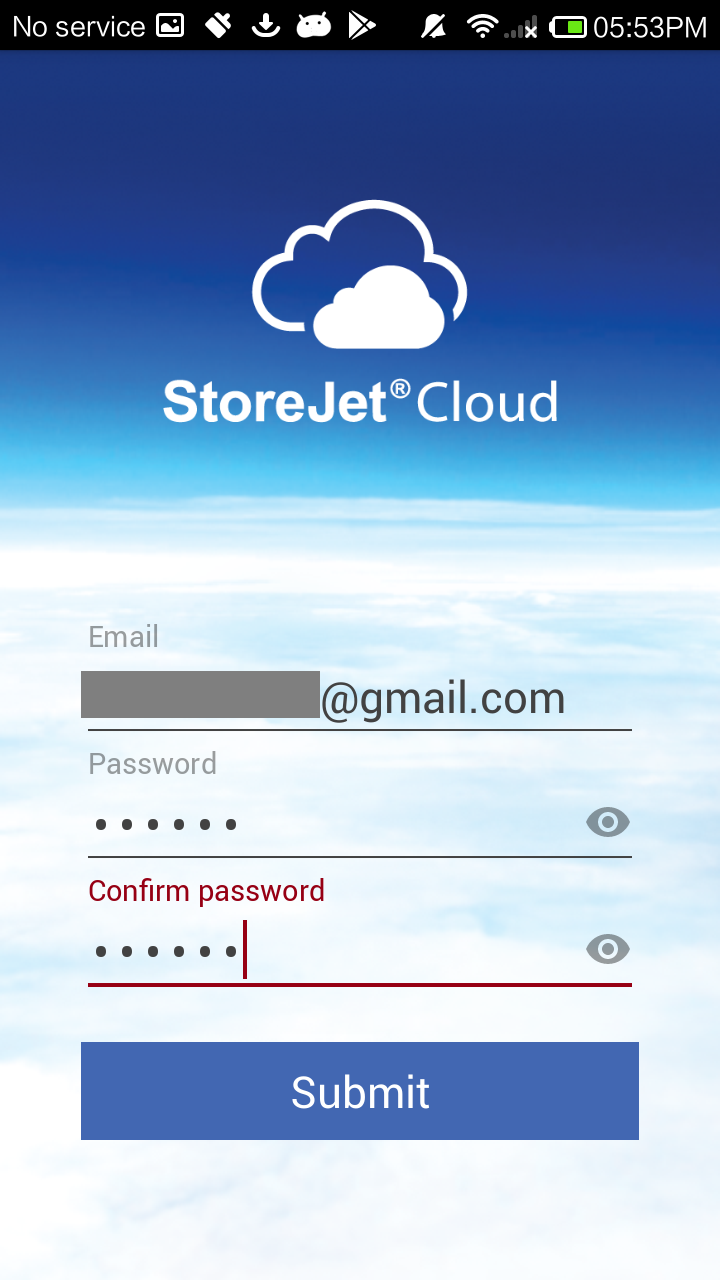
On first use of StoreJet Cloud App, you need to create a StoreJet Cloud account. Tap Sign Up, enter your email address and password, then tap SUBMIT. If you already have a StoreJet Cloud account, just enter the email address and password you registered to log in.

-
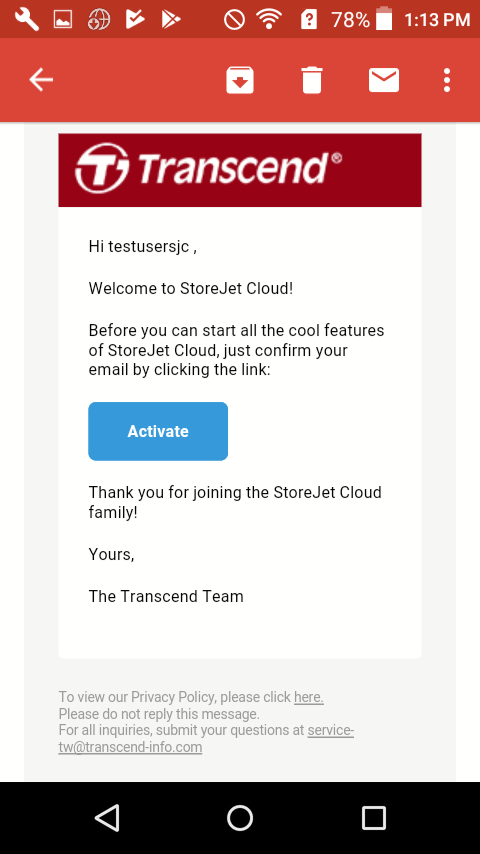
You will soon receive an activation email. Tap Activate to activate your StoreJet Cloud account.
-
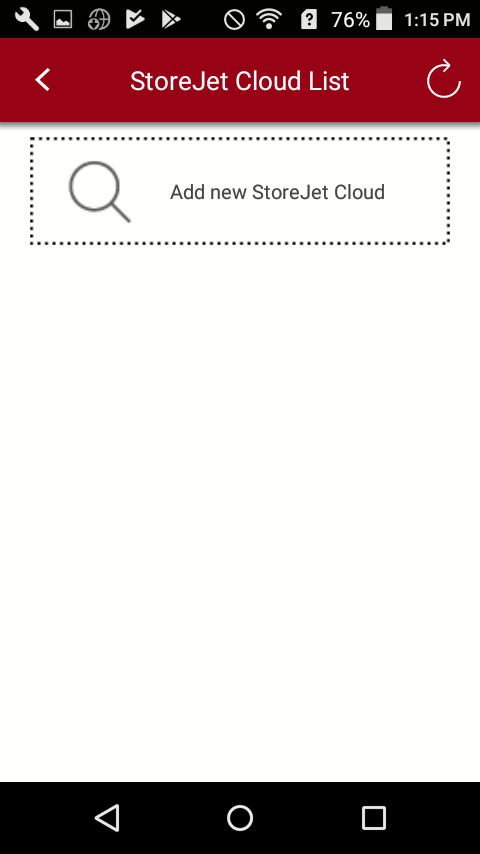
After activation, go back to StoreJet Cloud App, then tap Add new StoreJet Cloud.
-
Select the StoreJet Cloud you want to add and create a password for your admin account.
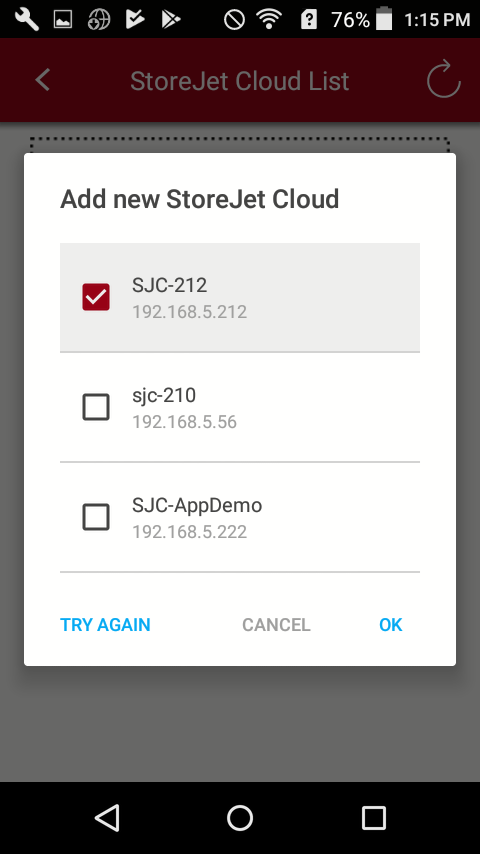
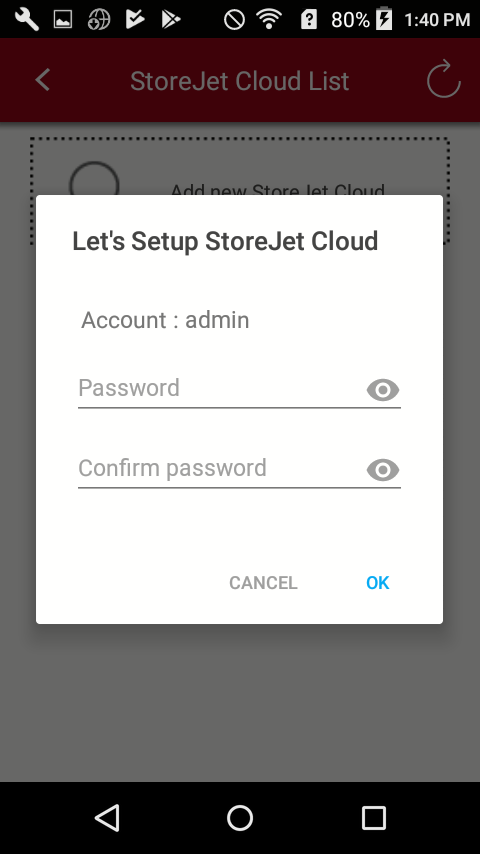
-
Your StoreJet Cloud is now ready. You can now explore your personal cloud storage.


2. Using the StoreJet Cloud
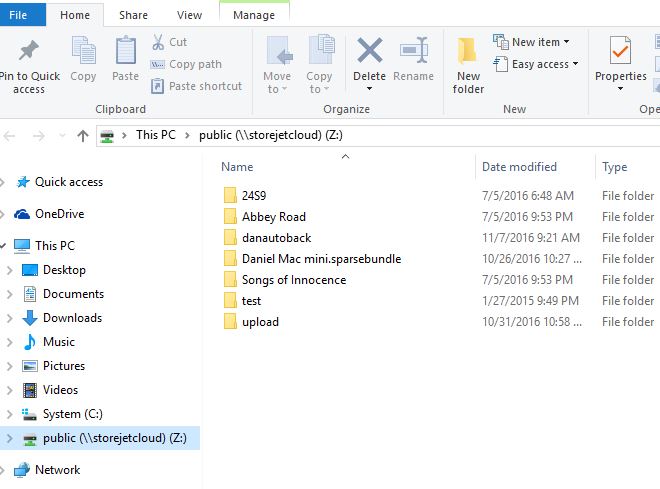
Uploading files using Windows
-
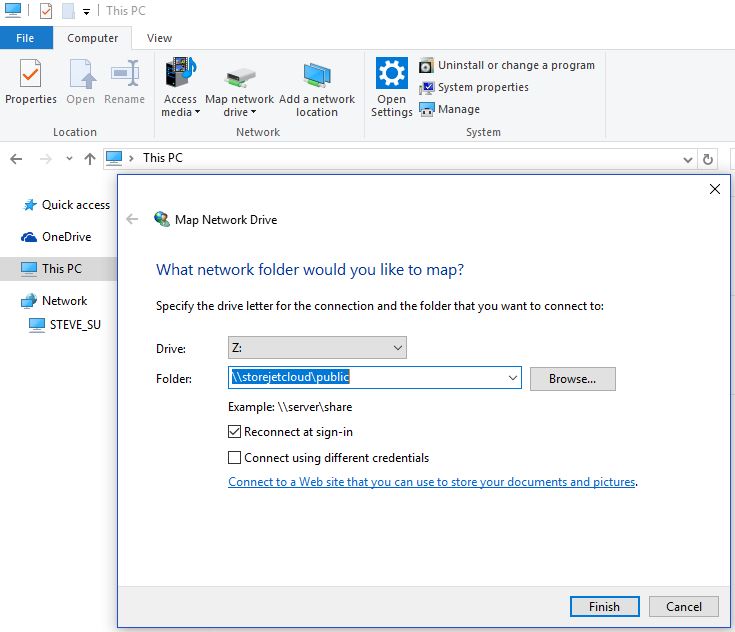
Open the Start menu, then select File Explorer.
-
On the left menu, select This PC, then select Map Network Drive.
-
Enter \\StoreJet Cloud device name\Public (Example: \\storejetcloud\public) or \\IP address\Public.
-
Enter your Username (Example: admin) and Password, then click OK.
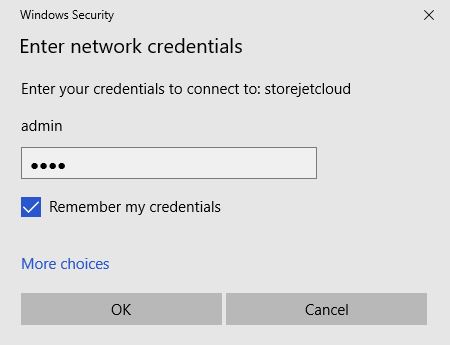
-
After setup, you can drag files from File Explorer to public folder.
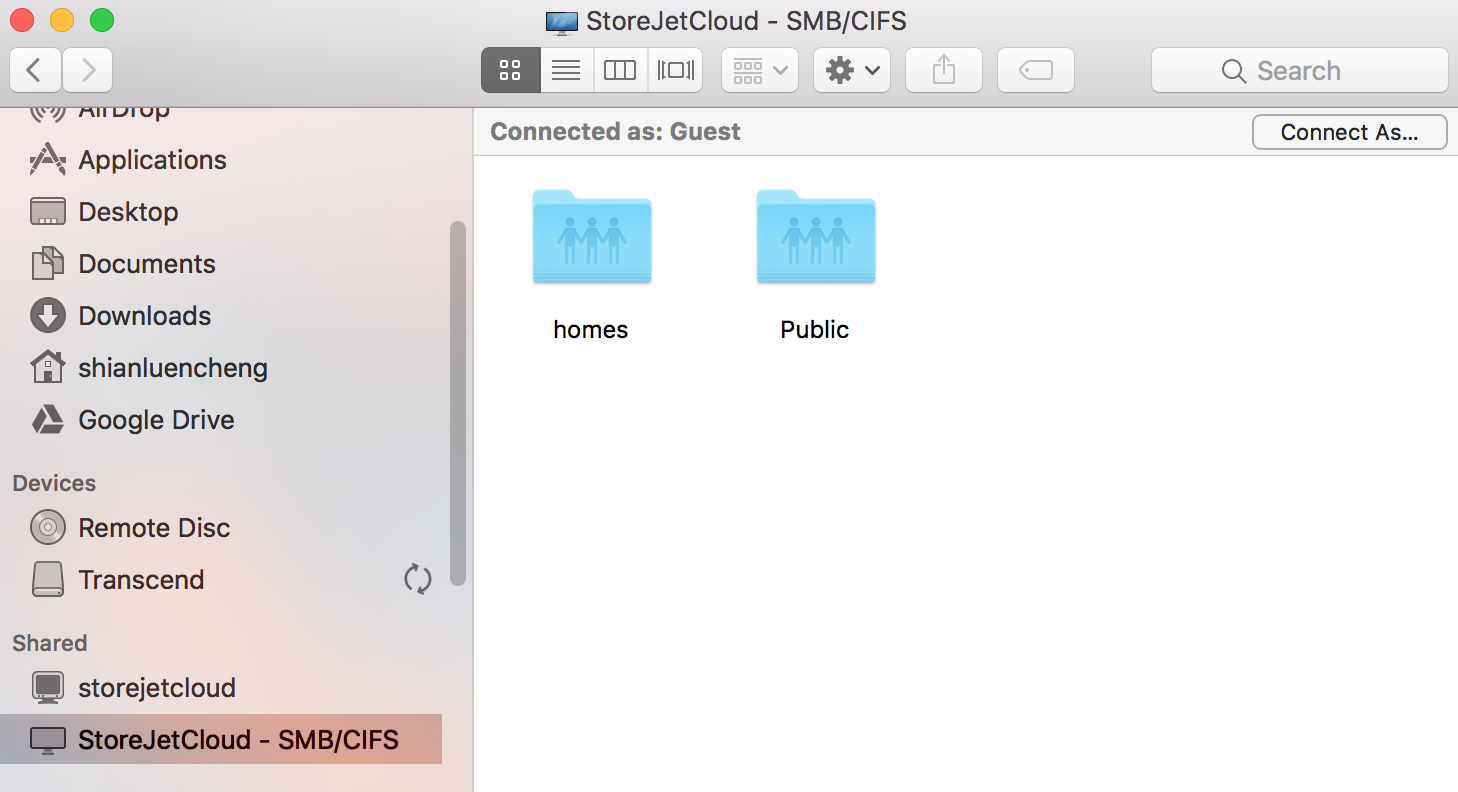
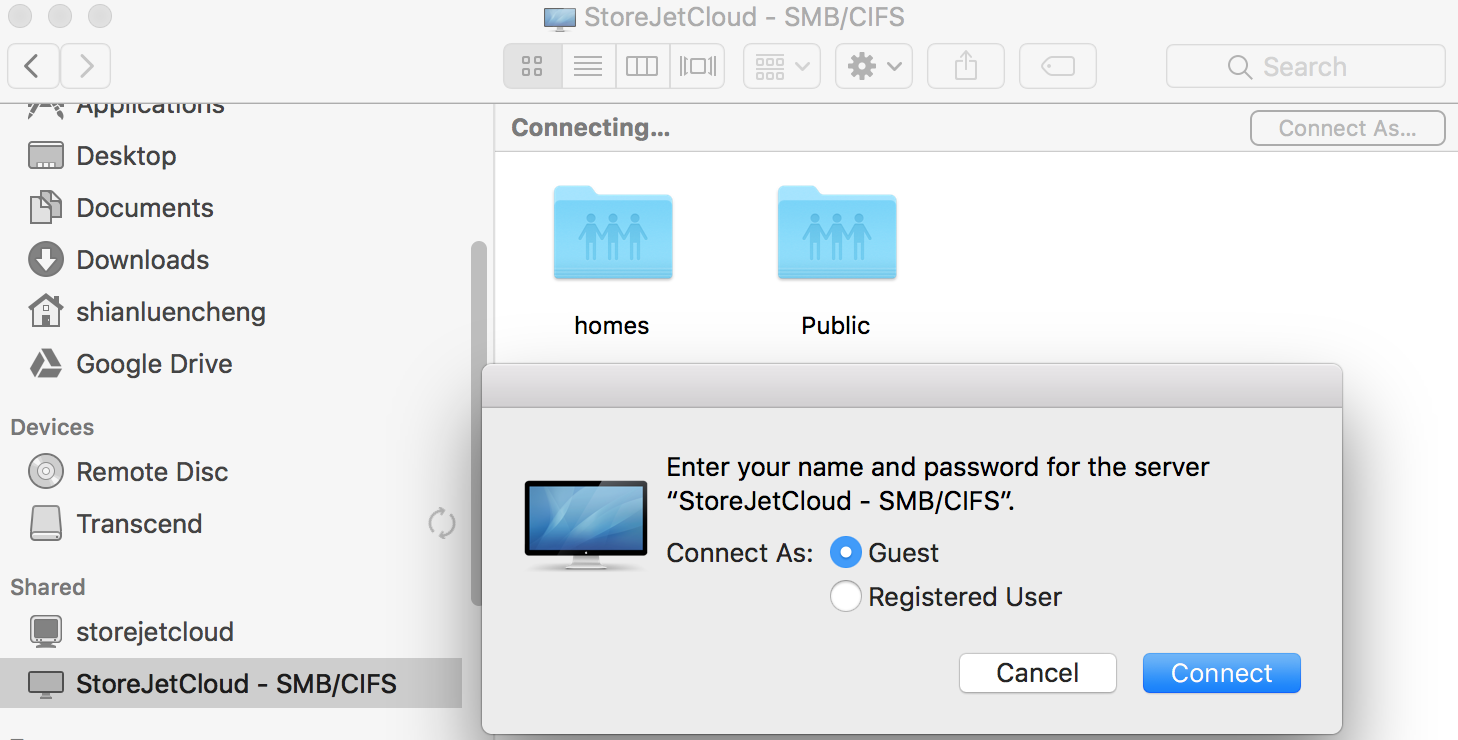
Uploading files using macOS
-
In the Finder window on the left side, click StoreJet Cloud device name (Example: StoreJetCloud - SMB/CIFS) in Shared.
-
If the authorization page shows up, enter your username and password, or connect as a guest, then click Connect to go to Public folder.
-
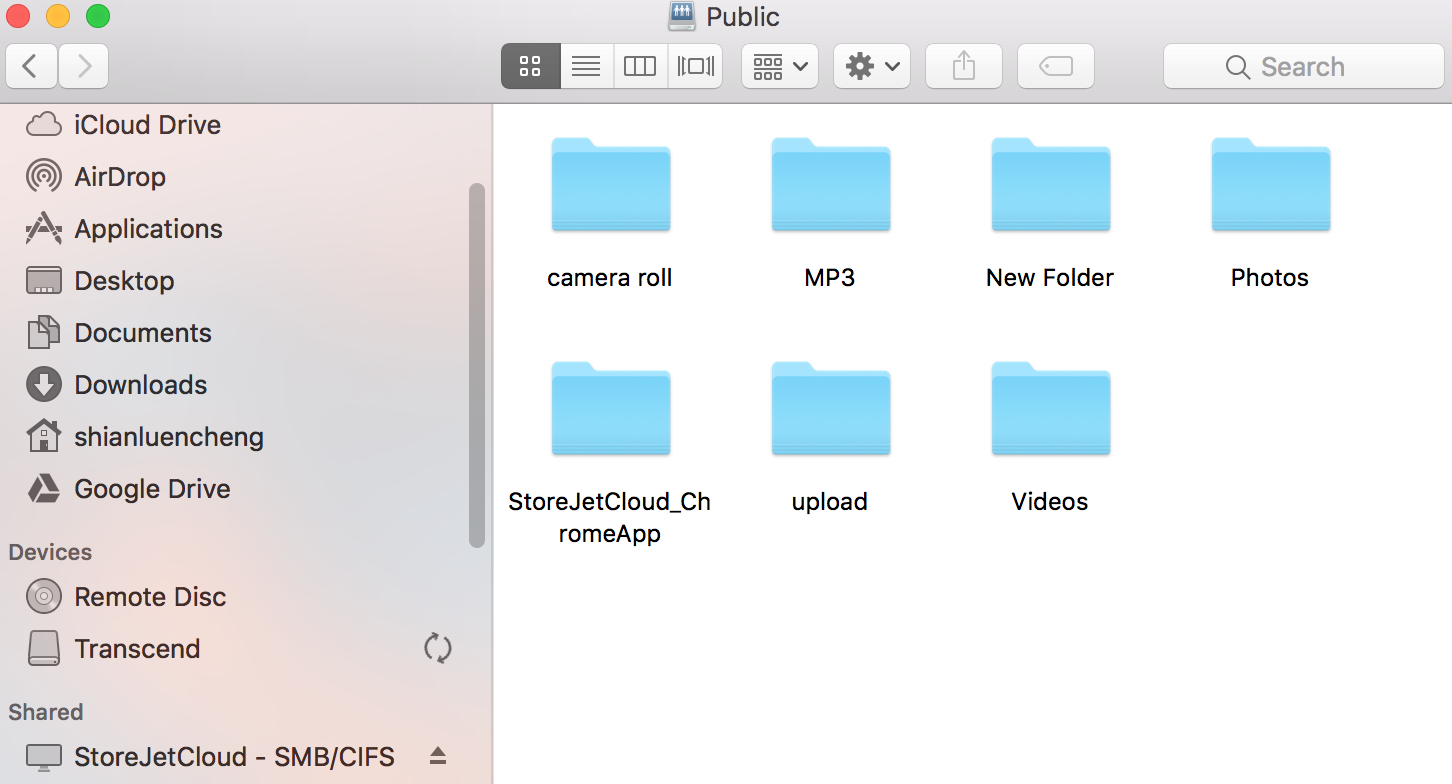
Double click Public folder, now you can drag files there.
Backing up photos and videos from your iPhone/iPad or Android devices (One Touch Backup) (SJC110N/SJC210N/TS-SJC210N)
The StoreJet Cloud is equipped with a USB port, allowing for simultaneous charging and data backup.
-
The built-in USB has an output of up to 5V/1.5A, allowing for simultaneous charging and data backup. Attention:
- Charging is impossible when the StoreJet Cloud enters sleep mode.
- Charging time may vary depending on whether data backing up is taking place at the same time.
-
You can make a full back up of all photos and videos from your smart devices to the StoreJet Cloud. Please follow the steps below to start backing up:
-
iPhone/iPad
- Connect your iPhone/iPad to the USB 3.0 port. The LED indicator will turn blue if the connection is successful.
- An authorization window will pop up, please select Trust.
- Press the red button at the back to start backing up. The LED indicator will continuously flash blue while backing up videos and photos to the \Public\device name(device serial number) folder.
- When backup is completed, the indicator will stop flashing and turn blue.
-
Android devices
- Connect your Android device to the USB 3.0 port. The LED indicator will turn blue if the connection is successful.
- Select USB Usage to Transfer files or MTP.
- An authorization window may pop up. Please select Allow.
- Press the red button at the back to start backing up. The LED indicator will continuously flash blue while backing up videos and photos to the \Public\device name(device serial number)
- When backup is completed, the indicator will stop flashing and turn blue.
-
Copying files from USB storage device (One Touch Backup)
The StoreJet Cloud includes a USB port for connecting to an external hard drive or USB storage device (Transcend's external drives and USB flash drives are recommended). The following file systems are supported: ext2, ext3, ext4, FAT32, exFAT, NTFS, HFS Plus.
Connect only one device to the USB port. Some external drives do not turn on automatically when connected to the StoreJet Cloud. Refer to Chapter 5 to mount them manually. Make sure to connect only one bus-powered drive at a time. If there is insufficient bus power for your external drive, connect its AC adapter.
To back up all data from a USB mass storage device to the StoreJet Cloud, please follow the steps below. Note: One Touch Backup will not start when a backup task is still running.
-
Connect the USB device. When it is connected, the function LED will light up Blue. Note: the LED will not light up if the connected USB device is not supported.
-
Press the red function button within 1 minute after you insert the USB device. The function LED will flash Blue when the files on the USB device are being backed up to the \\Public\USBbackup folder of the StoreJet Cloud.
-
When the backup operation is completed, the function LED on the StoreJet Cloud will be solid White.
Unmounting USB storage device
-
Click the icon
 at the upper right corner of the toolbar.
 -
Select the device to unmount.

-
The external drive will be unmounted. Once the drive is unmounted, unplug it from the StoreJet Cloud.
Connecting the StoreJet Cloud Dashboard
Please connect the StoreJet Cloud using one the following methods:
| Using Device | Method |
|---|---|
| Web Browser Windows / macOS | Enter http://find.storejetcloud.com to open StoreJet Cloud directly or the IP address as the URL. |
| macOS | Open Safari > Bookmarks > Bonjour > StoreJetCloud - Web administration . If you can't find Bonjour option in Bookmarks in Safari, please go Safari > Preference > Advanced > Bonjour > Enable > Include Bonjour in the Bookmark Menu |
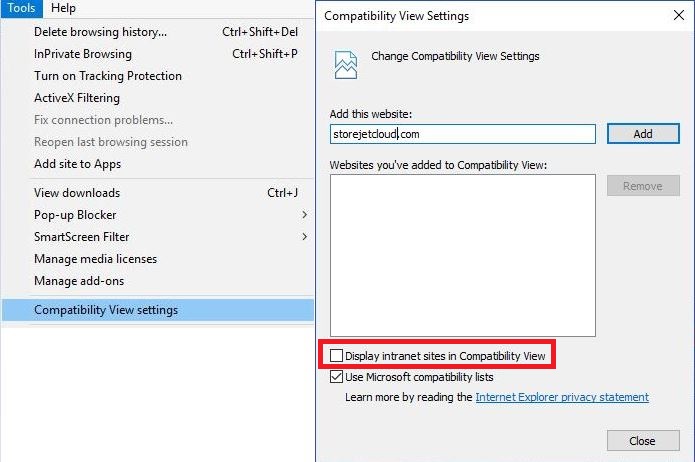
If you cannot log in using Internet Explorer 11, please follow the steps below: Click Tools > Compatibility View Settings > Uncheck Display intranet sites in Compatibility View .
The StoreJet Cloud Dashboard
The StoreJet Cloud Dashboard has a navigation bar on top of the page. There are 9 function icons in the middle of the page link to the device’s main functions.

Navigation Bar
| Icons | Name | Description |
|---|---|---|
| User | Log in Account / Log out / Restart / Shut Down | |
| Home | Back to Dashboard | |
| Eject | Eject External USB Drive | |
| Message | Show System Messages | |
| Help | Access user's manual https://help.storejetcloud.com | |
| Language | Change System Language |
Main Functions
| Icons | Name | Description |
|---|---|---|
 |
StoreJet Cloud | Access all stored files and folders and all StoreJet Cloud functions. |
 |
My Photos | Shortcut of photos that are stored on StoreJet Cloud. |
 |
My Music | Shortcut of music files that are stored on StoreJet Cloud. |
 |
My Videos | Shortcut of videos that are stored on StoreJet Cloud. |
 |
Media Player | Play Video. |
 |
Disk Manager | Open Disk Manager. |
 |
Remote Access | Remote Access Settings. |
 |
Settings | System information and services. |
 |
Dropbox Backup | Backup Dropbox files. |
3. StoreJet Cloud
StoreJet Cloud is an application that manages files and folders stored on the StoreJet Cloud.
To open StoreJet Cloud, please click the icon ![]()
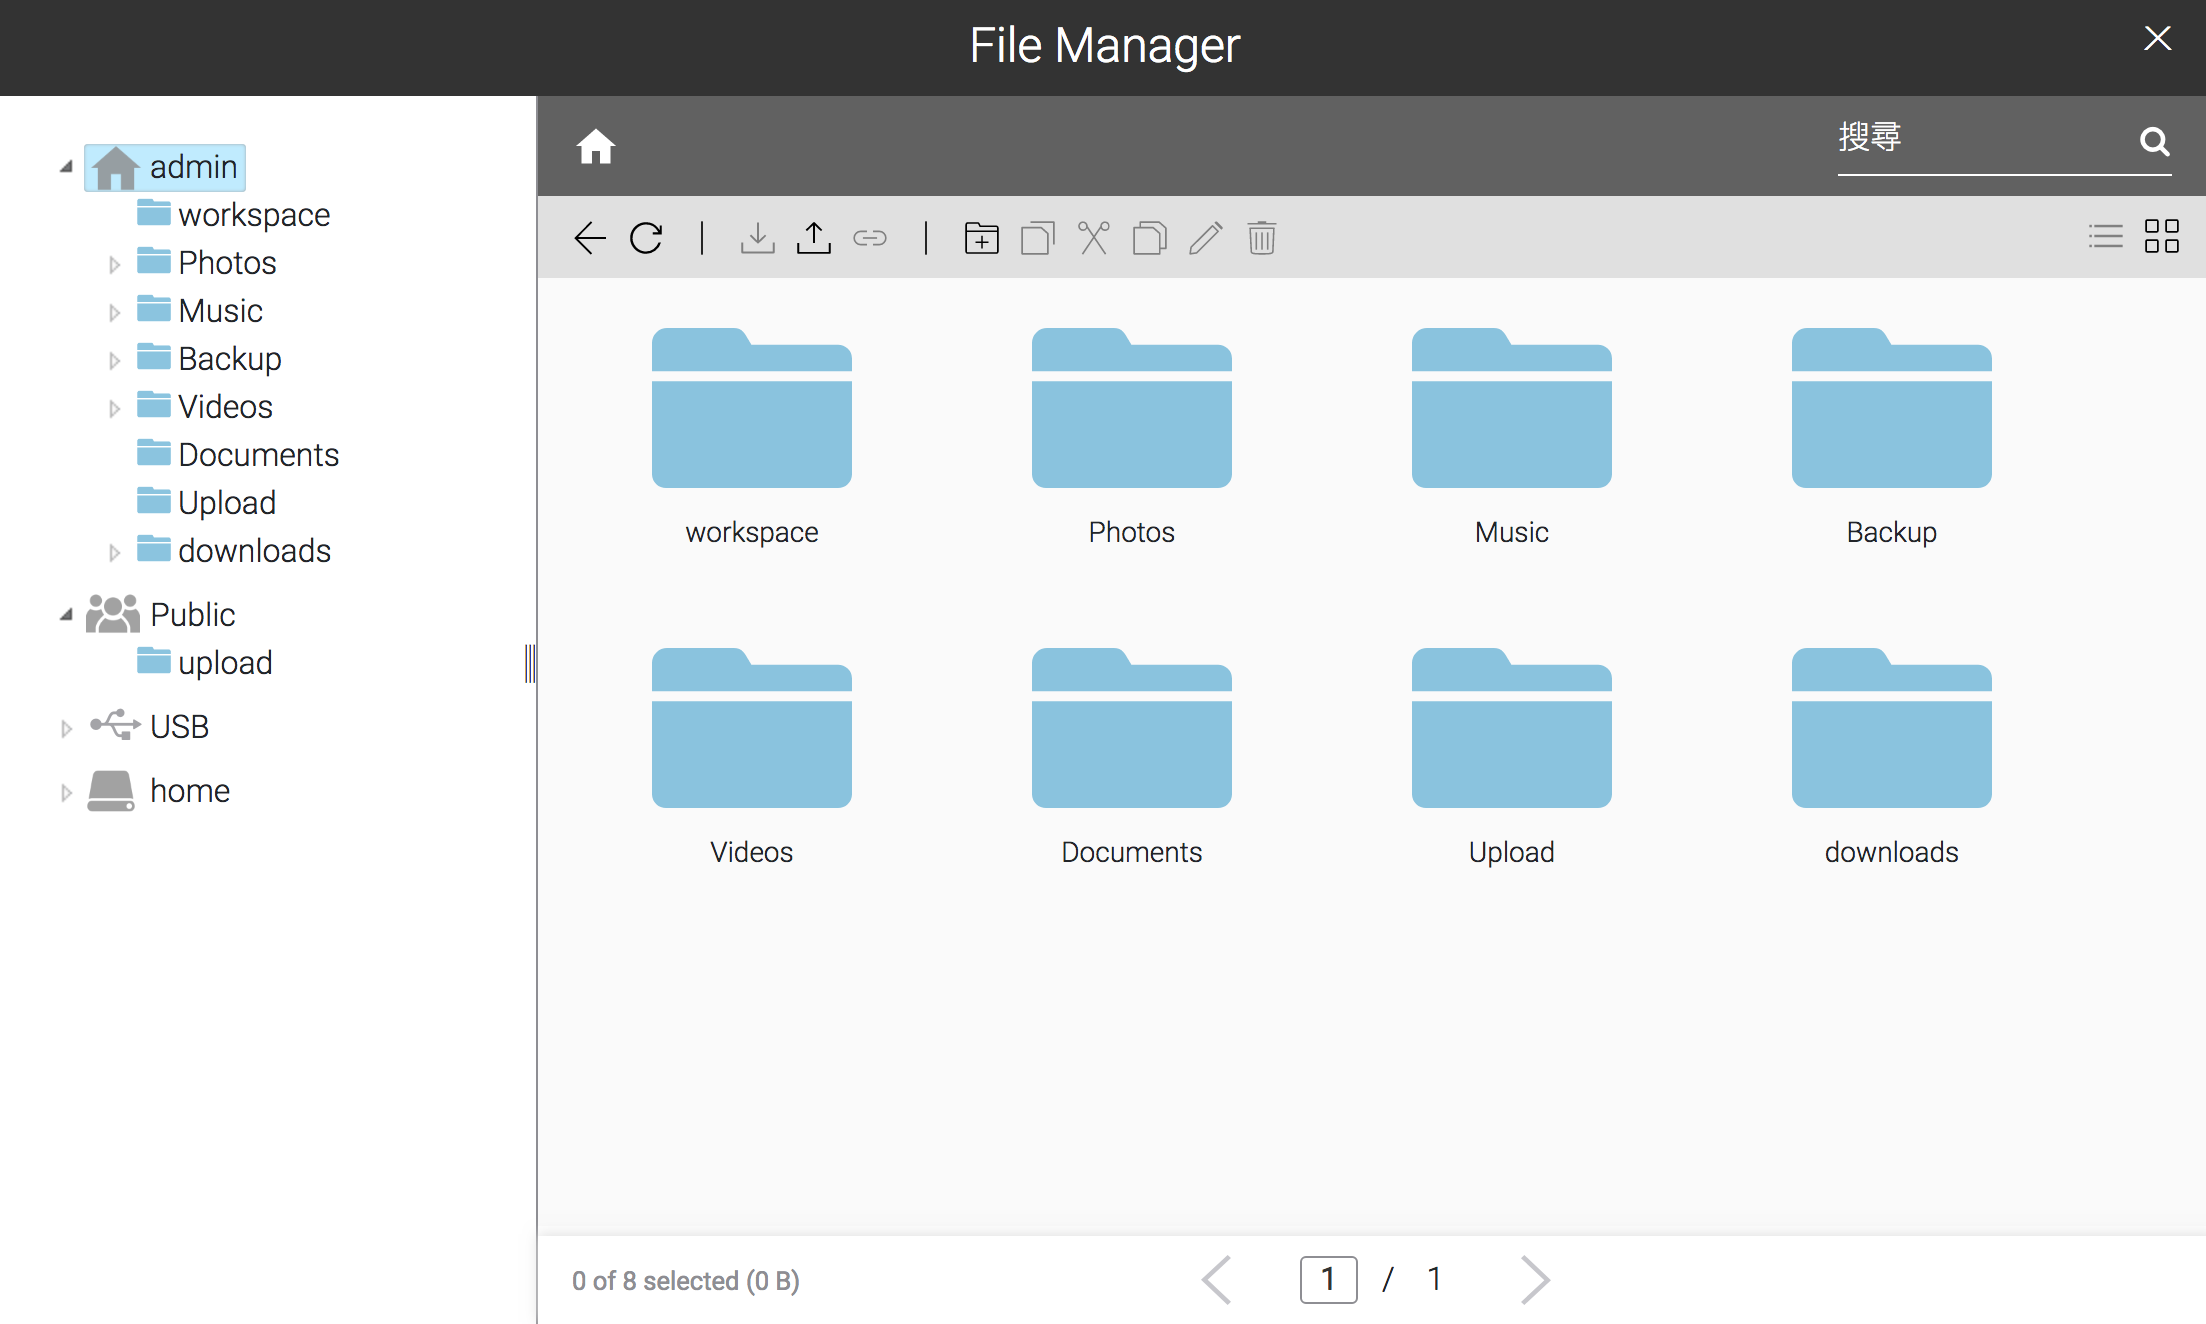
In the StoreJet Cloud window, the following tabs will be displayed on the left as a directory:
• HOME : This shows all subfolders in the user area that will be automatically created when creating a user. If you log in to Settings as the admin, this will display all folders in the admin folder.
• PUBLIC : This is the folder that any user can access.
• FILE EXPLORER : All shared folders and subfolders that are created in the StoreJet Cloud will be displayed. The folder can only be accessed by the admin account.
• USBDISK : All folders of the USB drive connected the StoreJet Cloud will be displayed.
StoreJet Cloud page has a navigation icon bar on top of the page as shown in the table below:
| Icons | Name | Description |
|---|---|---|
| Back | Return to the previous page. | |
| Refresh | Refresh the page. | |
| Upload | Upload a file from your local computer to the StoreJet Cloud. | |
| Download | Download a selected file to your local computer. | |
| New Folder | Create a new folder. | |
| Copy | Create a copy of the selected file or folder, either on the current directory or another that is available to the user. | |
| Cut | Cut the selected file or folder. | |
| Paste | Paste the selected file or folder to the new location. | |
| Rename | Change the name of a file or folder. | |
| Delete | Delete the selected file or folder. |
Adding Folders
-
Select a shared folder to add a subfolder from the directory list on the left.
-
Click New Folder.
-
Enter a folder name.
-
The folder will be created in the selected shared folder. If you want to share the created folder via the file sharing protocols in the local network, go to the SHARED section in chapter 7.

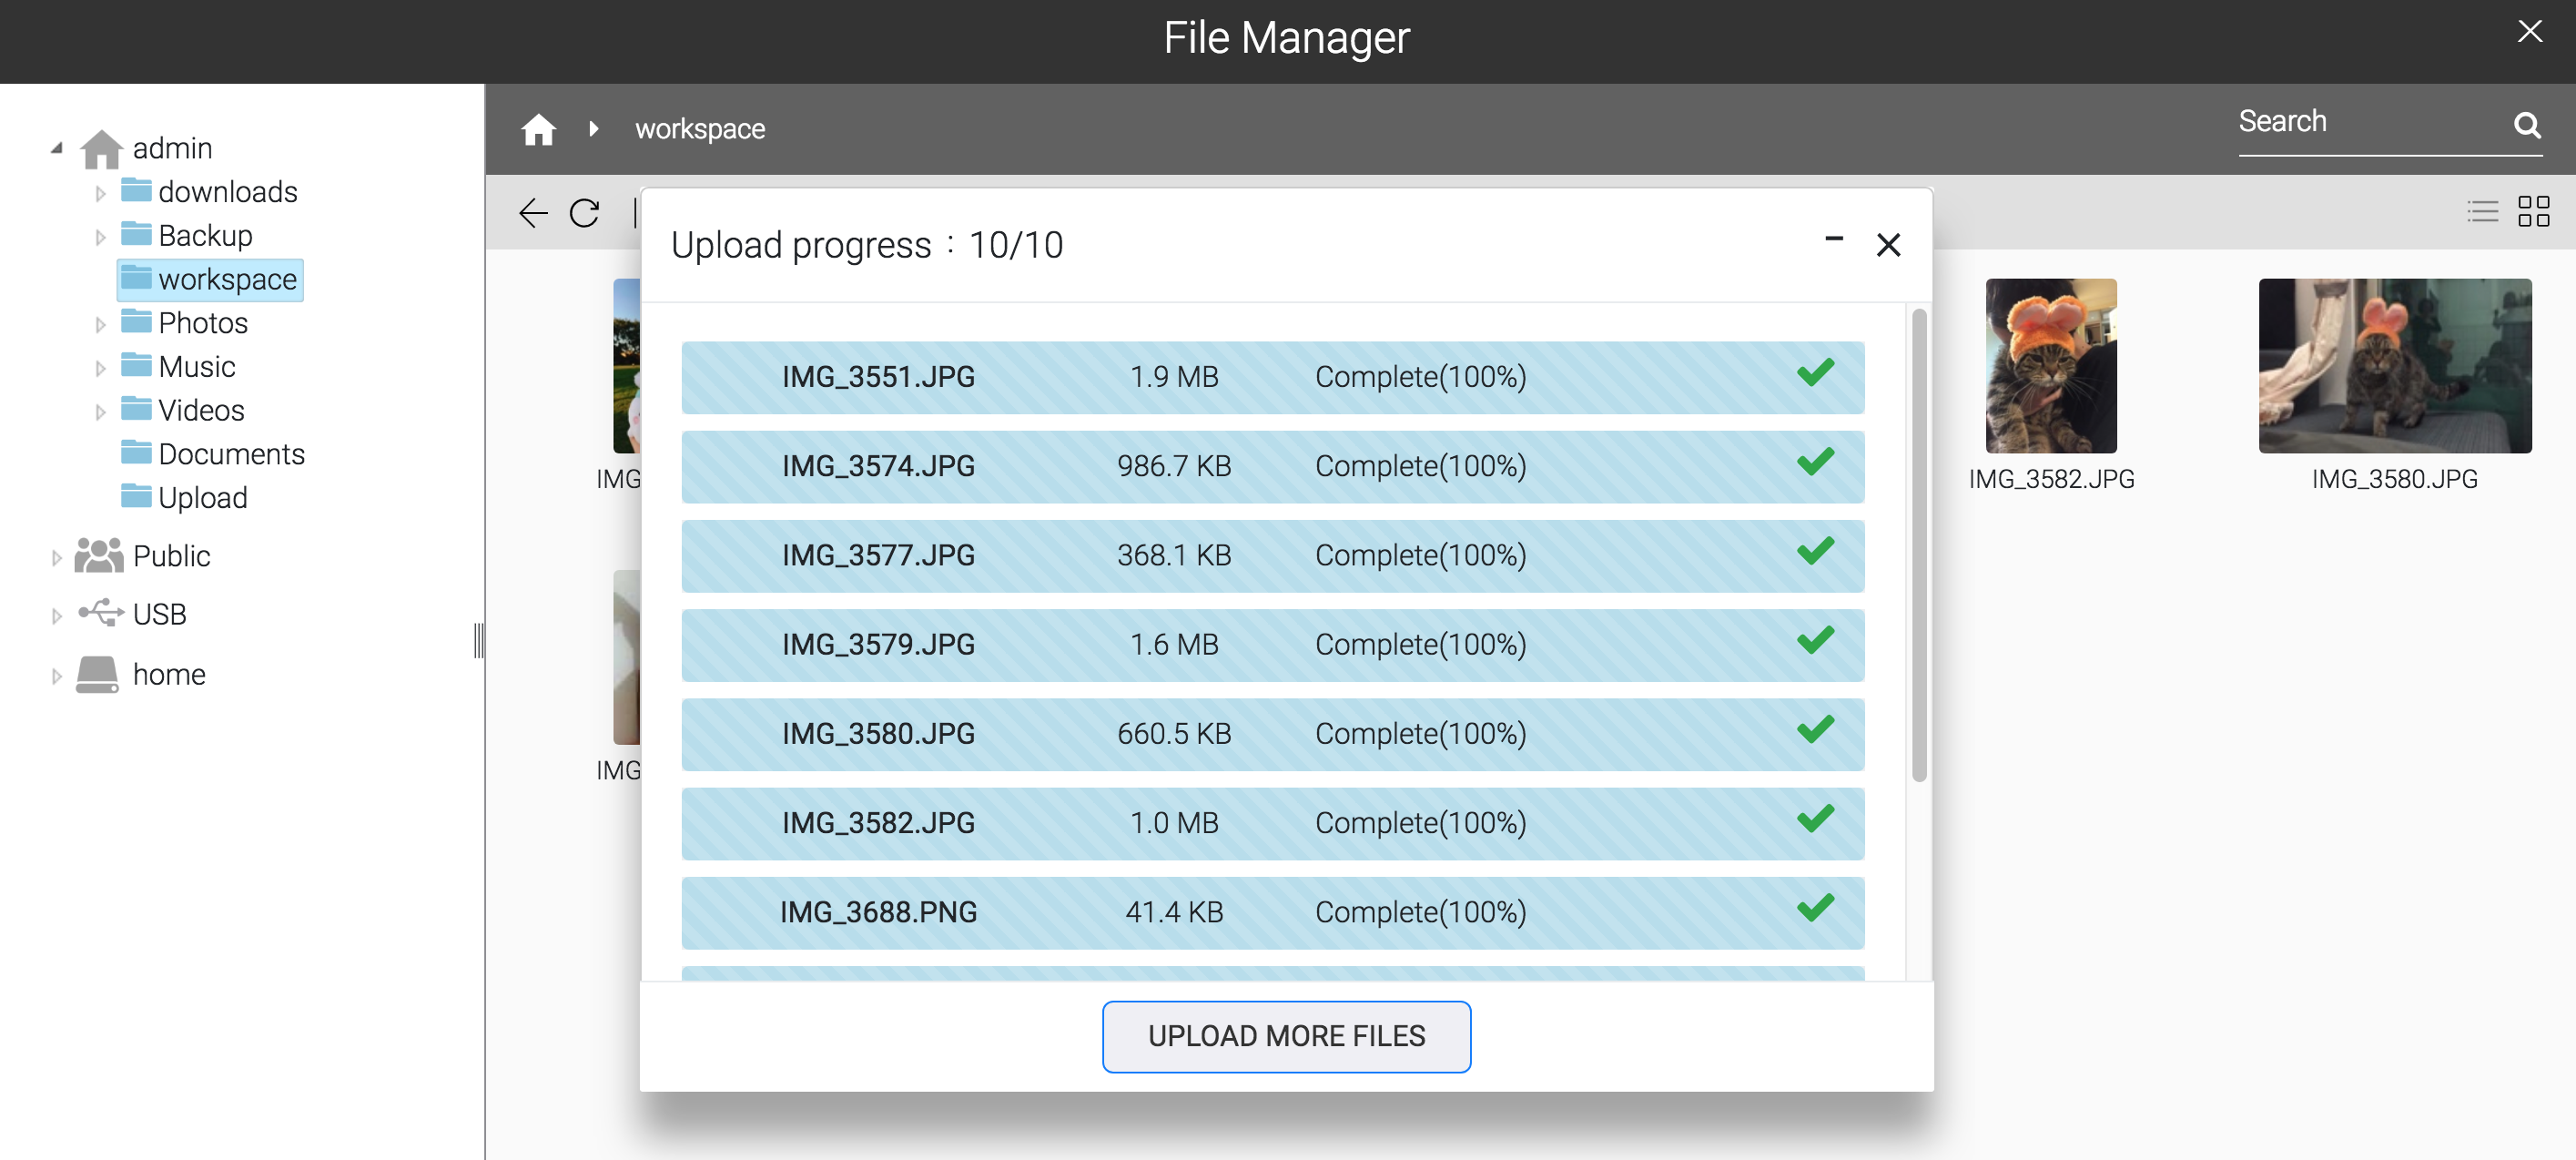
Uploading files from a computer
-
Select a destination folder to upload file(s) and click Upload.
-
Select the file(s).
-
Click Upload. The file(s) will be uploaded to the StoreJet Cloud.
Downloading files to a computer
-
Select the file(s) to download to your computer
-
Click Download.
4. Media Player
Media Player is an application that plays media files on the StoreJet Cloud and create original playlists with the media files.
To open Media Player, click the icon ![]()
| Icons | Name | Description |
|---|---|---|
| Refresh | Refresh the page. | |
| Show Player | Display the media player. | |
| Previous | Return to the previous media file. | |
| Play | Open the media player and play media files in the playlist. | |
| Next | Skip to the next media file. | |
| Add List | Add a new playlist. | |
| Rename List | Change the name of a playlist. | |
| Delete List | Delete a selected playlist. | |
| Add Items | Add a media file to the playlist. | |
| Copy | Create a copy of the selected media file, either on the current directory or another that is available to the user. | |
| Cut | Cut the selected media file. | |
| Paste | Paste the selected media file to a new location. | |
| Delete | Delete the selected media file. |
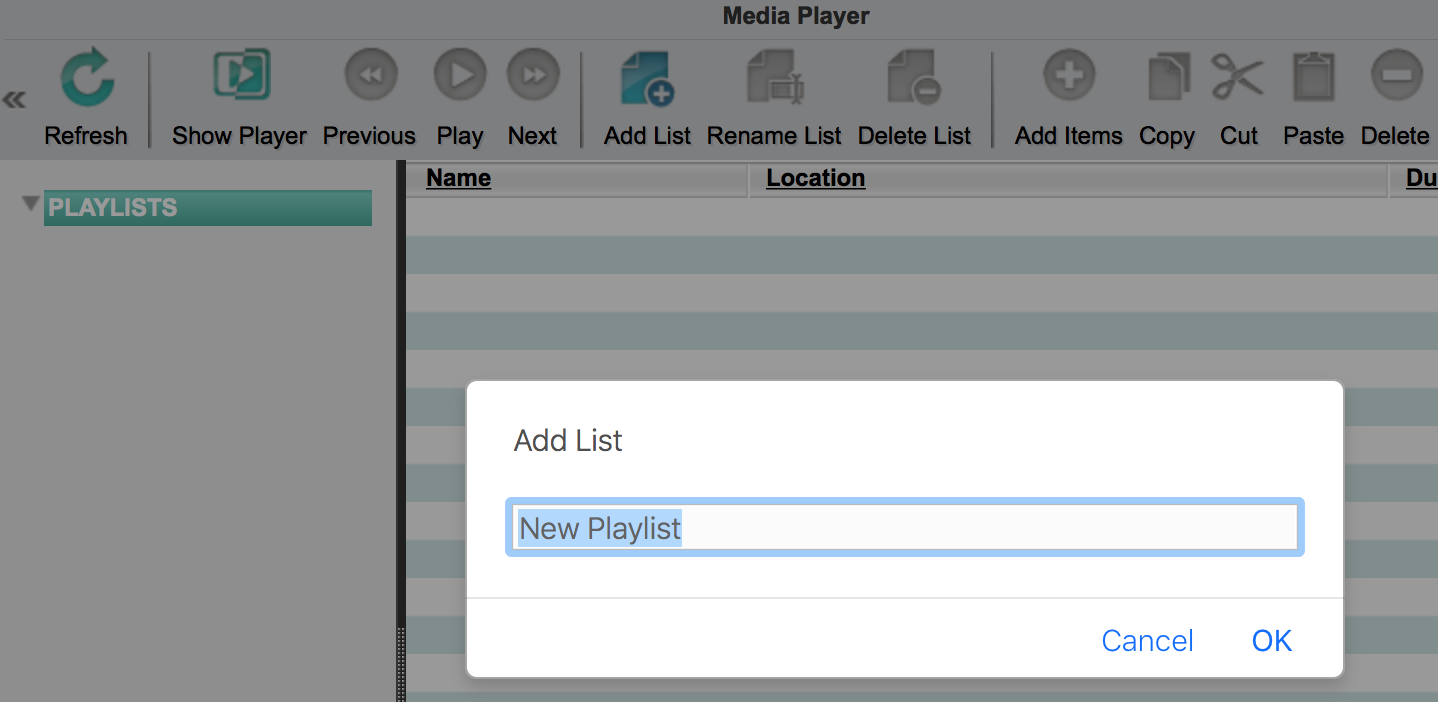
Creating Playlists
-
Select PLAYLISTS on the left of the window and click Add List.
-
Enter a desired playlist name and click OK. The new playlist will be created.
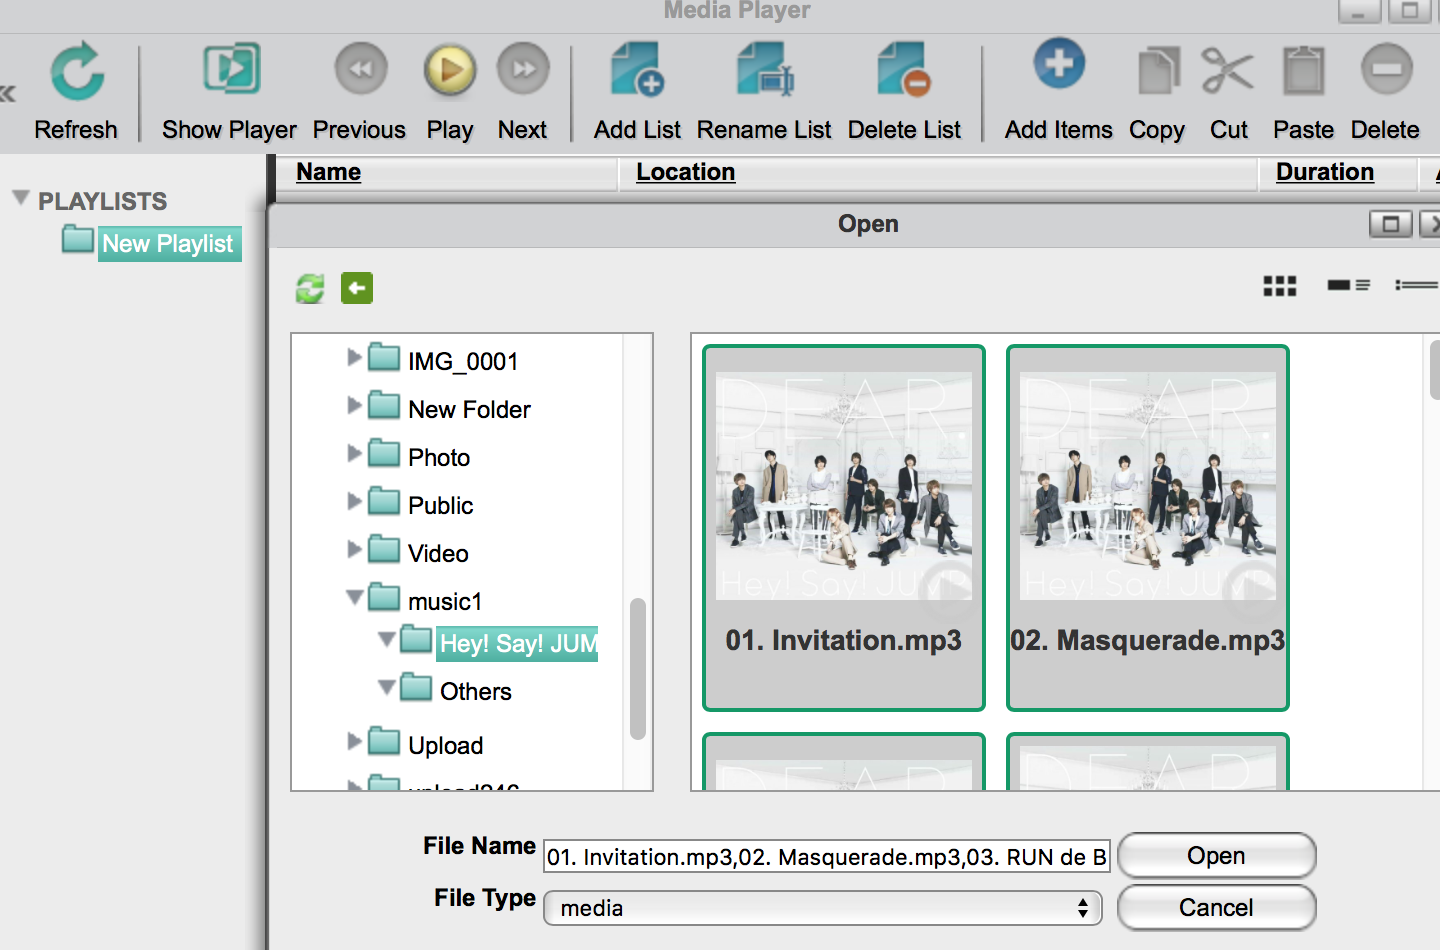
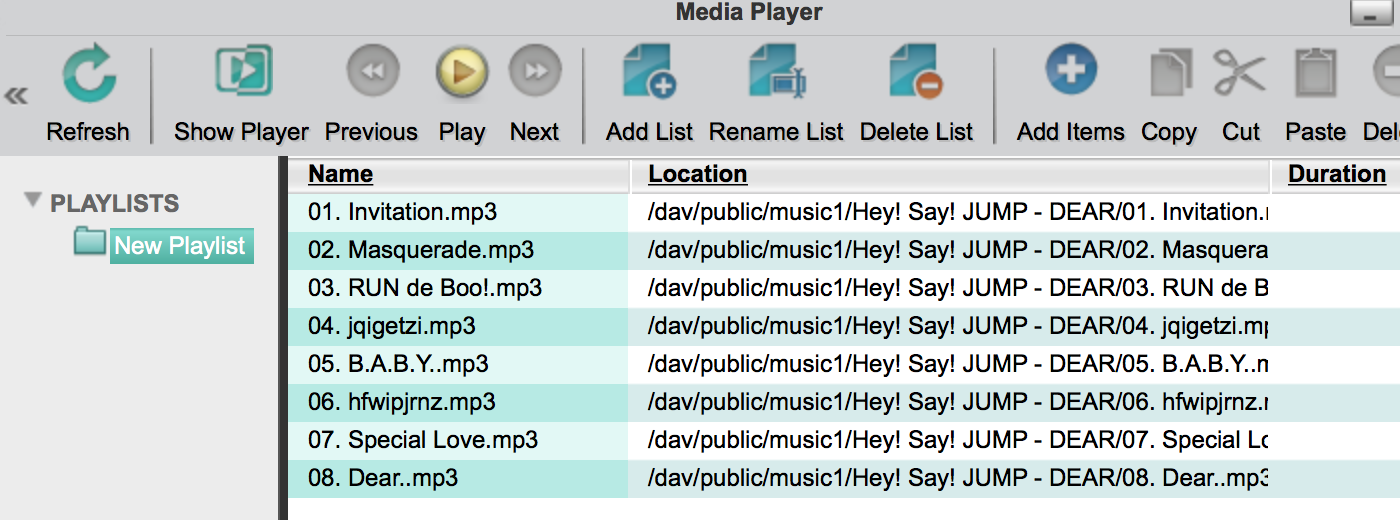
Adding Media Files
-
Select the playlist on the left of the window and click Add Items.
-
A dialogue window will be displayed. Select the media file(s) to add and click Open. The media file(s) will be added to the playlist.
Playing Files
The Media Player supports MP3 or MP4 files (some specific MP4 files may not be supported) on the browser. Other file types will be downloaded to the desired location in your computer.
-
Select the playlist on the left of the window and click Play.
-
Media Player will open and start playing media files. To return to the playlist, click Show Player.
5. Disk Manager (for Admin only)
Disk Manager is an application that manages RAID arrays and partitions of internal or external drives.
To open Disk Manager, please click the icon ![]() The drive information will be displayed.
The drive information will be displayed.
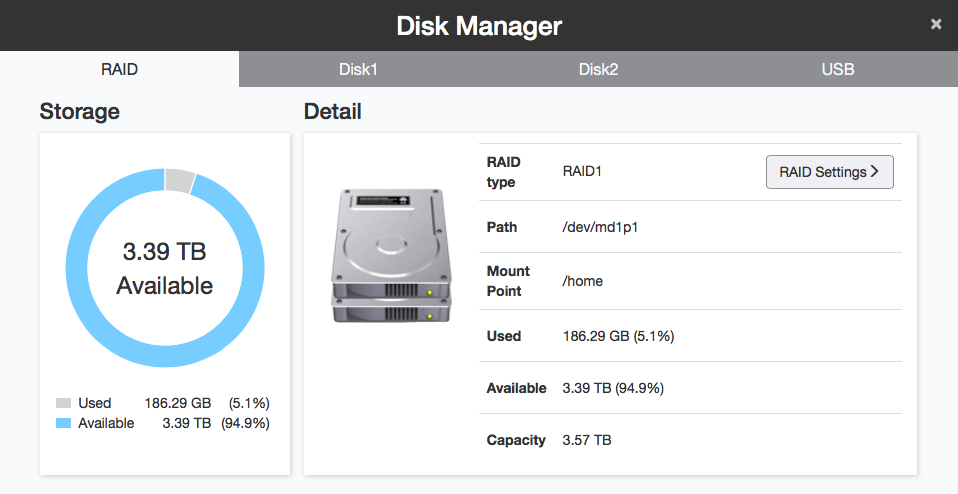
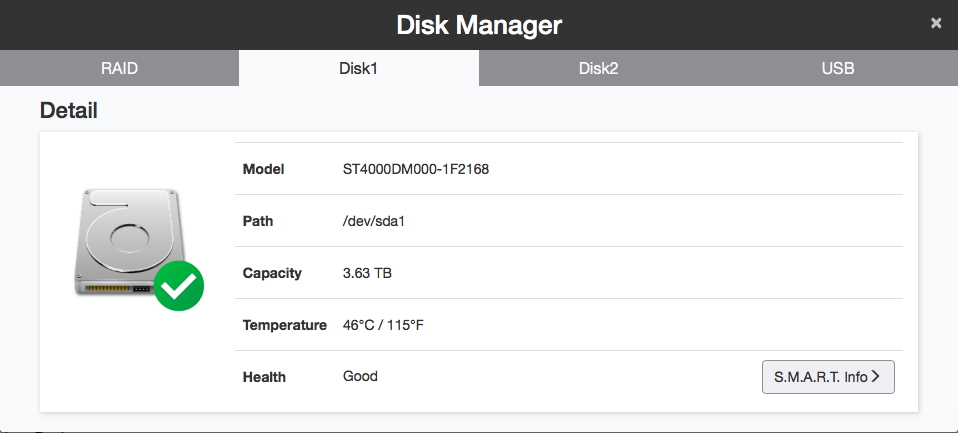
Viewing Hard Drive Information
-
Select the disk that you'd like to view information.
-
The disk information page displays the hard drive data : Model, Path, Capacity and Temperature .
-
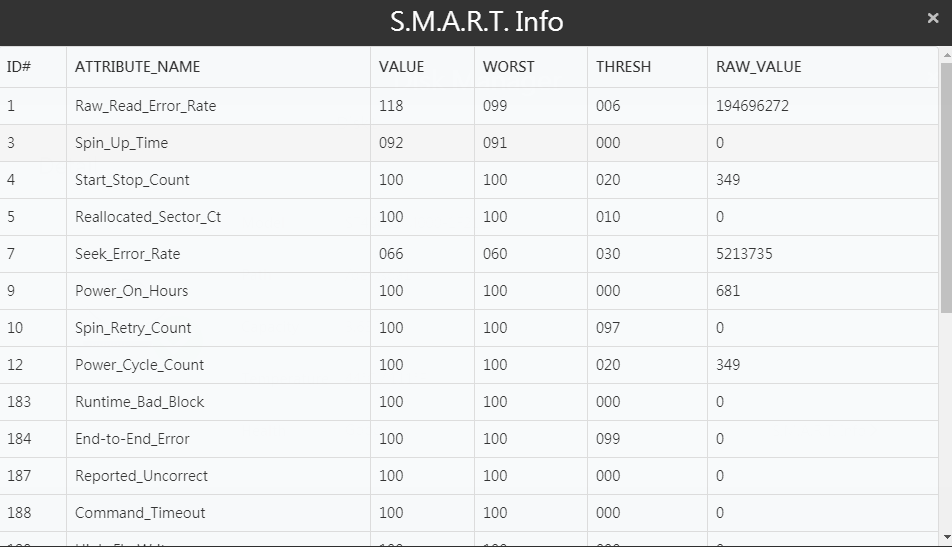
Click S.M.A.R.T info to view S.M.A.R.T information of the disk.
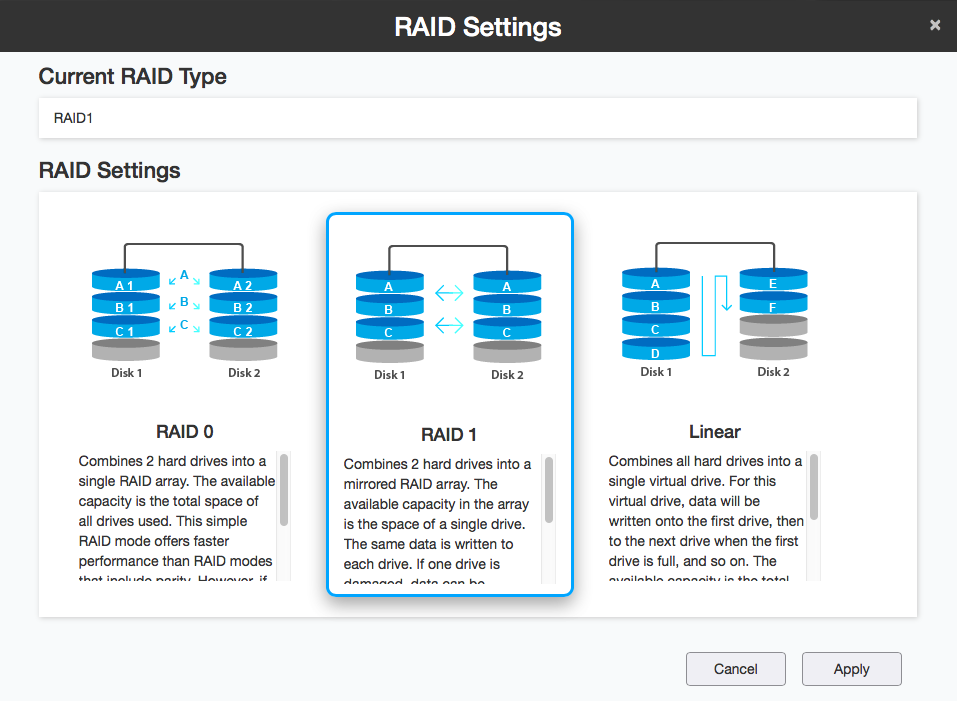
Changing RAID Mode (StoreJet Cloud 210 only)
The default RAID mode for StoreJet Cloud 210 is RAID 1.
Note: If you change the RAID mode, all data on the array is permanently deleted! Always back up any important data before changing your RAID mode.
| RAID mode | Description |
|---|---|
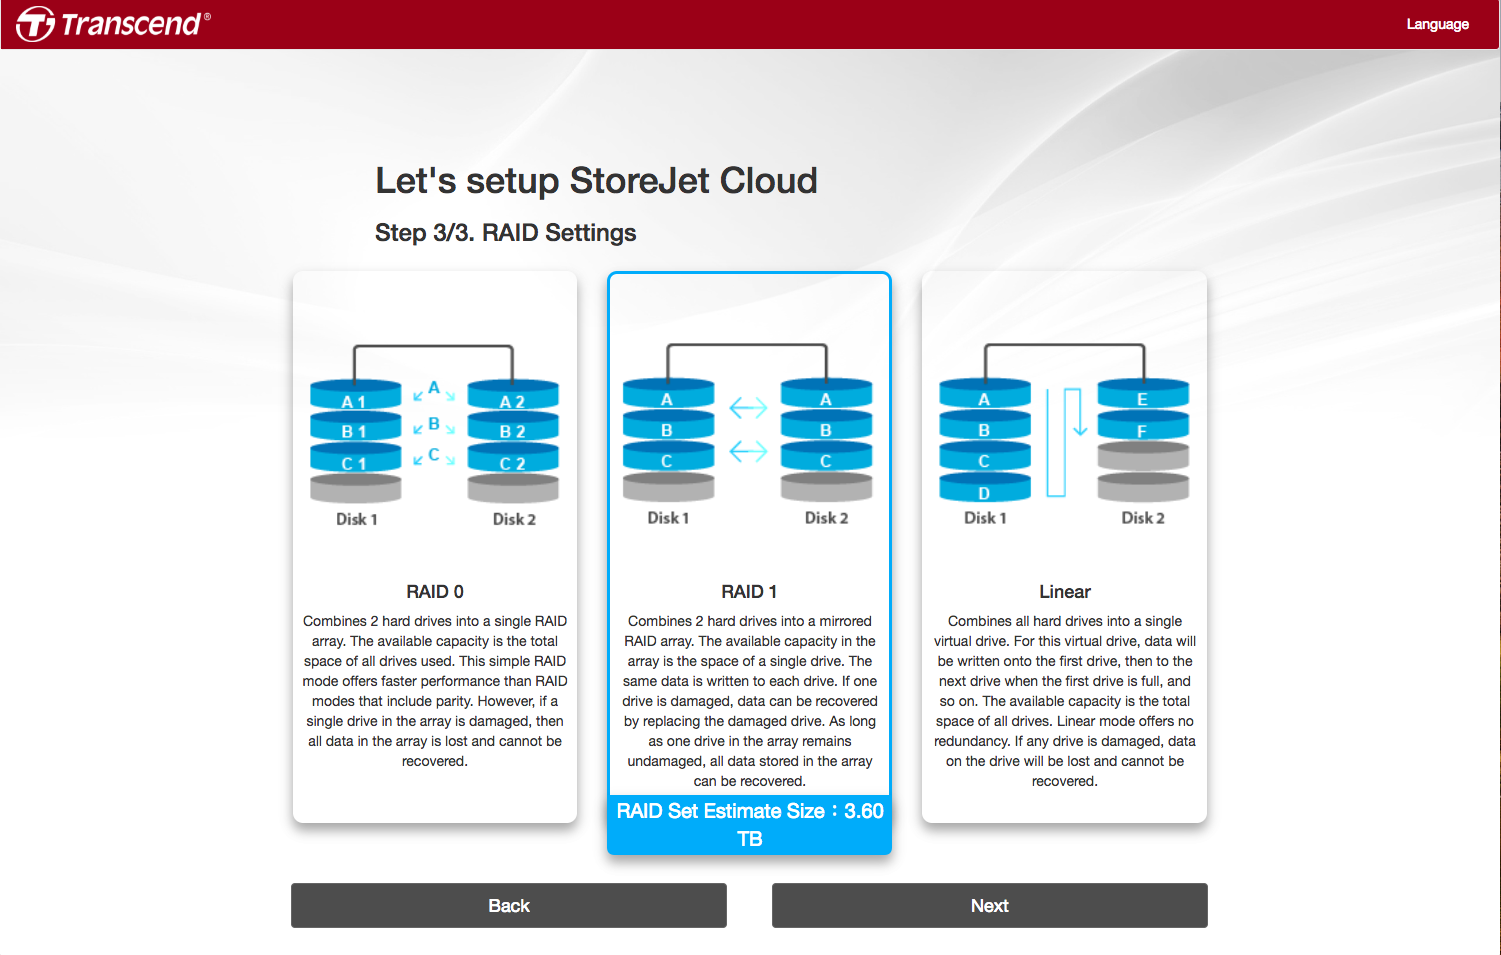
| RAID 0 | Combines 2 hard drives into a single RAID array. The available capacity is the total space of all drives used. This simple RAID mode offers faster performance than RAID modes that include parity. However, if a single drive in the array is damaged, then all data in the array is lost and cannot be recovered. |
| RAID 1 (Default) |
Combines 2 hard drives into a mirrored RAID array. The available capacity in the array is the space of a single drive. The same data is written to each drive. If one drive is damaged, data can be recovered by replacing the damaged drive. As long as one drive in the array remains undamaged, all data stored in the array can be recovered. |
| Linear | Combines all hard drives into a single virtual drive. For this virtual drive, data will be written onto the first drive, then to the next drive when the first drive is full, and so on. The available capacity is the total space of all drives. Linear mode offers no redundancy. If any drive is damaged, data on the drive will be lost and cannot be recovered. |
-
Click the RAID Settings
-
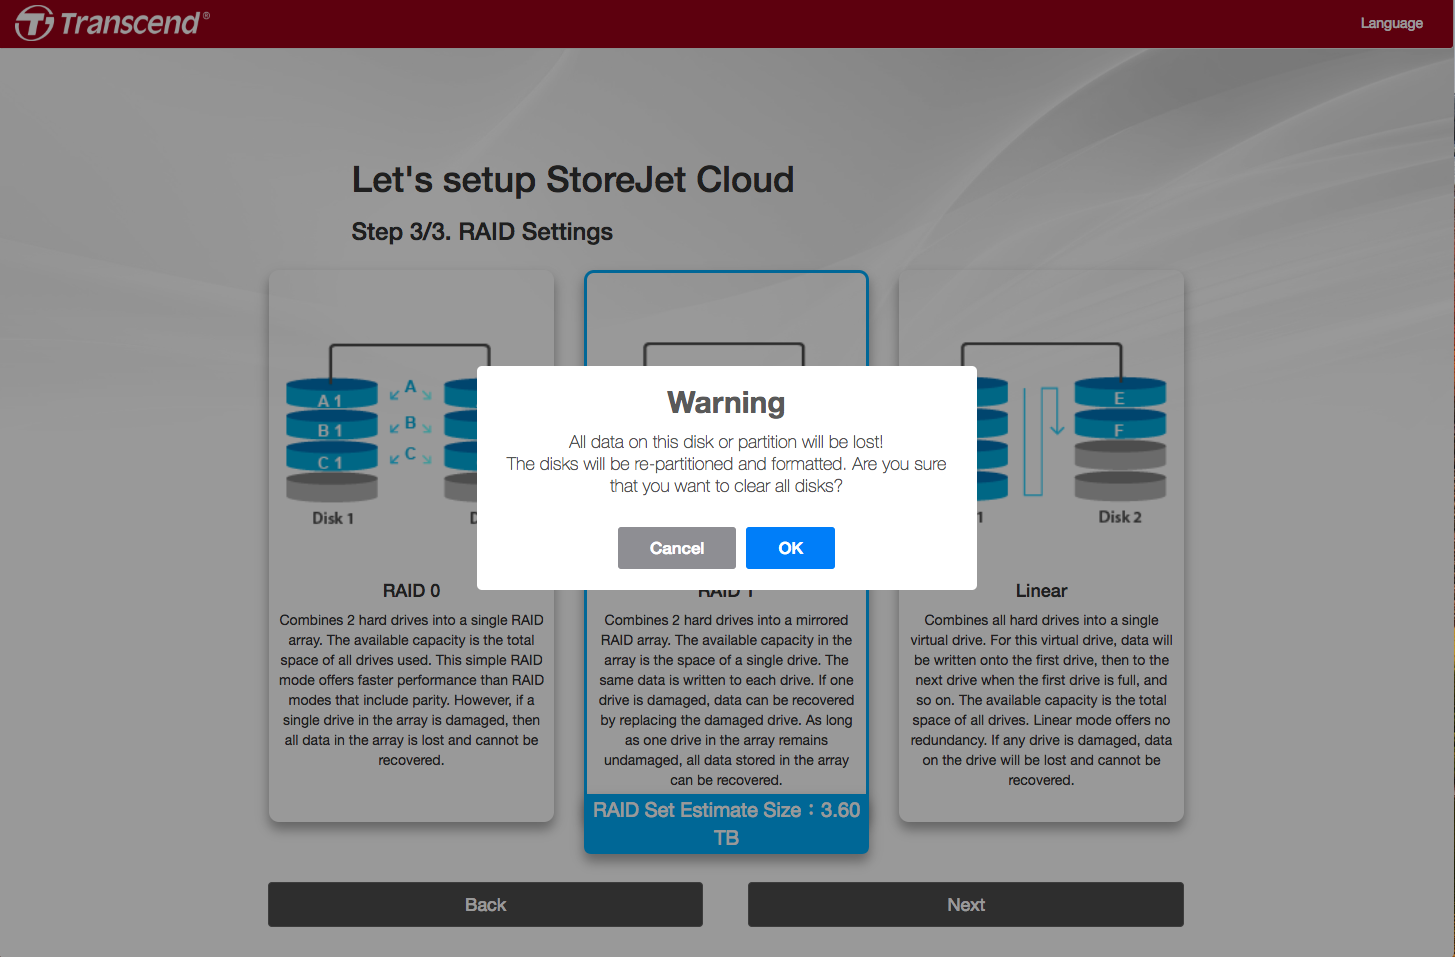
Select the RAID mode you’d like to use for your StoreJet Cloud 210.
-
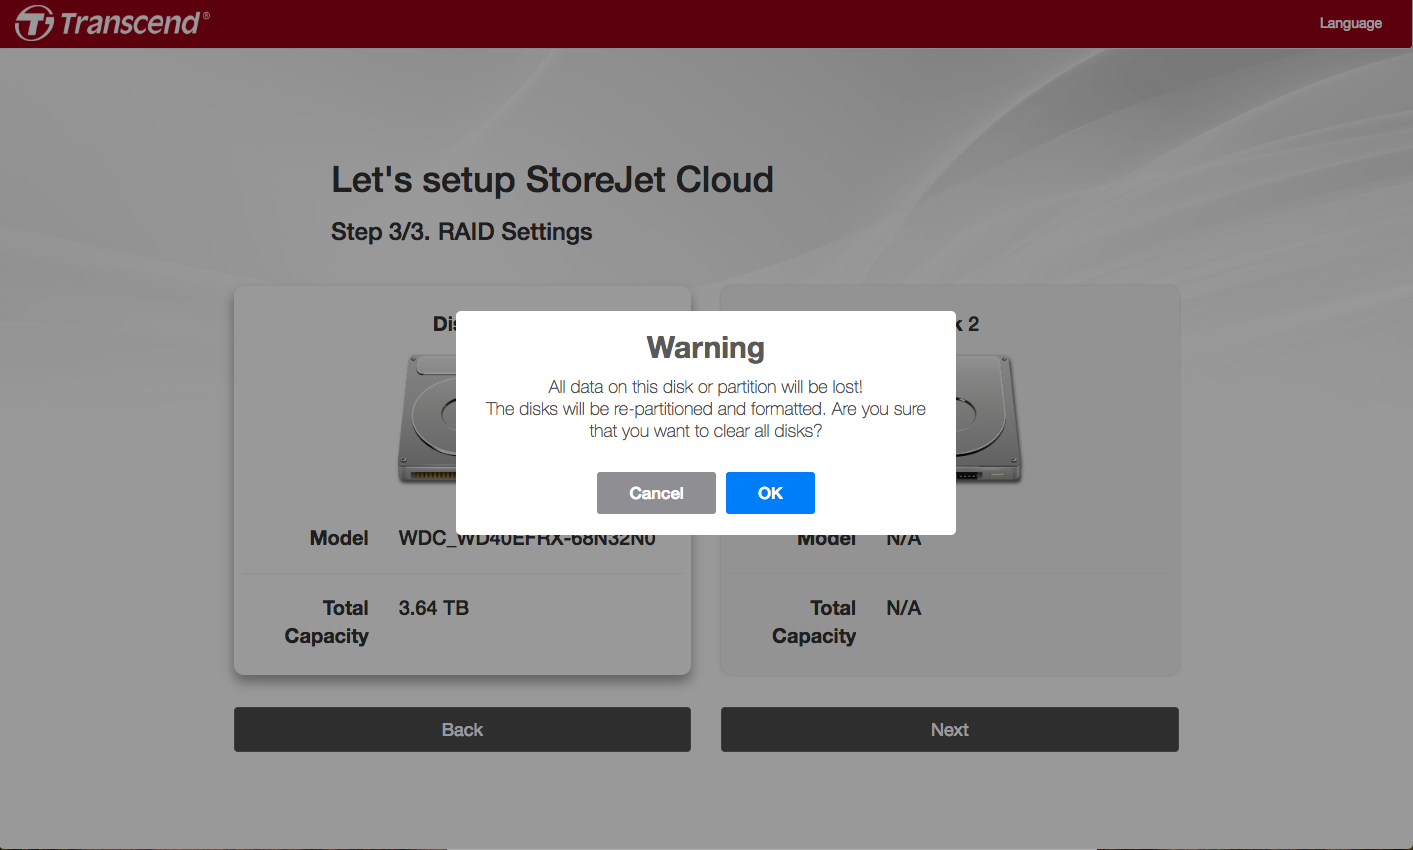
Click Apply. All data will be permanently erased.
-
RAID array creation will start. Wait until it's done.
6. Remote Access (for Admin only)
Remote Access allows you to connect to StoreJet Cloud remotely via your mobile devices.
Unlike public clouds, StoreJet Cloud keeps all your files, including photos, videos, music files etc. in one safe place on your home network.
Just create an account, then share files, stream media, and access your content anytime and anywhere, from the website and from mobile devices.
Create Remote Access account
-
Click the Remote Access icon
-
There are two possible connection statuses:
- Service is running : Remote Access is enabled.
-
Service is stopped : Remote Access is not enabled. Please enable your Remote Access. If the service is still stopped, check if the router of your StoreJet Cloud is correctly installed and your internet is connected.

-
You need to register an account before starting the Remote Access service. Click New Account and enter your email address and password. Note: The password must be between 6-20 characters.
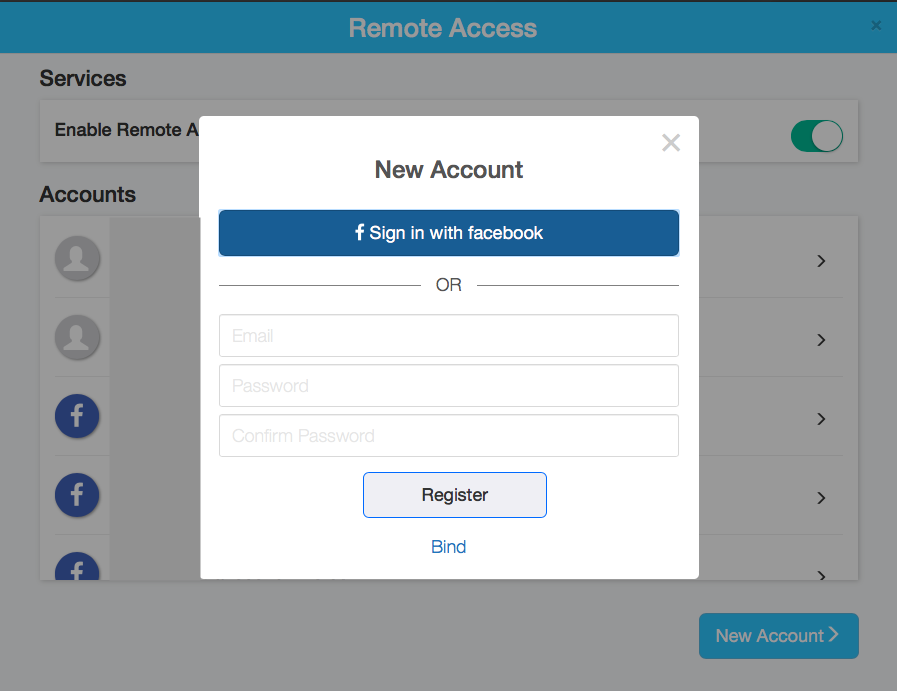
-
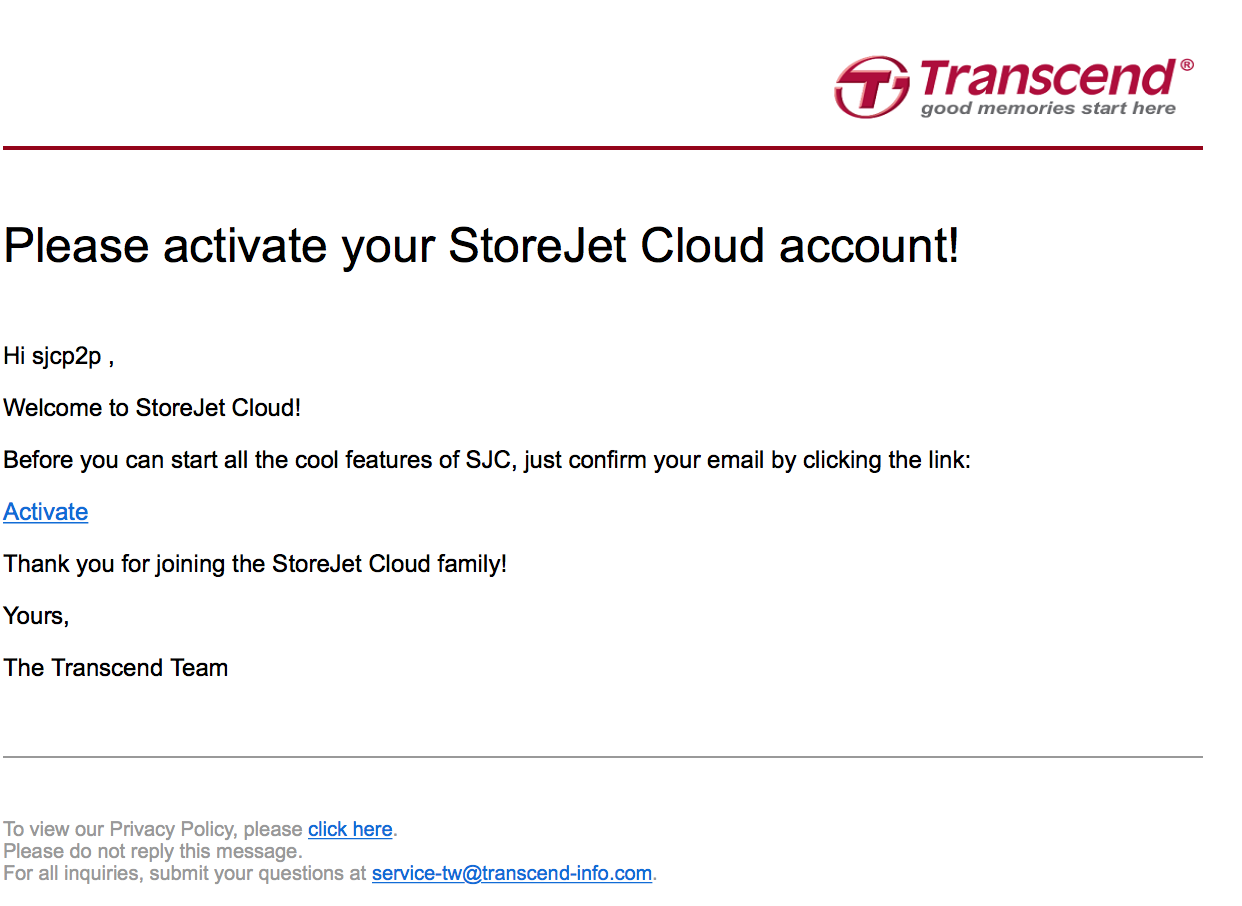
After registering, an activation email will be sent to your email address. To activate Remote Access service, check your email box and click Activate in the activation email. Check your Trash if you do not see the email in Inbox.
-
You can now use the iOS or Android App to connect to StoreJet Cloud using your email address. Or, you can use Chrome Web App to access StoreJet Cloud device if you are using PC or Mac computer.
Remote Access using Windows/macOS
-
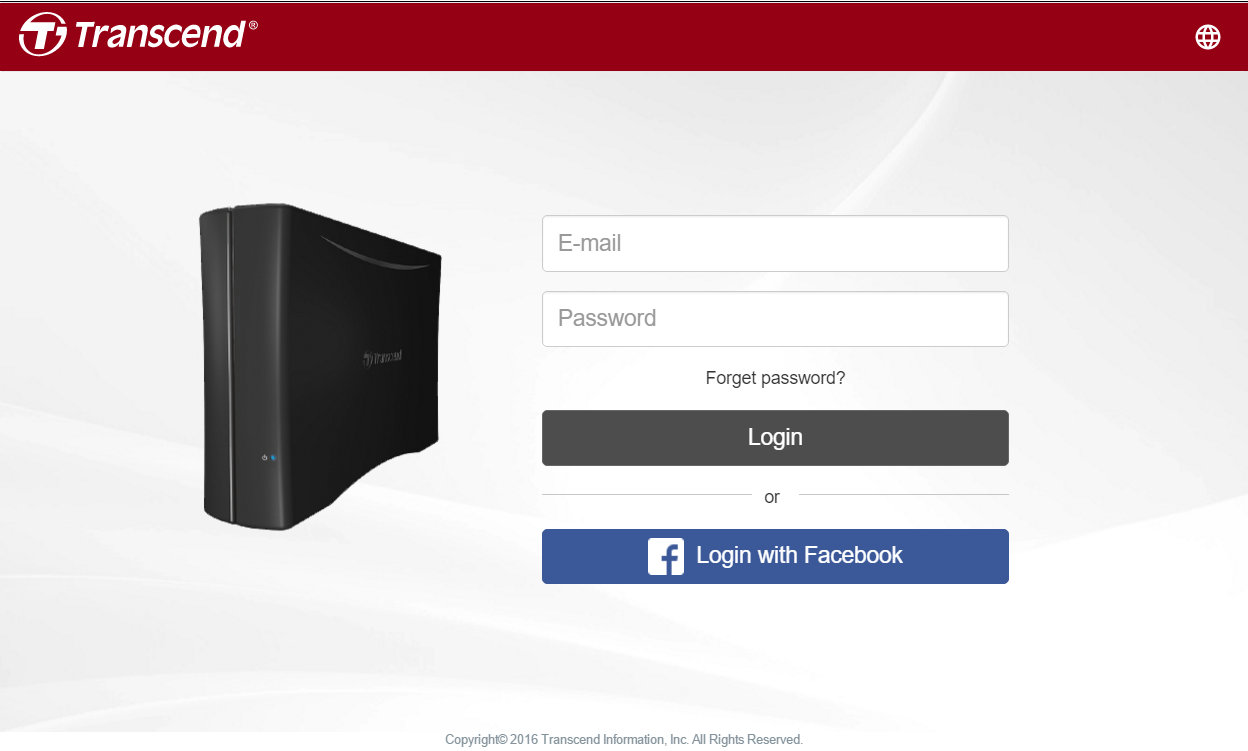
Install StoreJet Cloud Win/ Mac APP.
-
Enter the email address and password with which you registered.
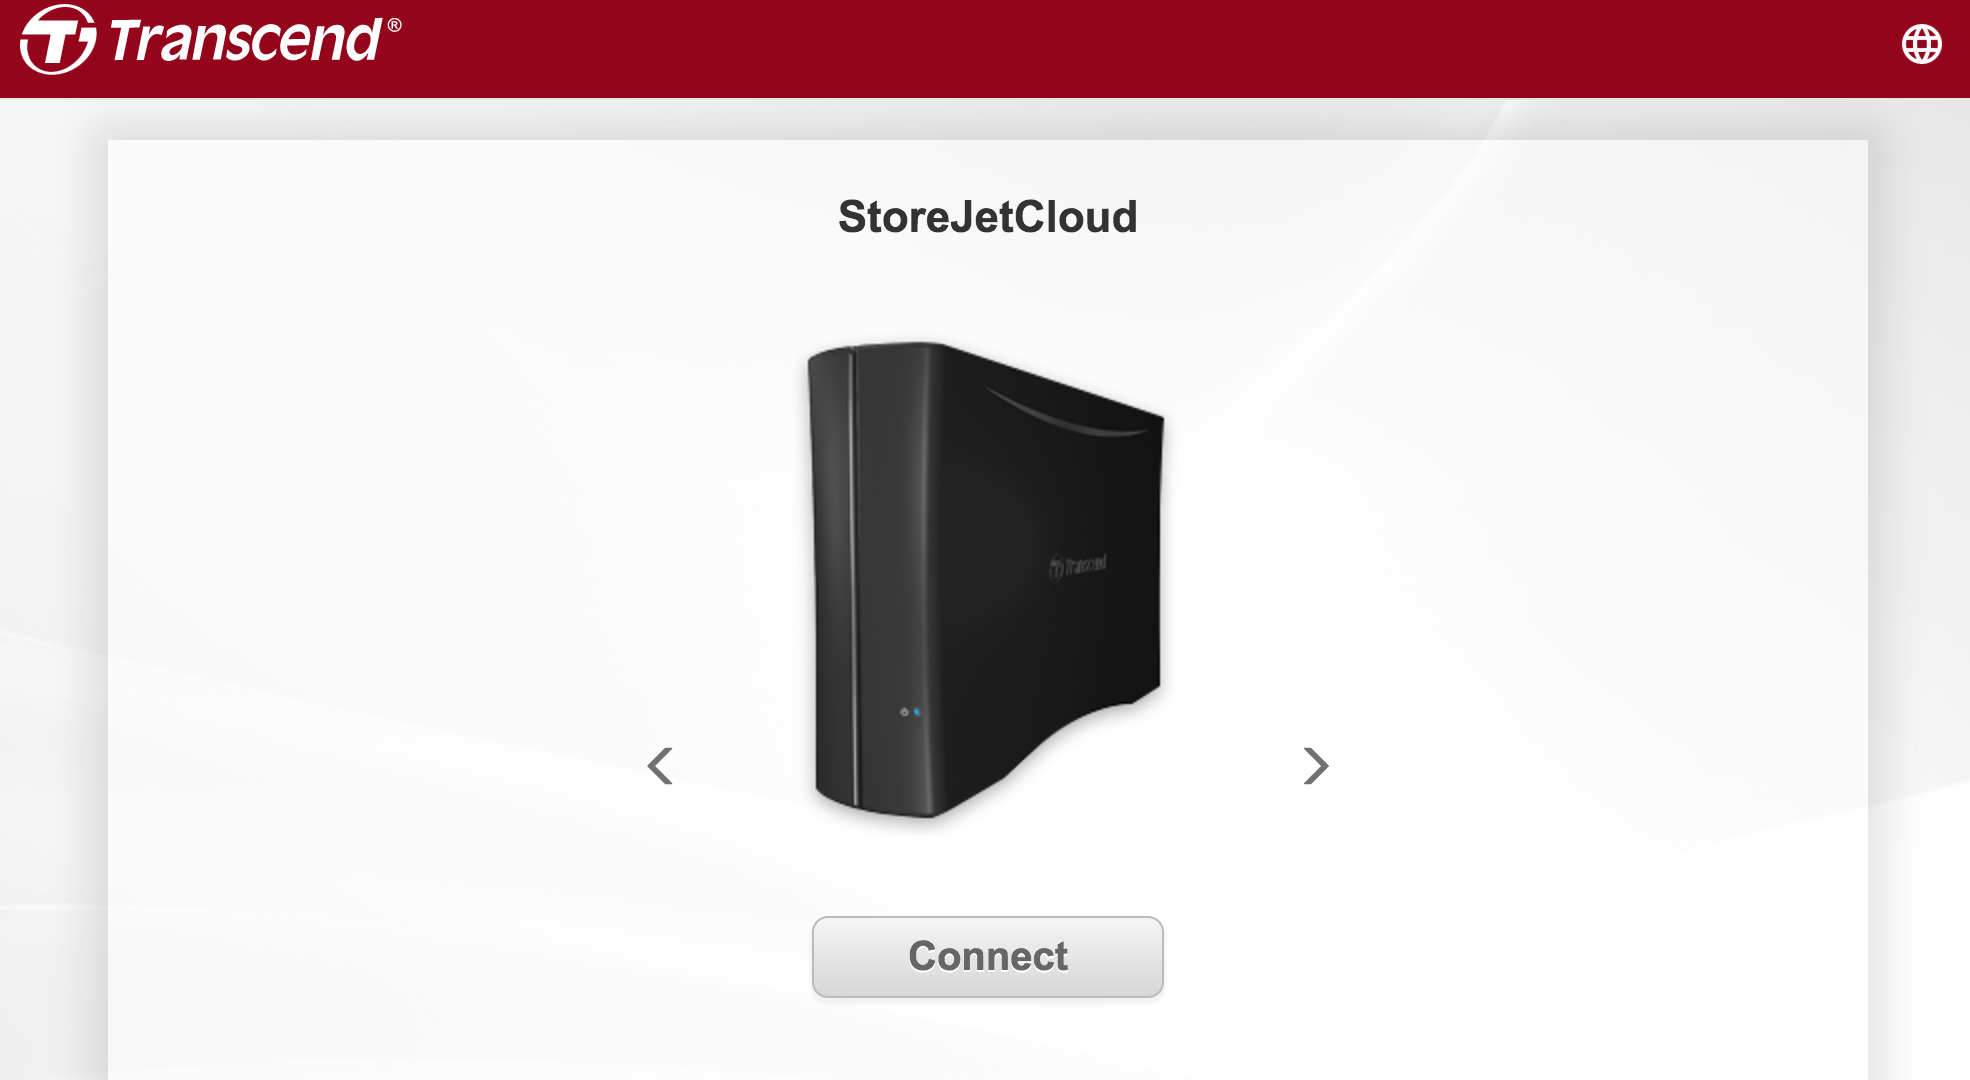
-
Select the StoreJet Cloud device you want to connect, and click Connect.
-
Enter your Username (Example: admin) and Password, then click Login.
-
After logging in, you can access the Shared Folder on the device.

Remote Access using iOS/Android
Please refer to Setting up StoreJet Cloud (iOS/Android)
7. Settings (for Admin only)
Click the icon ![]() in the dashboard to open Settings.
in the dashboard to open Settings.
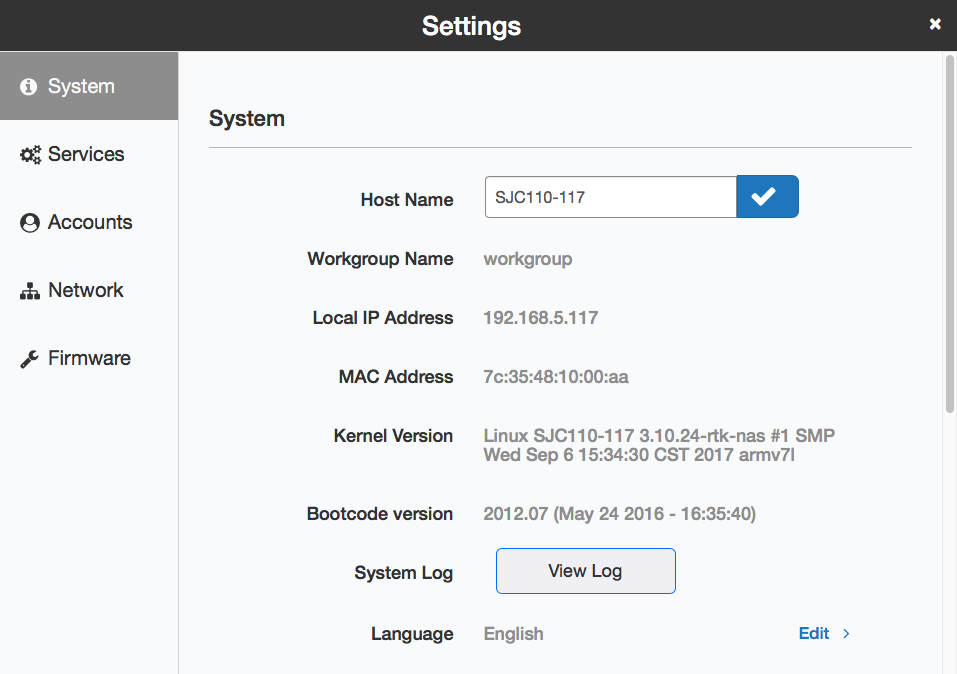
System
StoreJet Cloud Information
Displays the host name, workgroup name, IP address, MAC address, system time, and other system information.
Changing the Host Name
-
In Settings > click System.
-
Enter a new StoreJet Cloud host name, and click icon
 to apply.
Note: A hostname supports up to 15 alphanumeric characters.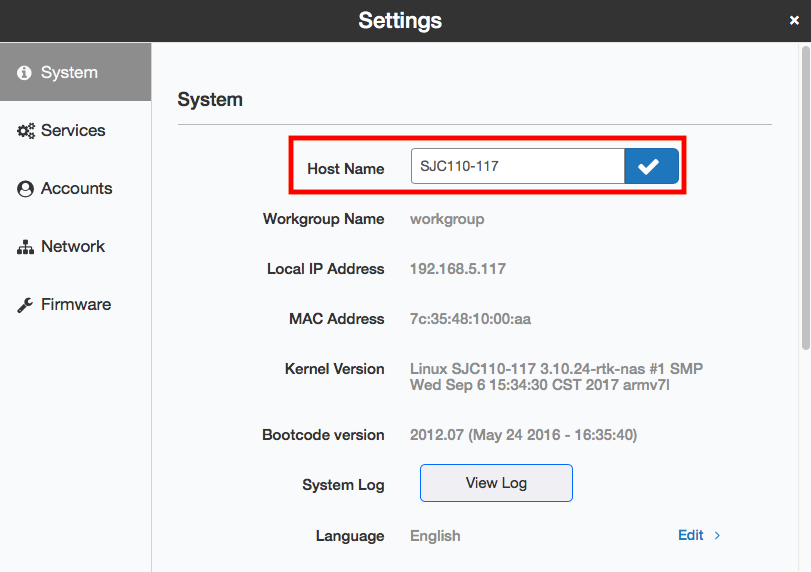
System Log
Displays multiple logs of the StoreJet Cloud. To open the System Log window, click View Log in System.

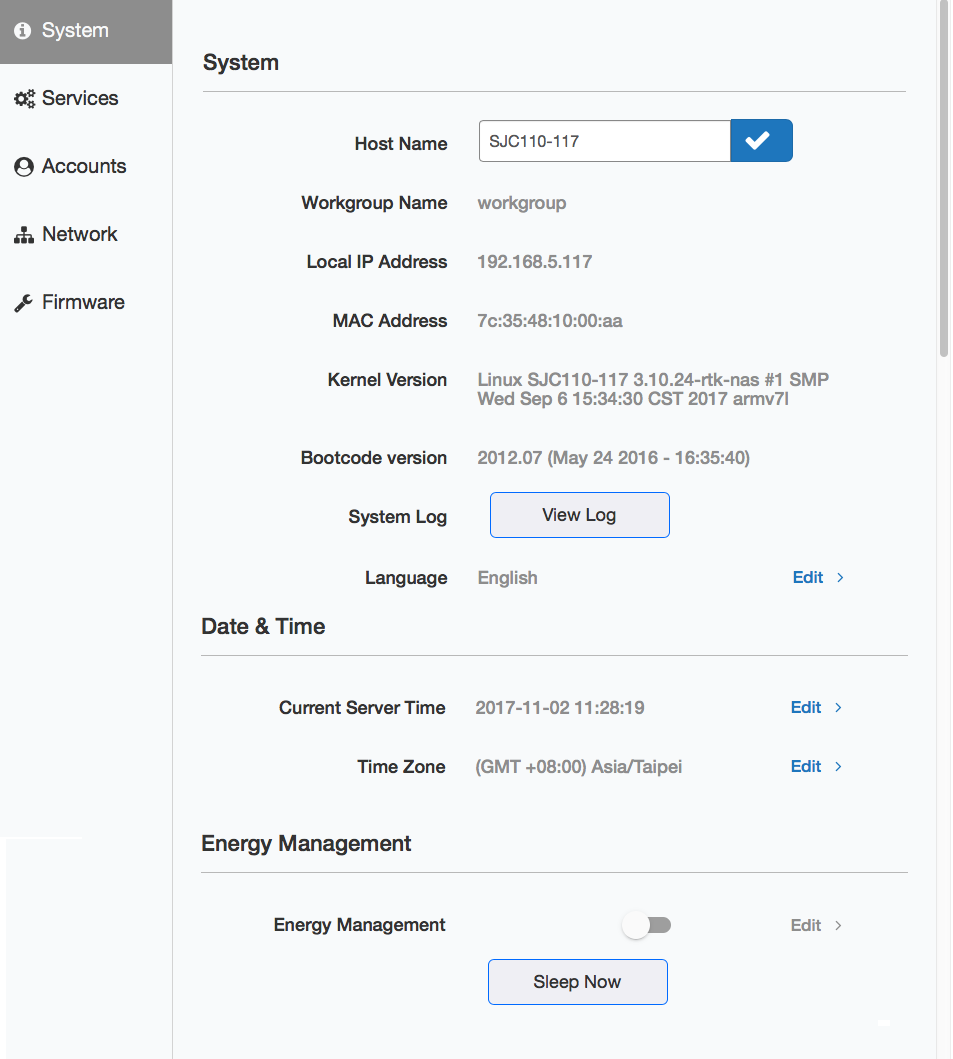
Date & Time
Adjust the time settings such as date and time, time zone, or NTP server settings.
-
In Settings > click System then navigate to Date & Time.
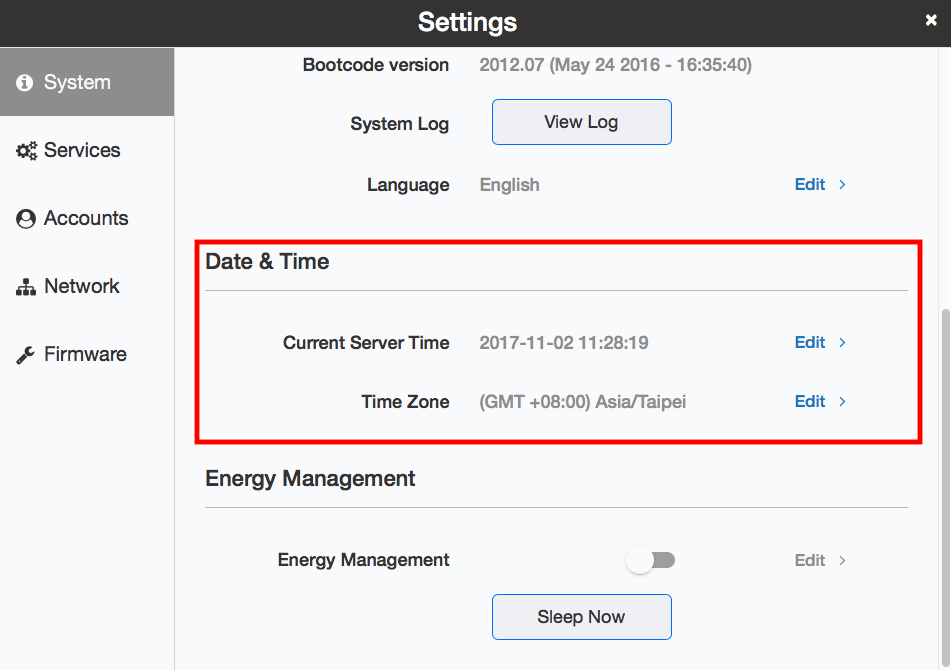
-
Click the Edit behind the Current Server Time to adjust time and modify NTP server then click Save.
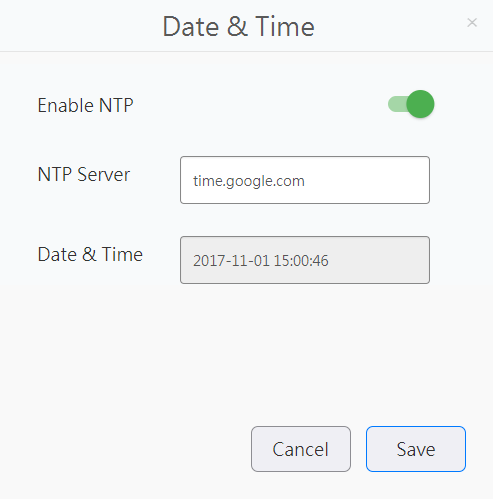
Note: When NTP is enabled, you cannot adjust time manually.
-
Select whether to enable NTP or set the date and time manually.
If NTP is enabled, the StoreJet Cloud adjusts its clock automatically by using the NTP server. You can either enter the NTP server manually, or use a preset NTP server on the StoreJet Cloud. If disabled, select the date from the calendar or enter the date into the "Date" field, and enter the time directly into the "Time" fields. -
Click the Edit behind the Time Zone and select your time zone from the list then click Save.
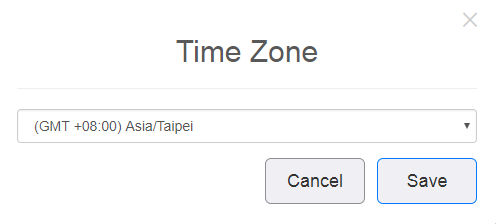
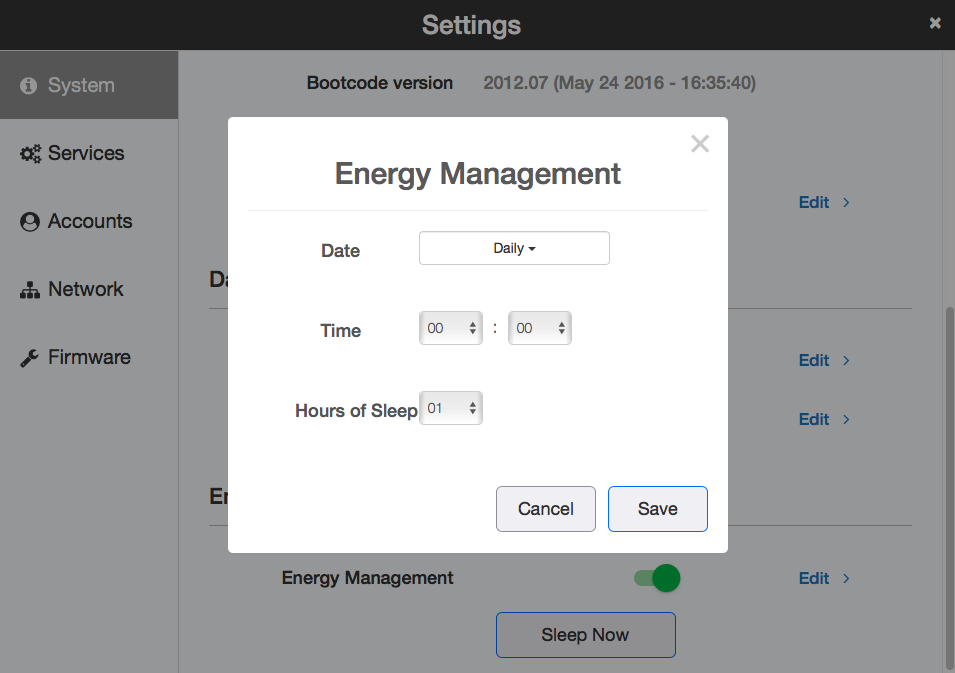
Energy Management
System Sleep Mode
To save energy, you can adjust a timer to have the StoreJet Cloud system enter sleep (standby) mode at a designated time, where all hard drives and LEDs are Orange Flashing.
-
In Settings > click System then navigate to Energy Management.

-
Enable the Energy Management.
-
Select the timer interval from "Daily" or "Weekly", time to go into Sleep mode, and how long the StoreJet Cloud will be in Sleep mode.
-
Click Save. If you want the StoreJet Cloud to sleep immediately, click Sleep Now.
Notes: Examples of multiple timer settings are shown below.
Example 1:
If running at a current time of 10:00 Tuesday.
Schedule: Daily. Sleep Hour: 0:00. Hours of Sleep: 12.
The unit goes into sleep mode at 0:00 am and wake up after 12 hours, 0:00 pm on Tuesday.
Example 2:
If running at a current time of 10:00 Tuesday.
Schedule: Weekly Tuesday. Sleep Hour: 21:00. Hours of Sleep: 12.
On every Tuesday, the unit goes into sleep mode at 9:00 pm and wake up after 12 hours, 9:00 am on Wednesday.
• To power on the StoreJet Cloud before the wake-up time when it is in Sleep mode, press the red function button. Otherwise, use Wake-on-LAN software, or power off then power on the StoreJet Cloud.
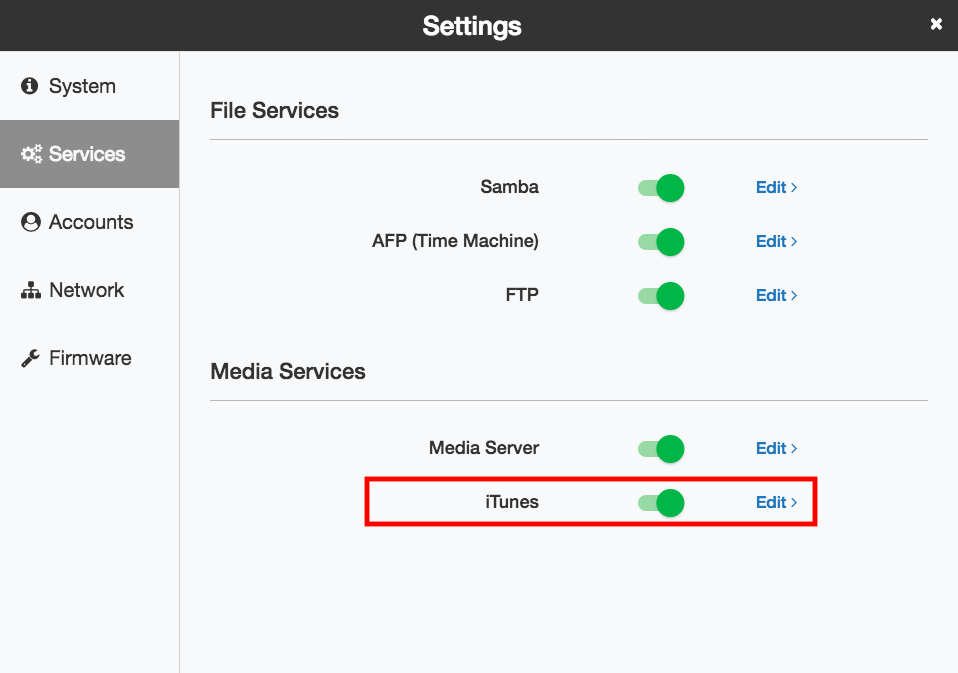
Services
File Services
Create or delete shared folders in the StoreJet Cloud and enable or disable protocol services.
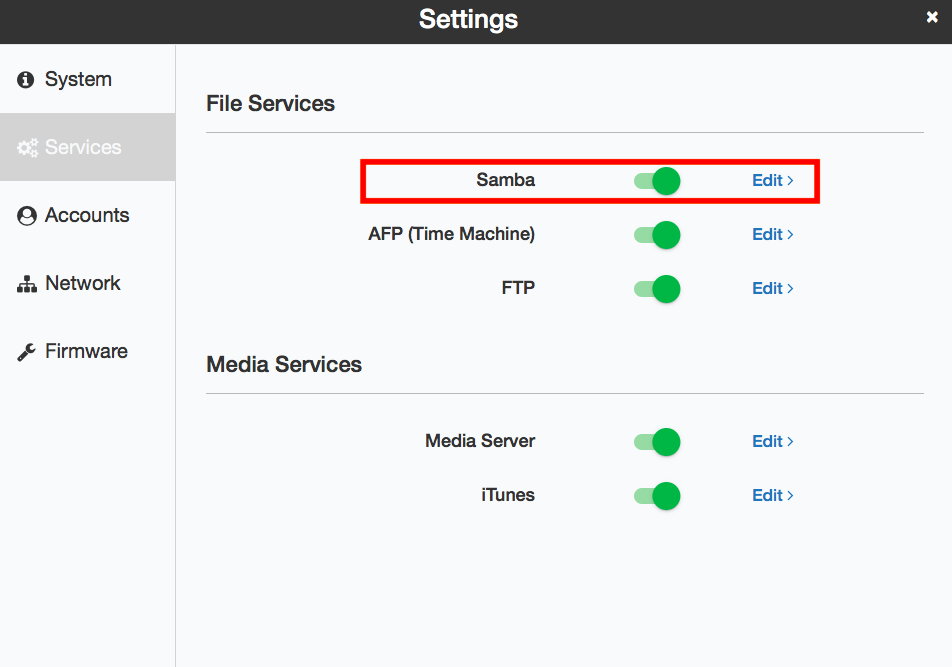
Samba(SMB)
Enable or disable SMB connections for the StoreJet Cloud. The SMB connection is enabled by default.
-
In Settings, click Services.
-
Enable it and click Edit.
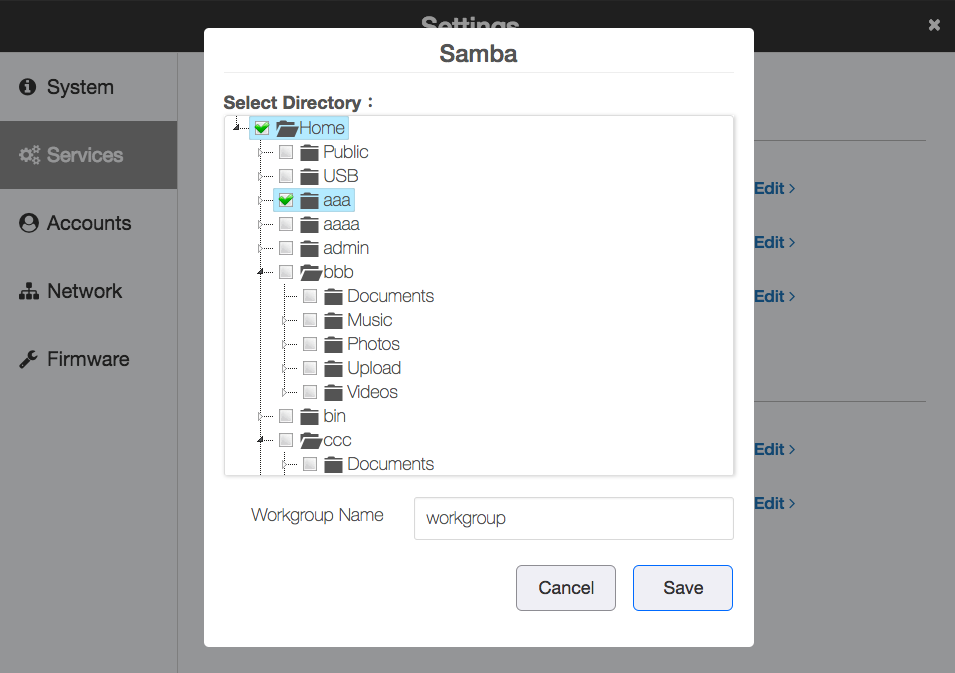
-
Select folder or modify the Workgroup Name and click Save.
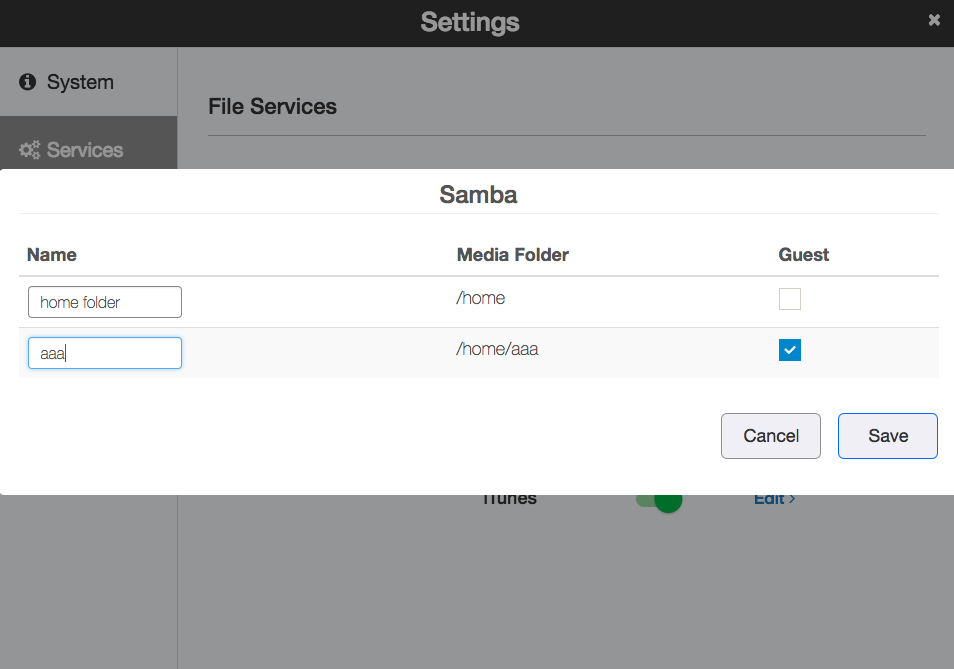
-
Enter a name for a shared folder and check Guest if allowing anyone can access this shared folder and click Save.
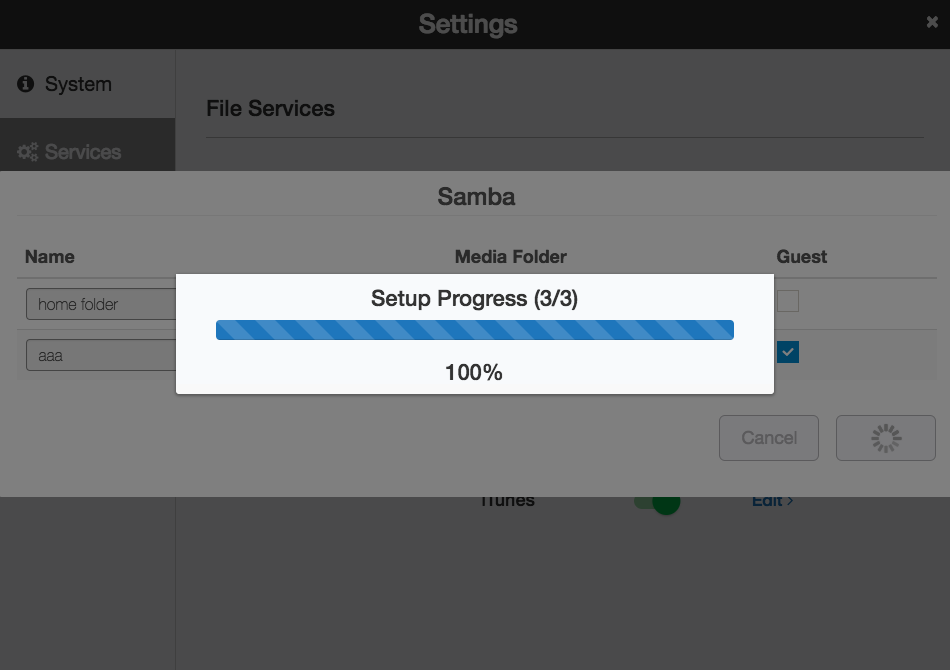
-
Wait for it to take effect.
Note: Even if you delete the folder name from the list, the folder including the data that exists in the home partition will not be deleted.
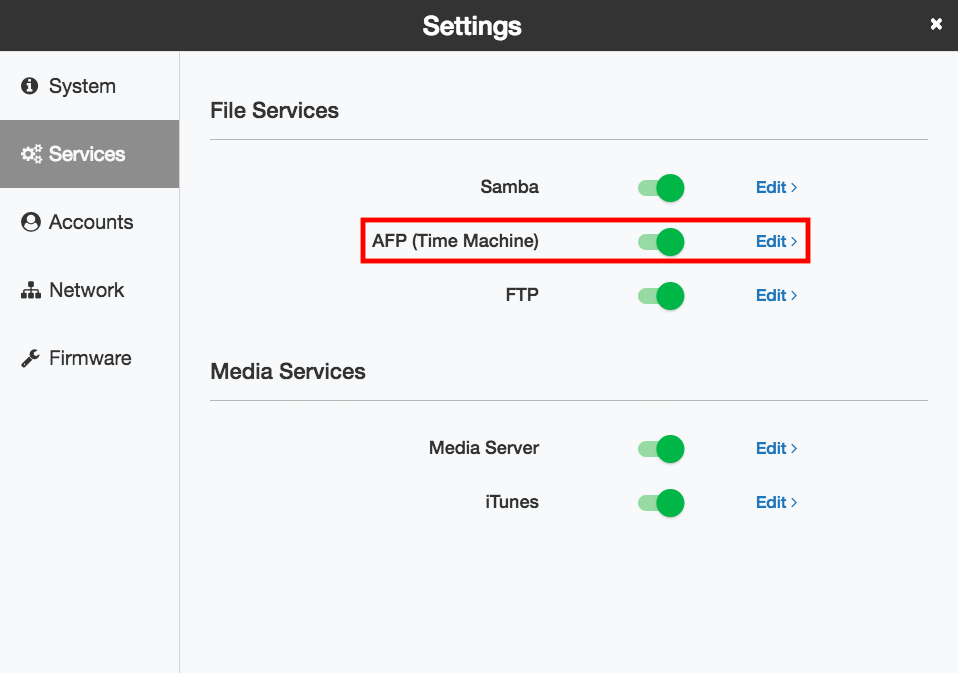
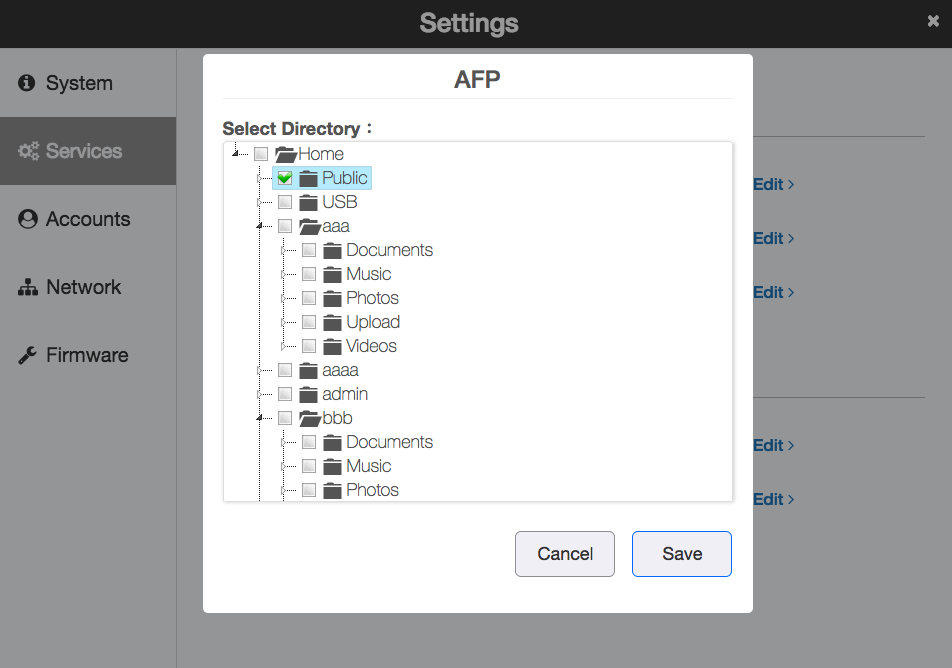
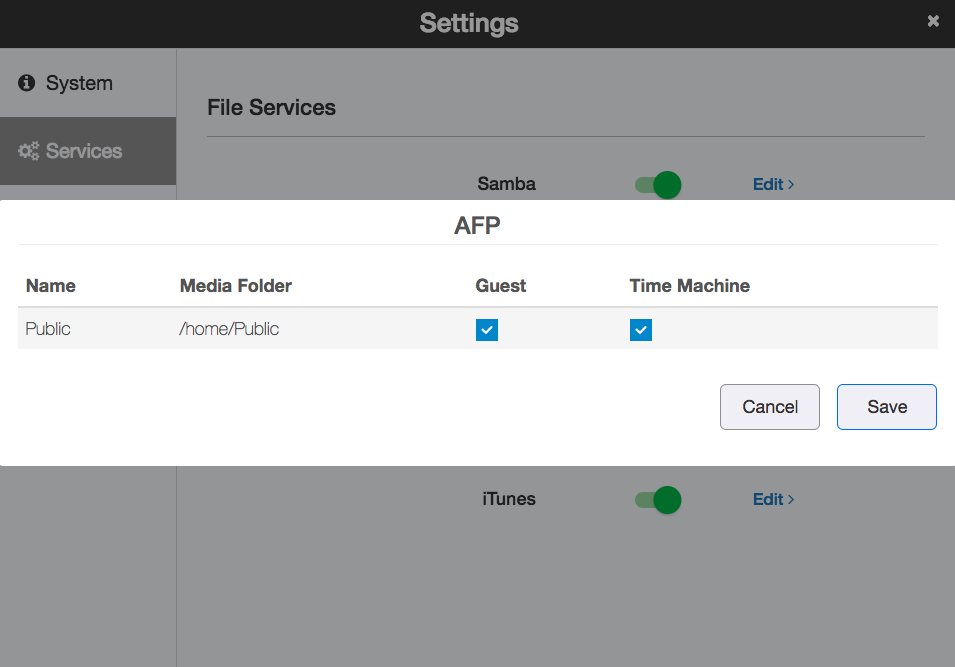
AFP
Enable or disable AFP connections for the StoreJet Cloud. The AFP connection is disabled by default.
-
In Settings, click Services.
-
Enable it and click Edit.
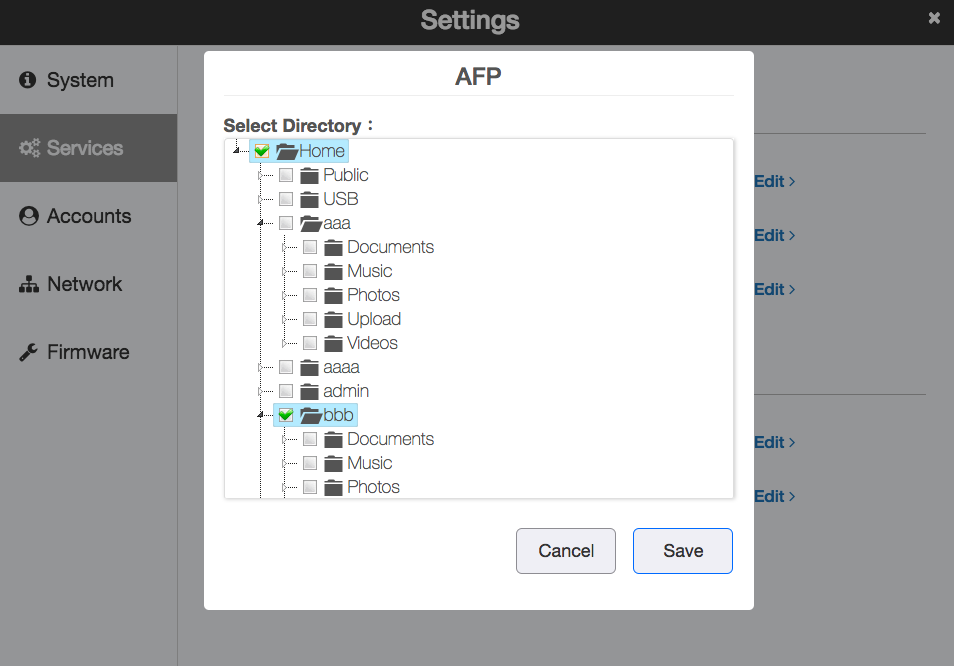
-
Select folder and click Save.
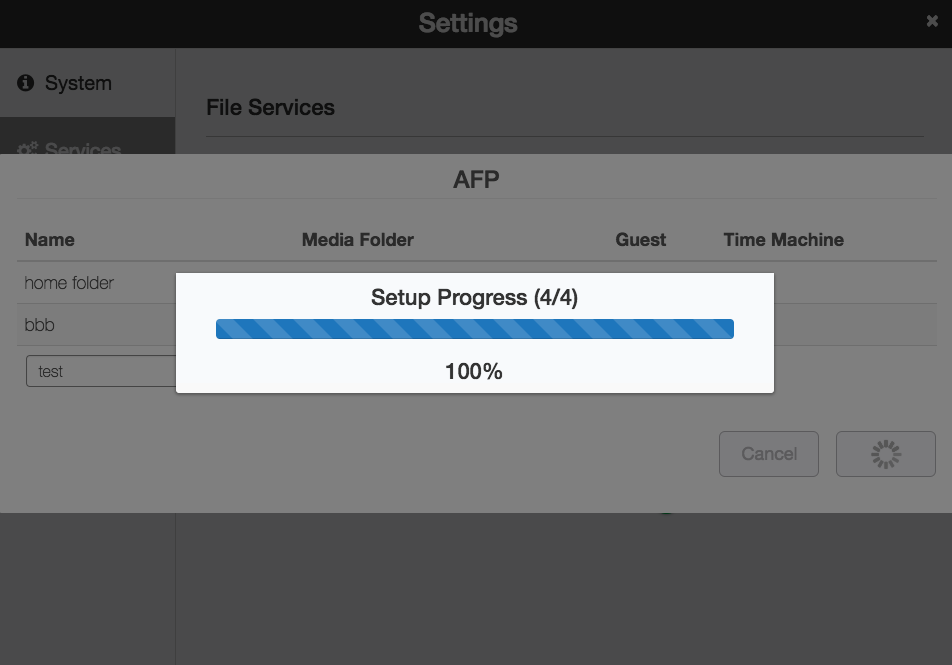
-
Enter a name for a shared folder and check Guest if allowing anyone can access this shared folder and click Save.
Check Time machine if want to use this shared folder to back up .
-
Wait for it to take effect.
Note: Even if you delete the folder name from the list, the folder including the data that exists in the home partition will not be deleted.
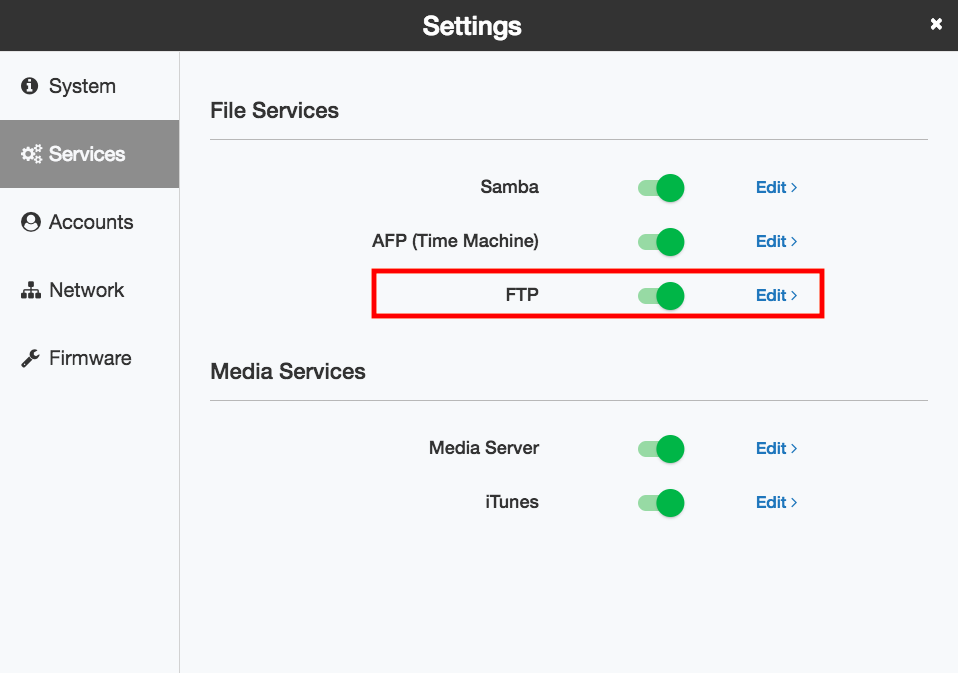
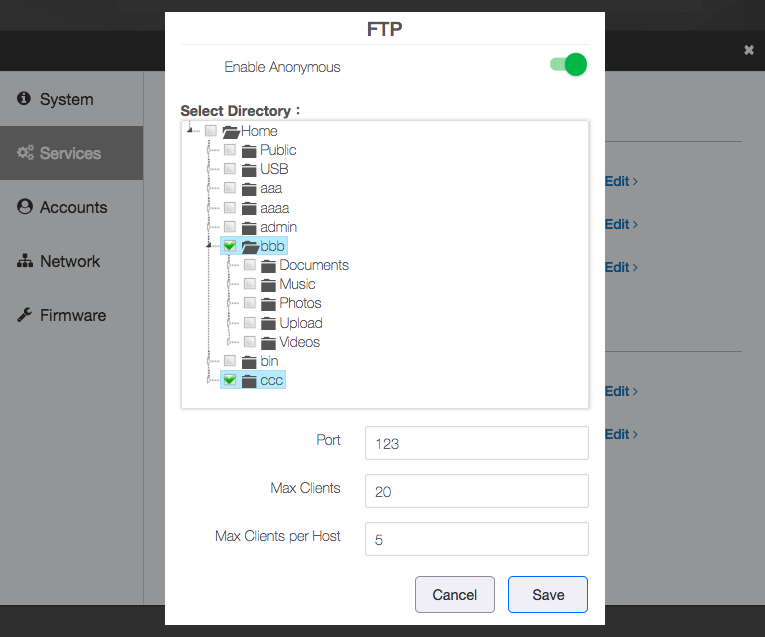
FTP
Enable or disable FTP connection of the StoreJet Cloud. The FTP connection is disabled by default.
-
In Settings > click Services.
-
Enable it and click Edit.
-
Select folder ,enter a desired port number and other settings. If you want to allow anonymous access, check Enable anonymous then click Save.
-
Enter a name for shared folder then Click Save.
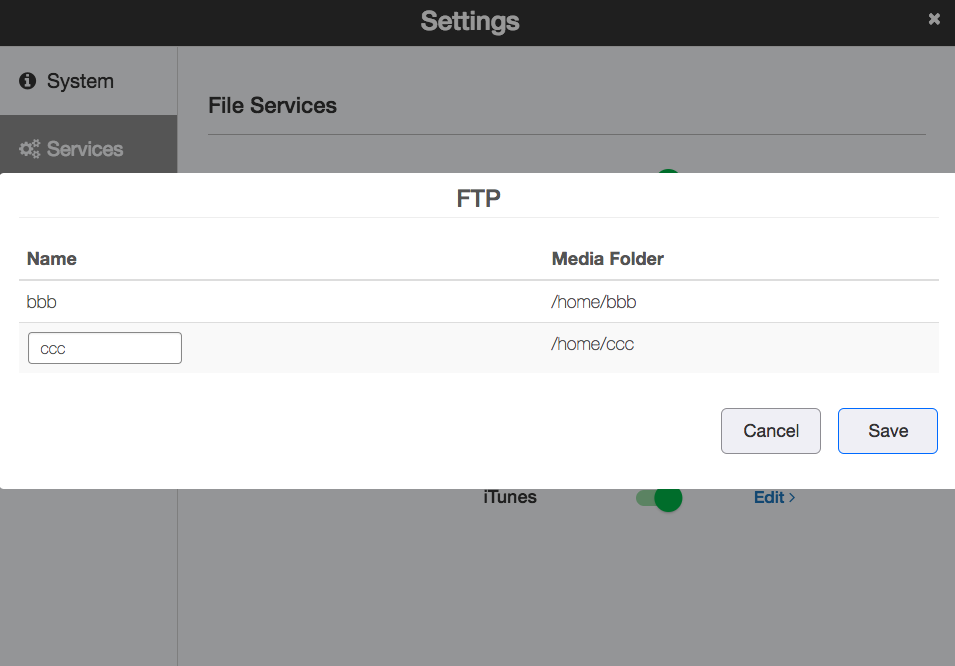
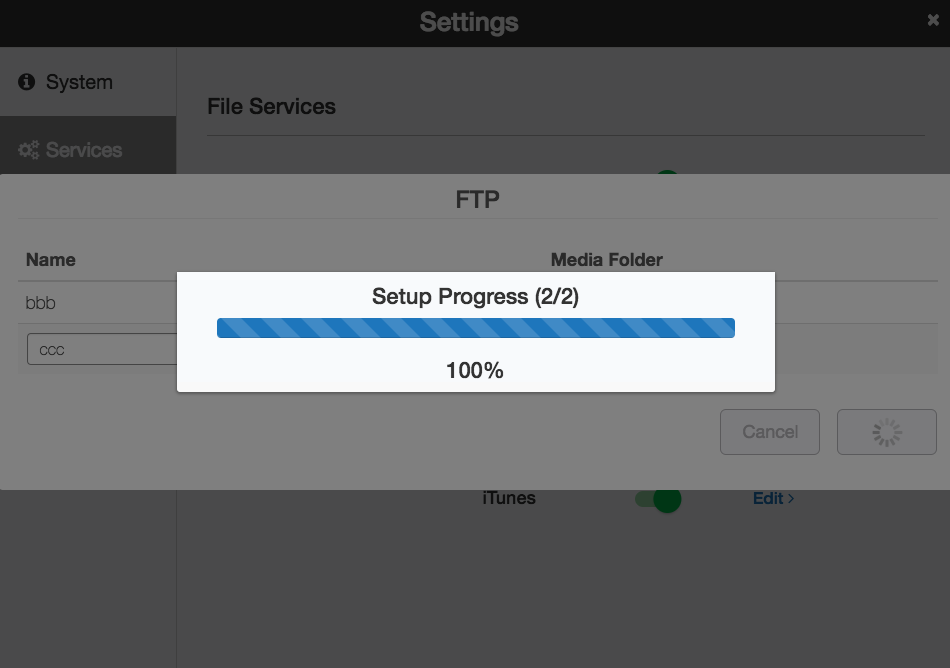
-
Wait for it to take effect.
Note 1: Even if you delete the folder name from the list, the folder including the data that exists in the home partition will not be deleted.
Note 2: If you access the StoreJet Cloud as an anonymous user via FTP, the access will be be read-only.
Media Services
Enable or disable Media Service of the StoreJet Cloud.
Media Server (DLNA Server)
The Media Server is enabled by default and cannot be disable. The Media Server page on Settings allows you to enable or disable the DLNA media server. Media server allows re-scanning the StoreJet Cloud or fully rebuilding the DLNA database.
-
In Settings > click Services, check Enable to enable the Media Server.
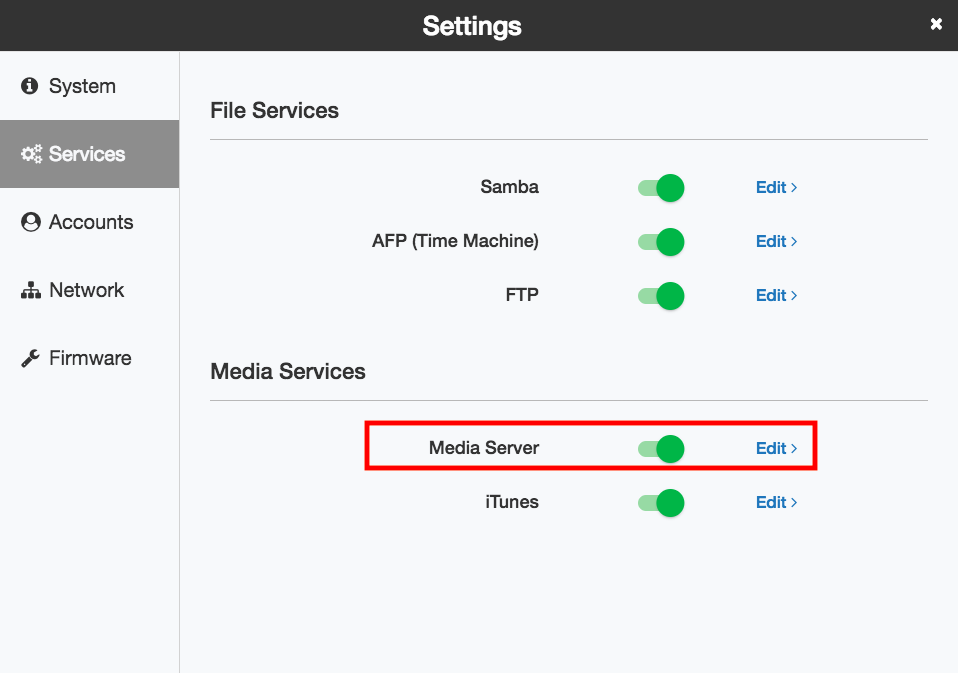
-
Cilck Edit then enter a desired server name then click Save.
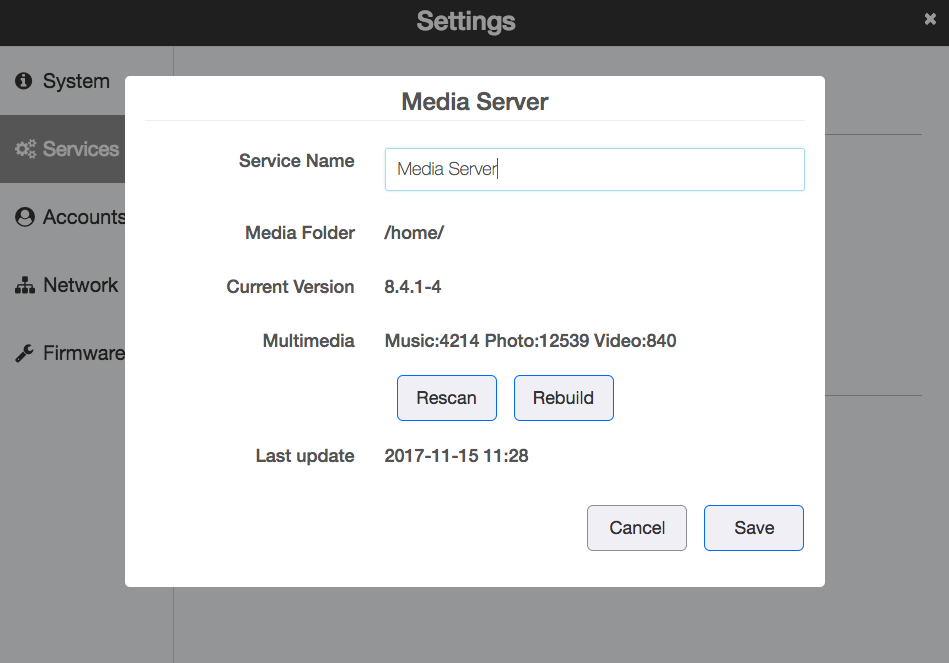
| Media File Supported | |
|---|---|
| Photo | jpg/gif/bmp/png |
| Music | mp3/mpa/wma/aac/ac3/lpcm/wav/m3u/m4a/aif/flac/ogg/mp1/mp2/mka/webm/ 3gp/ adts/ flv/amr/awb/dsf |
| Video | avi/asf/mpg/mpeg/mp4/mov/wmv/xvid/mkv/webm/3gp/flv |
Accessing StoreJet Cloud Using Media Players / DLNA Devices
After copying files to one of the Shared folders, you can use a variety of DLNA-compatible media players to stream media.
The following media types are supported:
- Windows Media Player 12 (comes with Windows 7 / 8)
- XBox 360
- PlayStation 3 / 4
- Blu Ray players
- Network-connected TVs
- Network music player
Please find below some general steps for setting up devices such as digital picture frames, Blu Ray players, network connected TVs, and digital media adapters:
-
Ensure that your StoreJet Cloud device is connected to your home’s local network and is powered on.
-
Follow the user instructions provided with your media player to go through any initial setup or installation of drivers.
-
Using the navigation feature on your player, scan and detect your StoreJet Cloud device on your network.
-
Depending on the player you use, you may have to access a Settings/Network Setup page in the user interface to establish connection so that your player can link to your StoreJet Cloud device. Please refer to your player’s user manual for specific instructions.
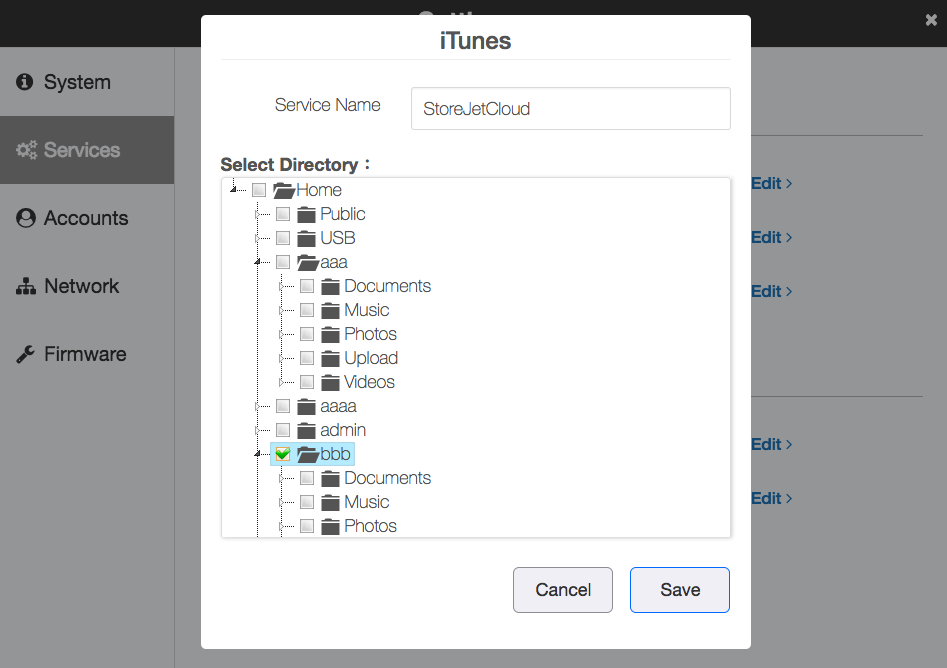
iTunes
Enable or disable the iTunes server, change the server name, and select the folder for sharing.
iTunes is disabled by default. If the iTunes server is enabled, computers on your network with iTunes can play music files stored on the StoreJet Cloud and transfer them to your iOS devices.
-
In Settings > click Services, check Enable to enable the iTunes.
-
Cilck Edit then enter a desired iTunes name.
-
Select the folder to use for iTunes, then click Save.
Note: When you access the iTunes server from a computer or iOS device right after enabling the service on the StoreJet Cloud, the file list may not be properly displayed. In this case, disconnect and reconnect the StoreJet Cloud to the computer or iOS device. The file list should be updated then.
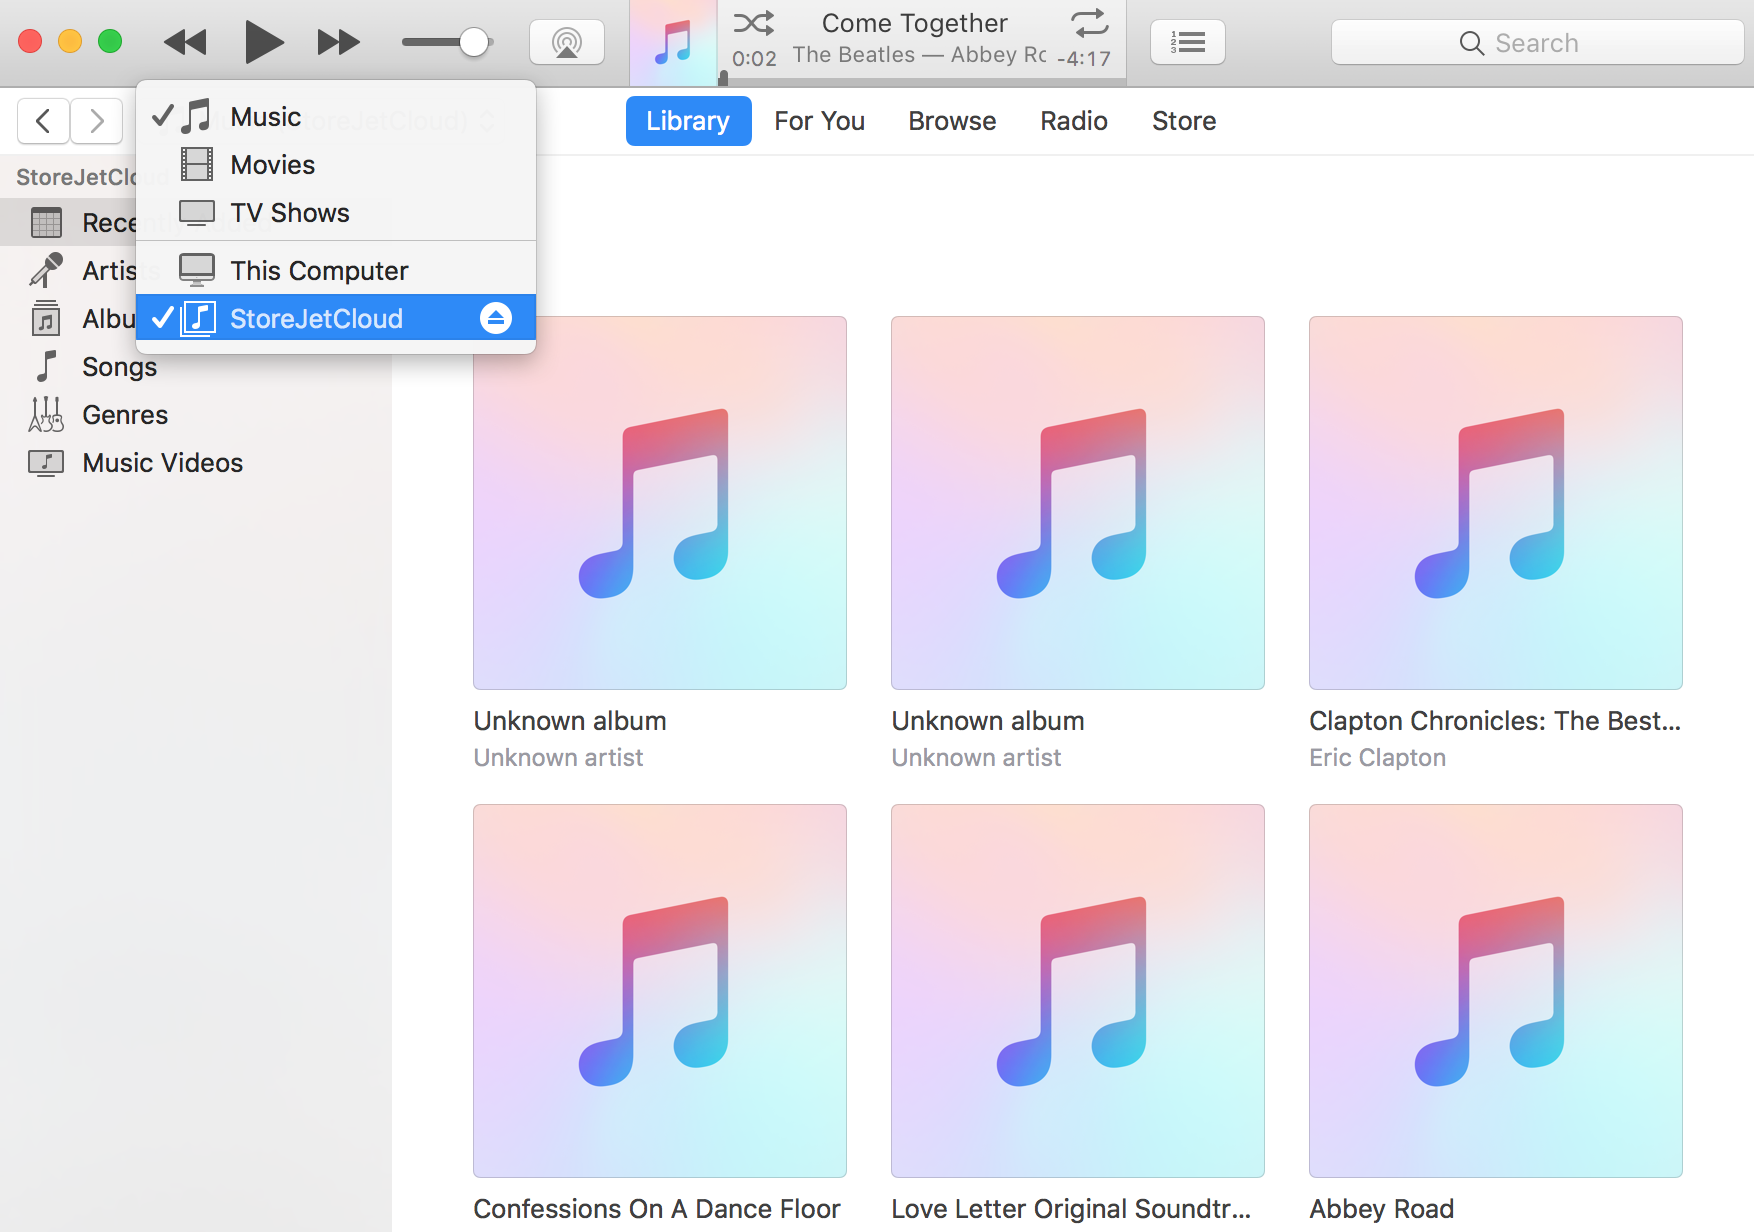
Streaming Media in iTunes
-
Launch iTunes on your Mac or computer.
-
Click StoreJet Cloud under the Shared section of the left side. If you have put music to the /Public/Shared Music folder or a video to /Public/Shared Videos folder, and it is in a format supported by iTunes, it will be listed here.
Accounts
Accounts
Create or delete users in the StoreJet Cloud, or change the admin password.
Create User
-
In Settings > click Accounts.
-
Click New.
-
Enter a username and password, confirm the new password, and then click OK. A new user will be added to the list.
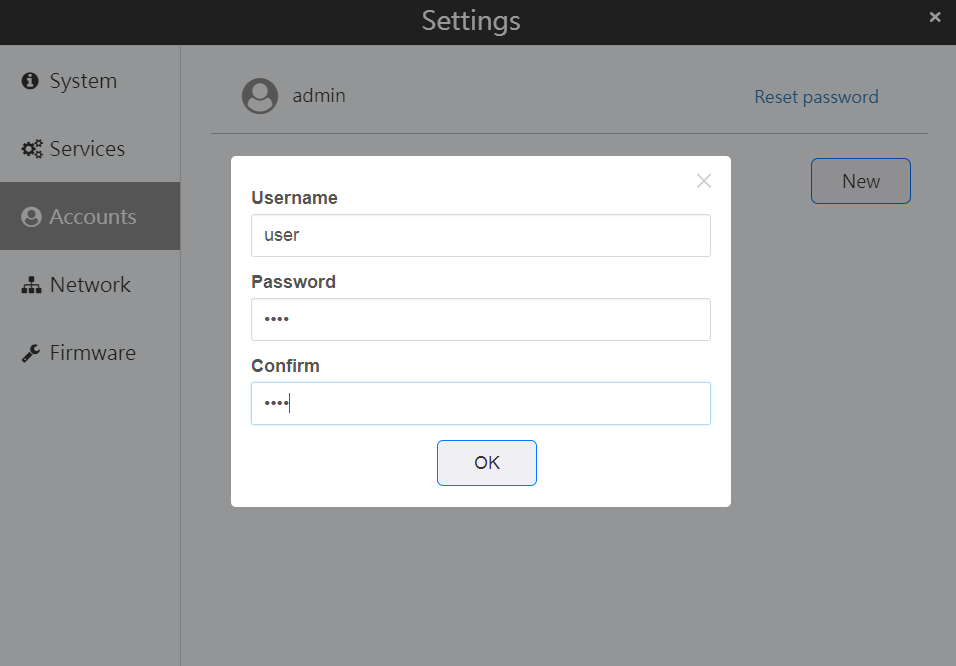
Notes:
- A username supports up to 32 alphanumeric characters and the following symbols: _ -. (Do not use a symbol as the first character and full numeric)
- A password supports up to 16 alphanumeric characters and the following symbols: _ . , ; : ? ! @ # $ % ^ & | ` ~ + - * / ( ) [ ] { } < >.
- When a new user is created, a shared folder that uses the username as its folder name is also created automatically.
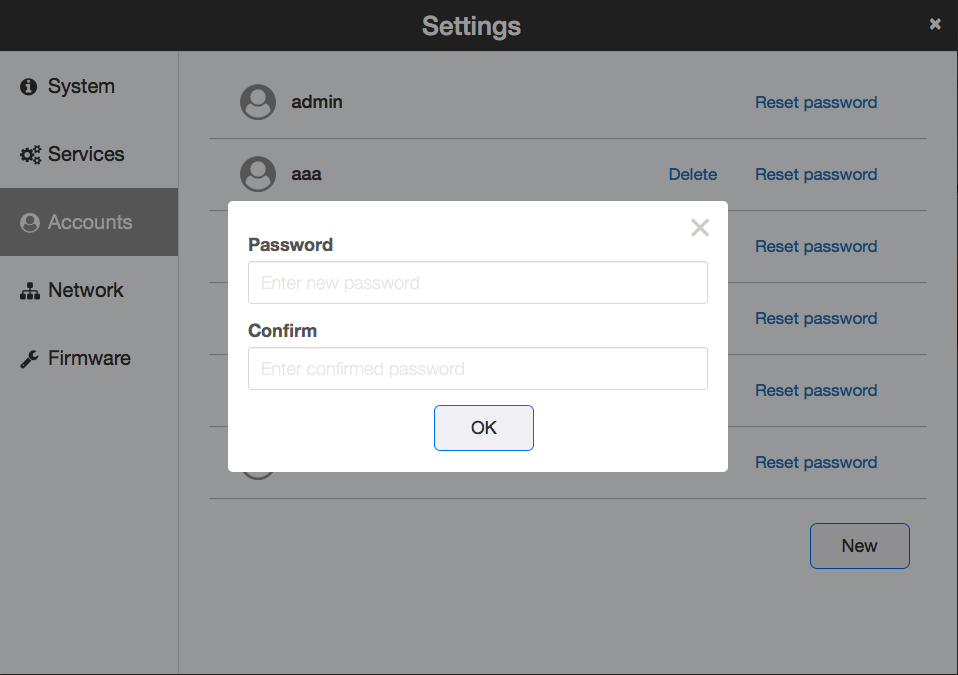
Reset Password
-
In Settings > click Accounts.
-
Select a user to reset the password. Enter and confirm the new password, and then click OK.
Delete User
-
In Settings > click Accounts.
-
Select a user and click Delete.
-
Click OK. The selected user will be deleted.
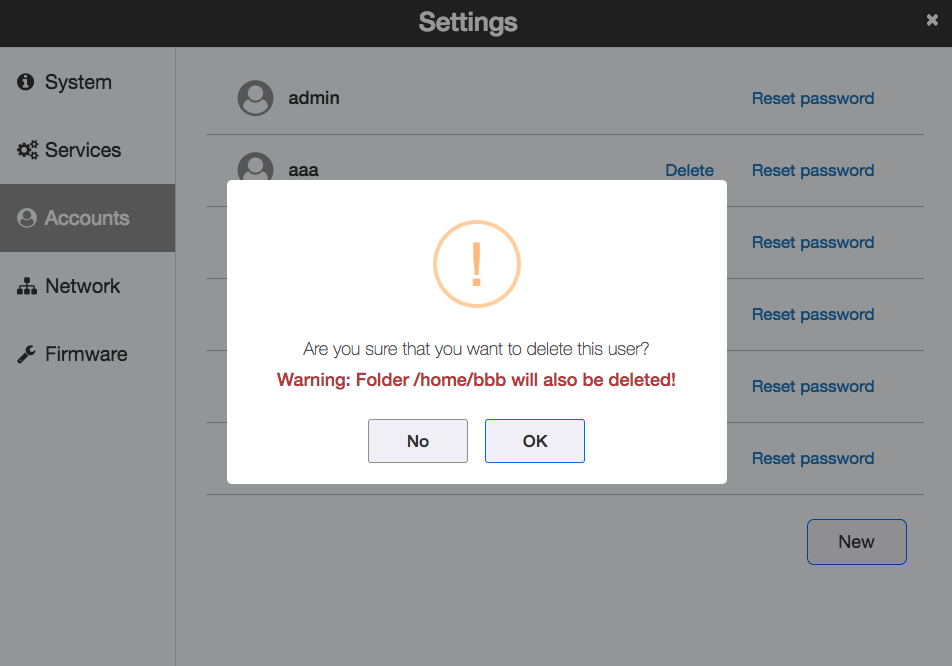
Note: If the user is deleted, the folders under this user will be deleted.
Network
Network
Configure network settings such as IP address, or Wake-on-LAN.
Changing the IP Address
-
Click the Network.
-
Disable DHCP and enter the desired network address settings, and click Apply.
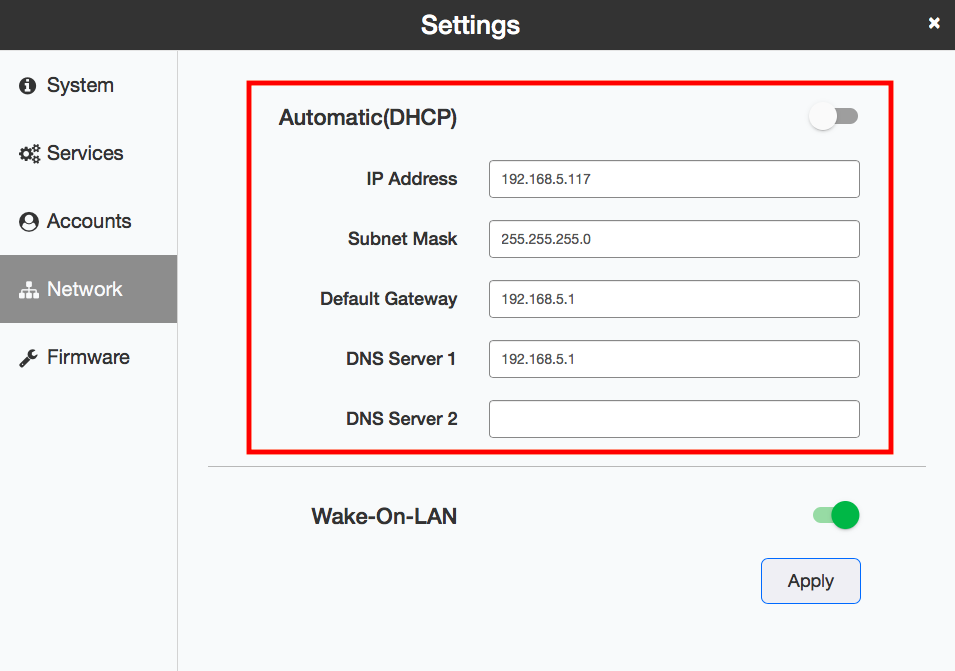
Note: Please make sure the client IP is changed to the same subnet with StoreJet Cloud so that you can reconnect it successfully.
Wake-on-LAN
- The StoreJet Cloud supports Wake-on-LAN, allowing the device to be powered on remotely. You can only wake the StoreJet Cloud up when the StoreJet Cloud is in sleep (standby) mode.
Note: To use Wake-on-LAN, you need Wake-on-LAN software that sends magic packets. The StoreJet Cloud does not include Wake-on-LAN software.
-
Enable Wake-on-LAN, then click Apply.

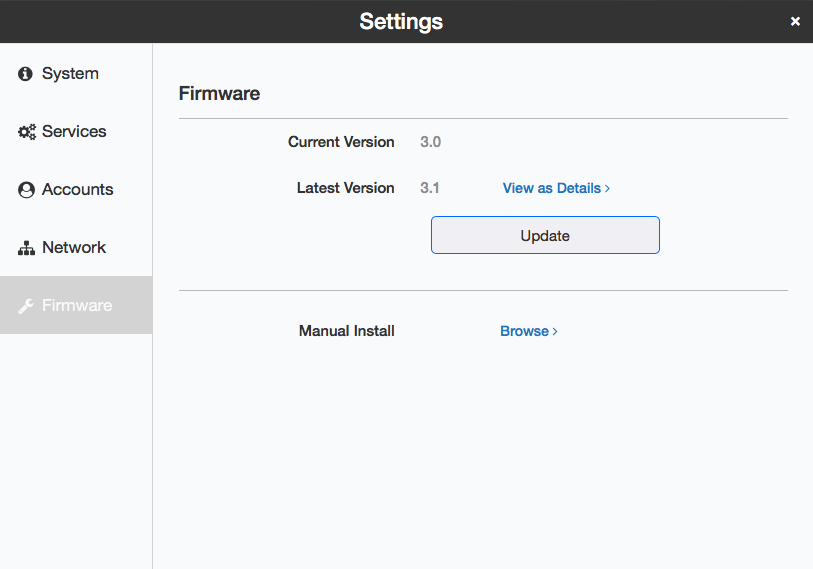
Firmware
Firmware Update
Check the firmware version or update the StoreJet Cloud firmware. To update the firmware, please follow the steps below.
-
In Settings > click Firmware.
-
If the newer firmware is available, click Update.
Note: If the current firmware is the latest one, Update icon won't show up.
-
When the firmware is being updated, the power LED flashes blue. Wait until the process is completed and the LED returns to white.
Note: Rebooting is required during updating firmware, therefore , all of services will interrupt for a while.
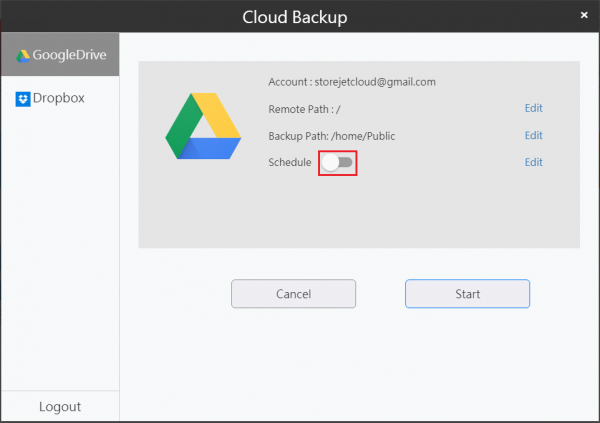
8. Cloud Backup
Cloud Backup allows you to easily synchronize files between StoreJet Cloud and GoogleDrive/Dropbox.
To open Cloud Backup, please click on the icon ![]()
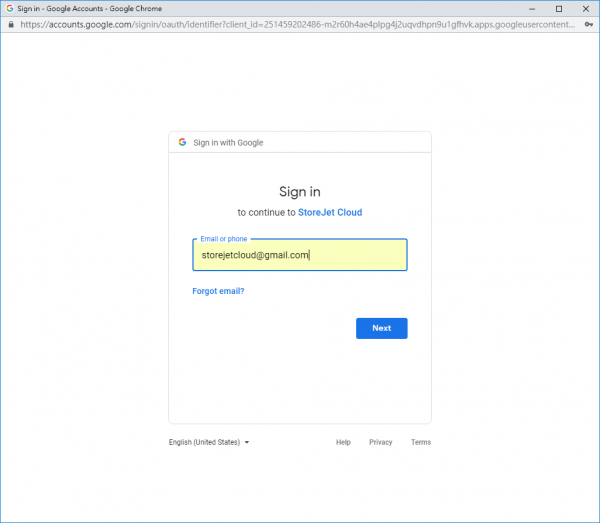
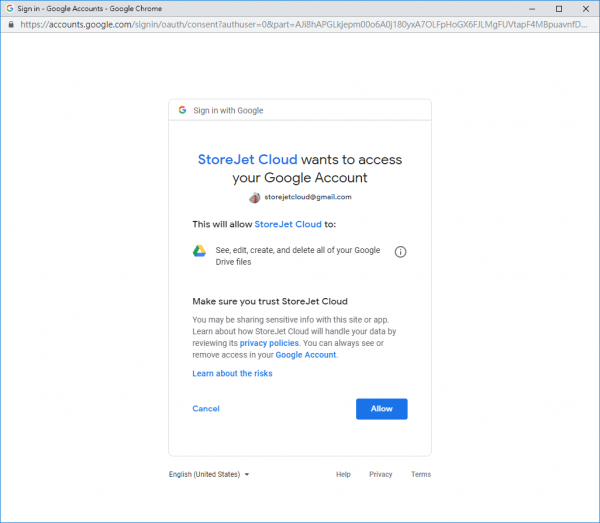
Google Drive
-
Click Login. Sign in to the desired Google account and click Allow to access Google Drive.

-
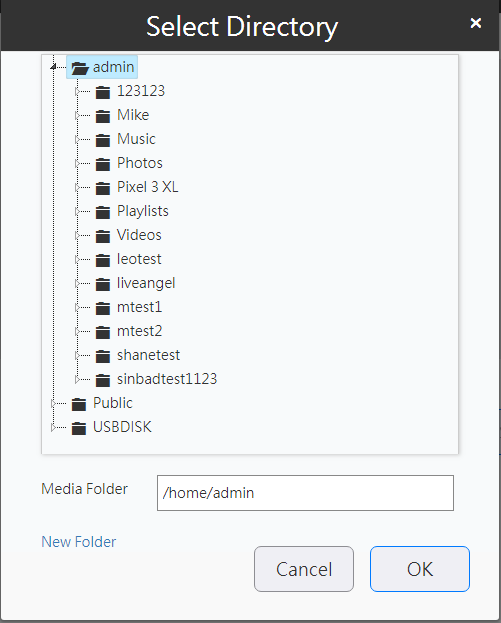
Specify a resource and a destination for back up.
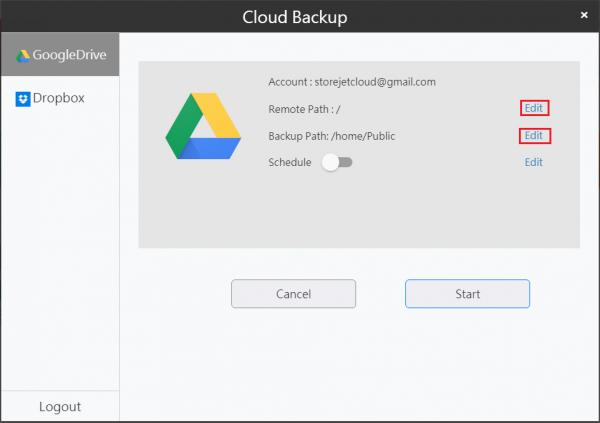
-
To enable scheduling, check Enable. This function can allow you to backup your Google Drive files routinely.
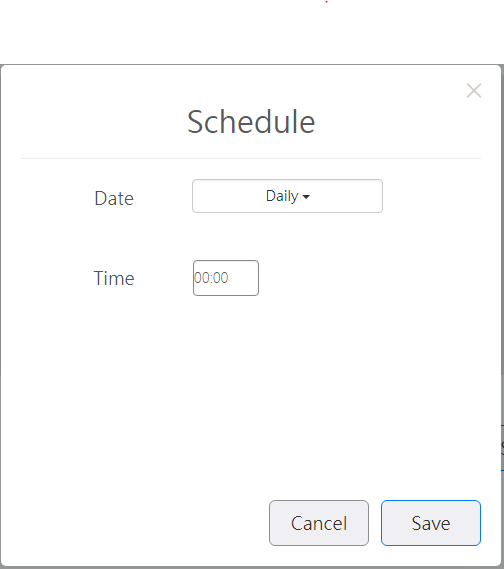
Notes: Examples of schedule settings are shown below.
Example 1:
Schedule : Daily. Time : 0:00.
The backup task starts at 0:00 am every day.
Example 2:
Schedule: Weekly Tuesday. Time : 21:00.
The backup task starts at 9:00 pm every Tuesday.
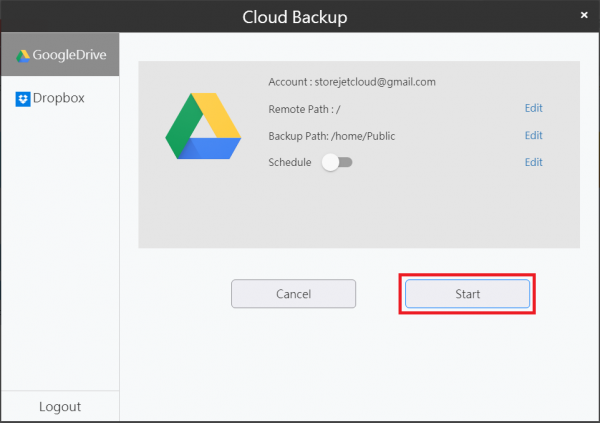
-
Click Start to backup all of your Google Drive files to StoreJet Cloud. All files will be downloaded to the path you previously specified.
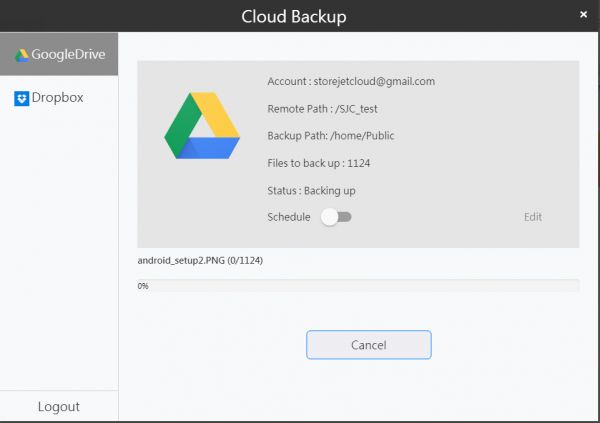
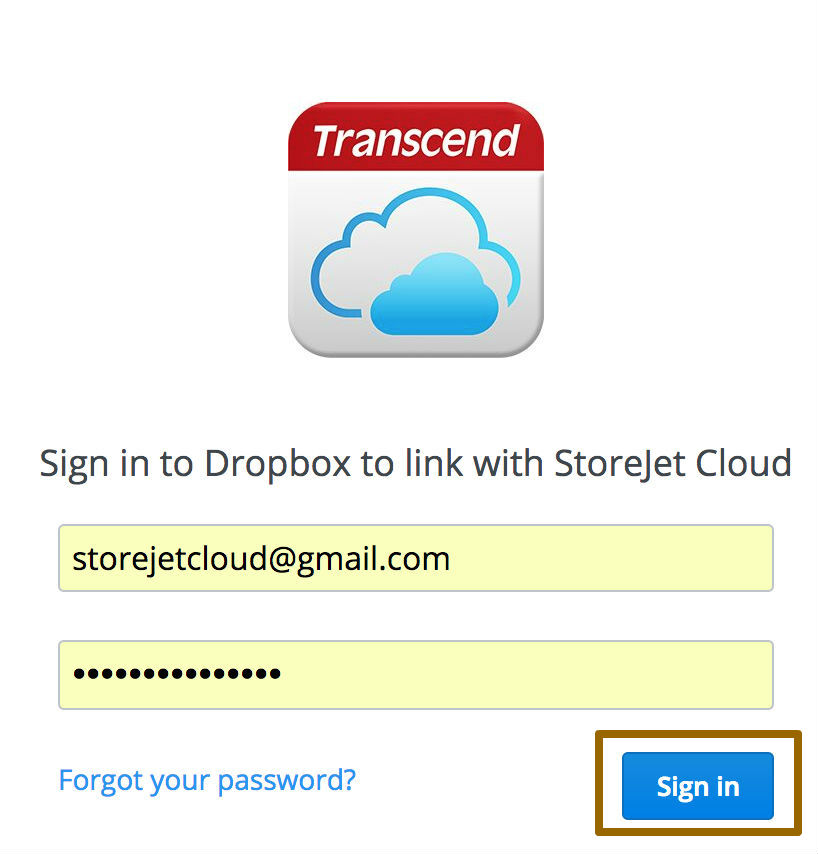
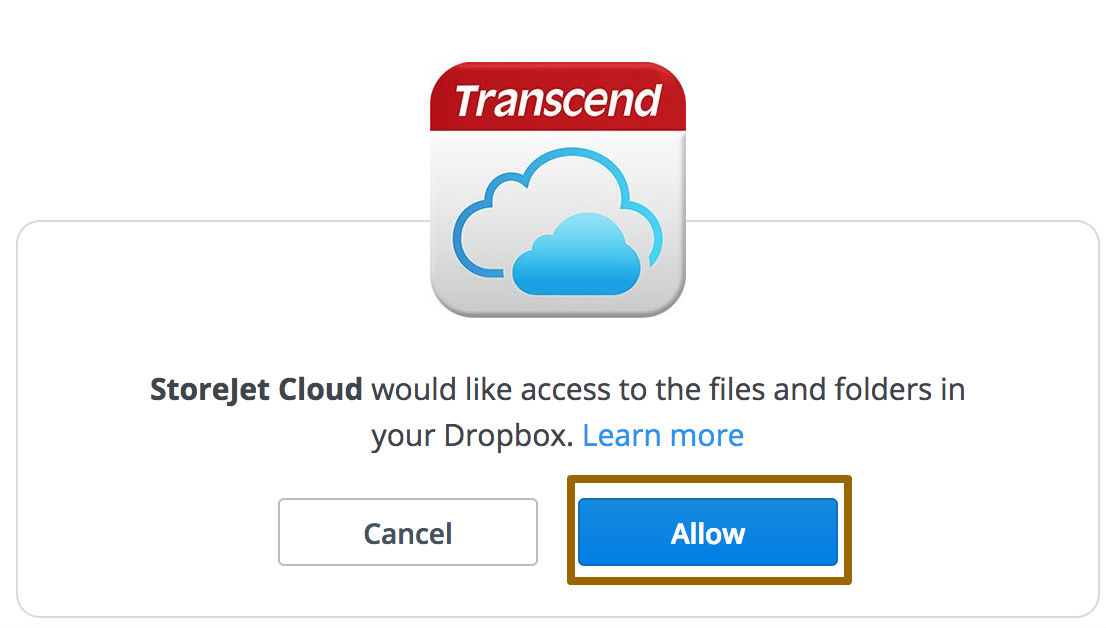
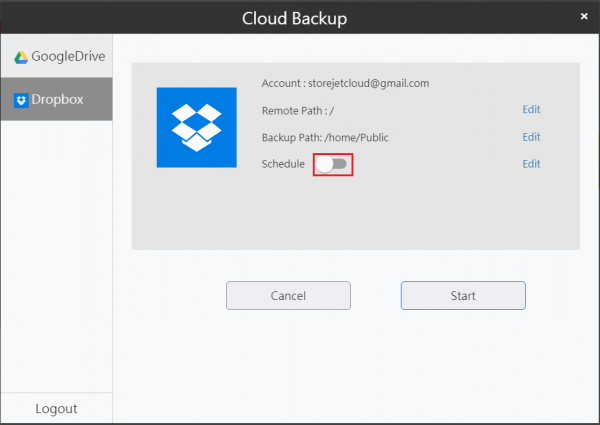
Dropbox
-
Click Login. Sign in to the desired Dropbox account and click Allow to access Dropbox.

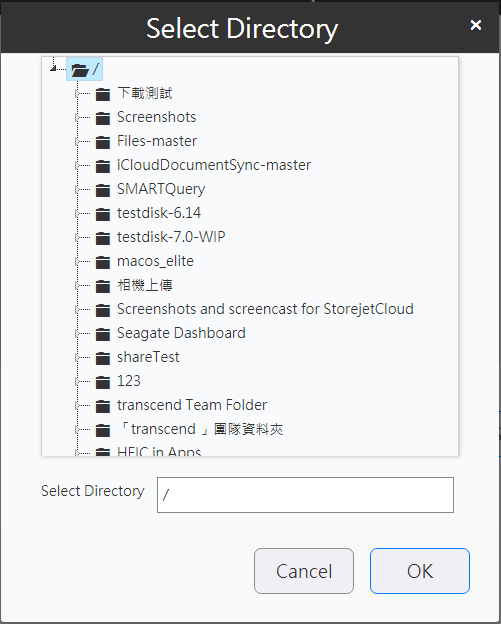
-
Specify the resource and the destination for backing up.

-
To enable scheduling, check Enable . This function can allow you to backup your Dropbox files routinely.

Notes: Examples of schedule settings are shown below.
Example 1:
Schedule : Daily. Time : 0:00.
The backup task starts at 0:00 am every day.
Example 2:
Schedule: Weekly Tuesday. Time : 21:00.
The backup task starts at 9:00 pm every Tuesday.
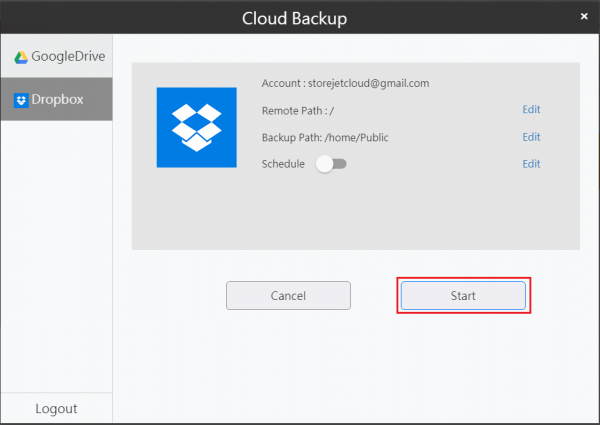
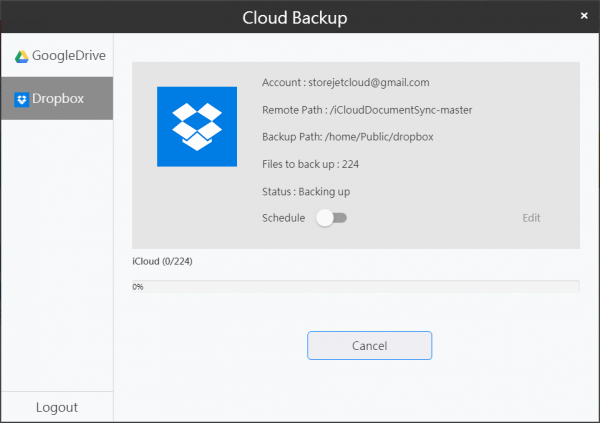
-
Click Start to backup all files of your Dropbox files to StoreJet Cloud. All files will be downloaded to the path you previously specified.
9. Using Time Machine Backup and Settings
Time Machine Settings (for Admin only)
Time Machine is a backup feature included in Mac OS X. To use your StoreJet Cloud as a backup destination for Time Machine, adjust it as described below.
-
In Settings > Click Services > Click Edit behind the AFP(Time machine).
-
Select a shared folder (ex.Public) as your backup destination for Time Machine.
-
Check both Guest and Time Machine then click Save.
Using Time Machine Backup
-
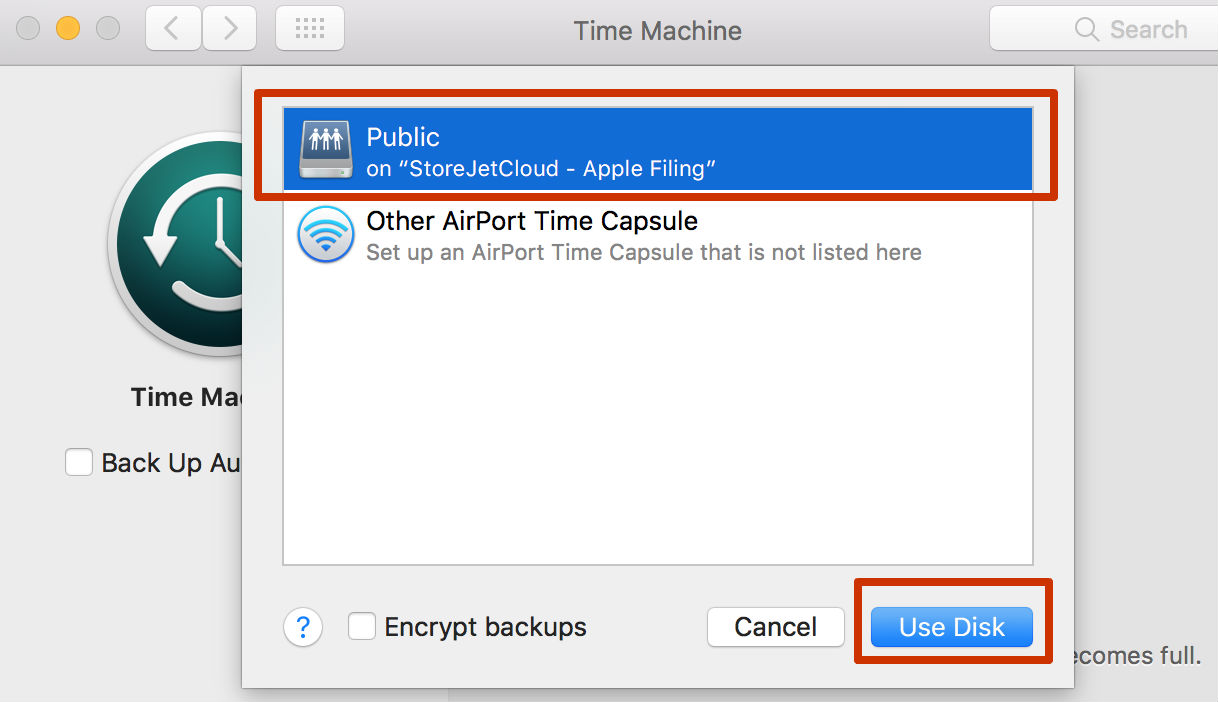
On the macOS, open System Setting > Click Time Machine.
-
Click Select Backup Disk > Select the StoreJet Cloud, then click Use Disk.
-
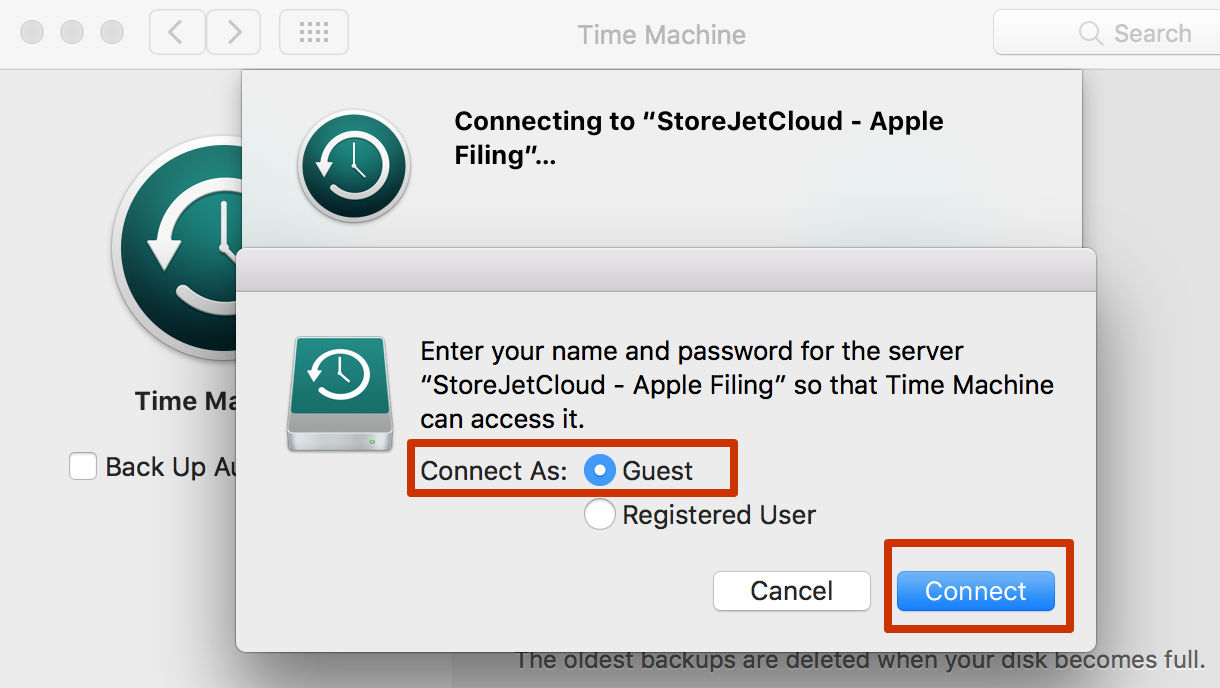
Select "Guest" or enter a username and password with access right to the shared folder on the StoreJet Cloud, then click Connect.
-
Time Machine will start backing up.
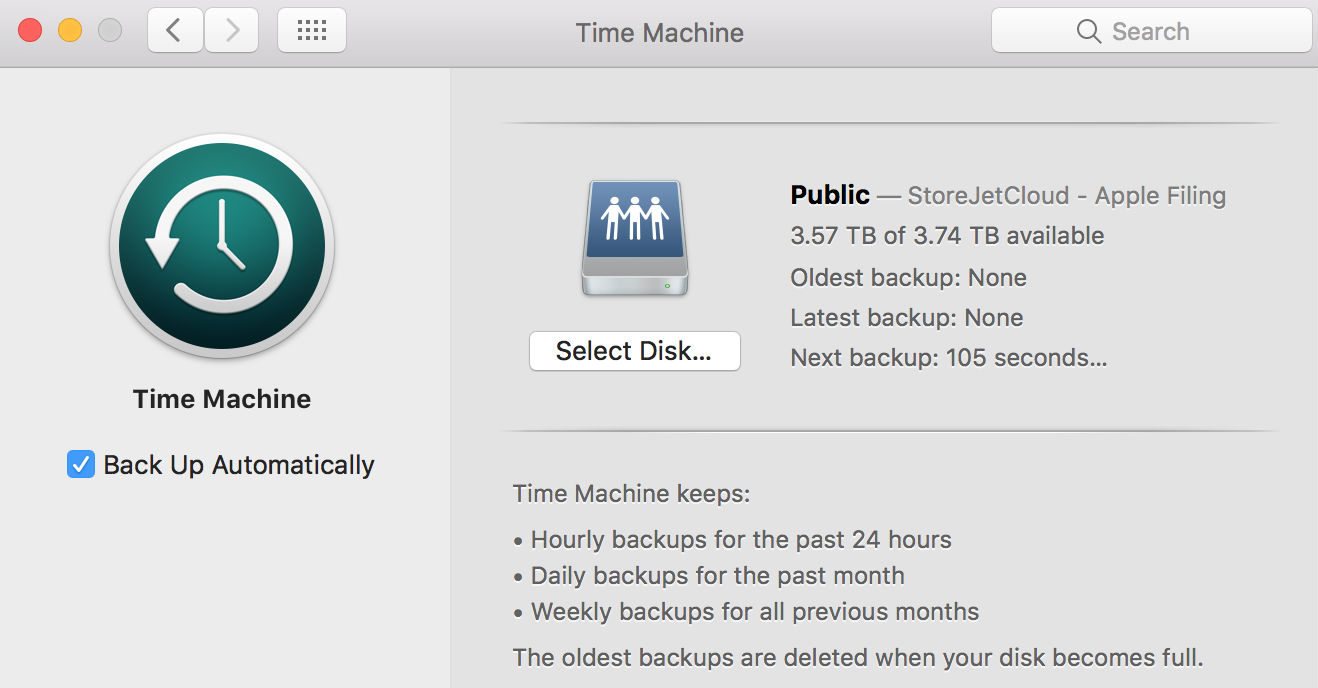
For information about the Time Machine, please see Apple's website : https://support.apple.com/en-us/HT201250
10. BitTorrent
Bittorrent allows you to employ the peer-to-peer file sharing (P2P) method which is used to access data and electronic files on the Internet.
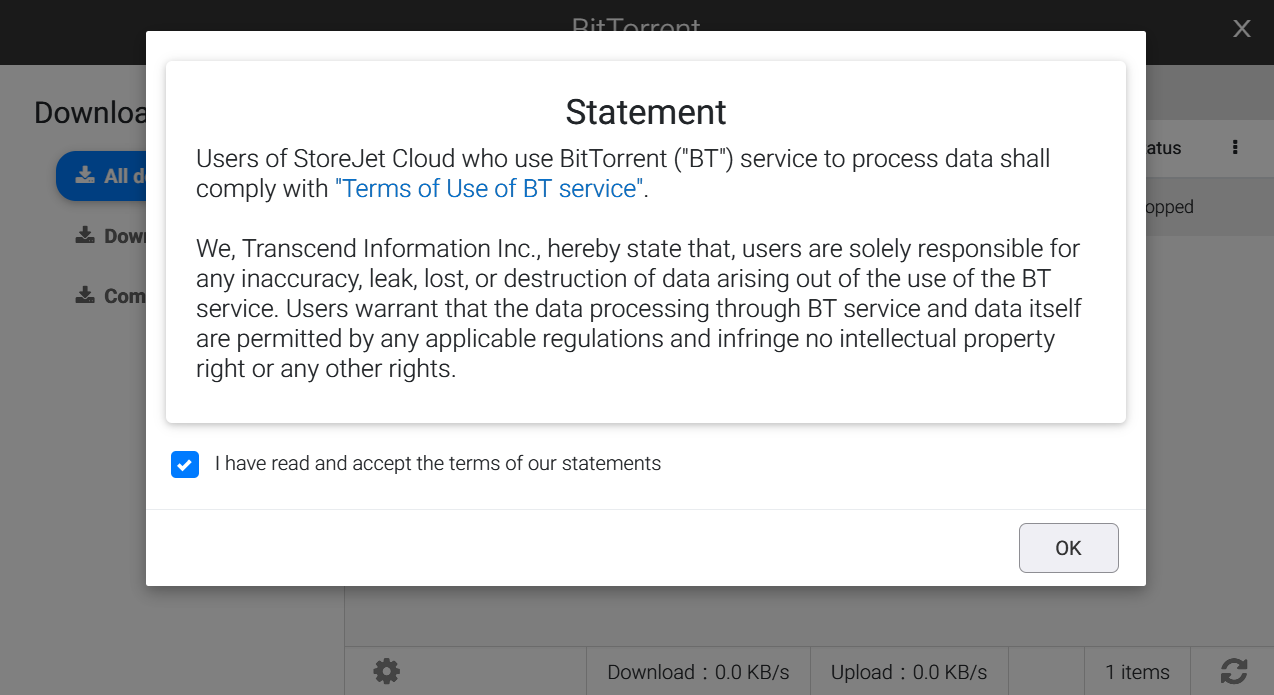
Note: Users of StoreJet Cloud who use the BitTorrent ("BT") service to process data shall comply with the "Terms of Use of BT service". We, Transcend Information Inc., hereby state that, users are solely responsible for any inaccuracy, leak, lost, or destruction of data arising out of the use of the BT service. Users warrant that the data processing through the BT service and the data itself are permitted by any applicable regulations and infringe no intellectual property right or any other rights.
-
Click on the icon

-
Read and agree to the terms of our Statement before using BitTorrent.
Create task
-
Click

-
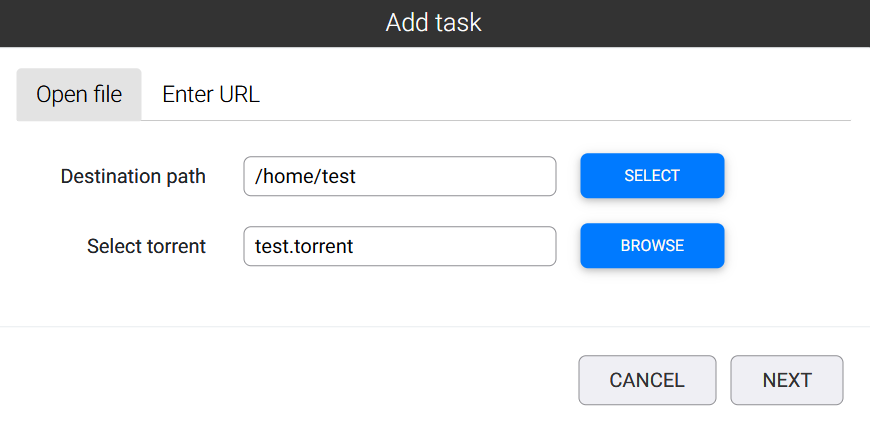
Click SELECT to select your downloaded directory and click BROWSE to choose the torrent file, then click NEXT.
-
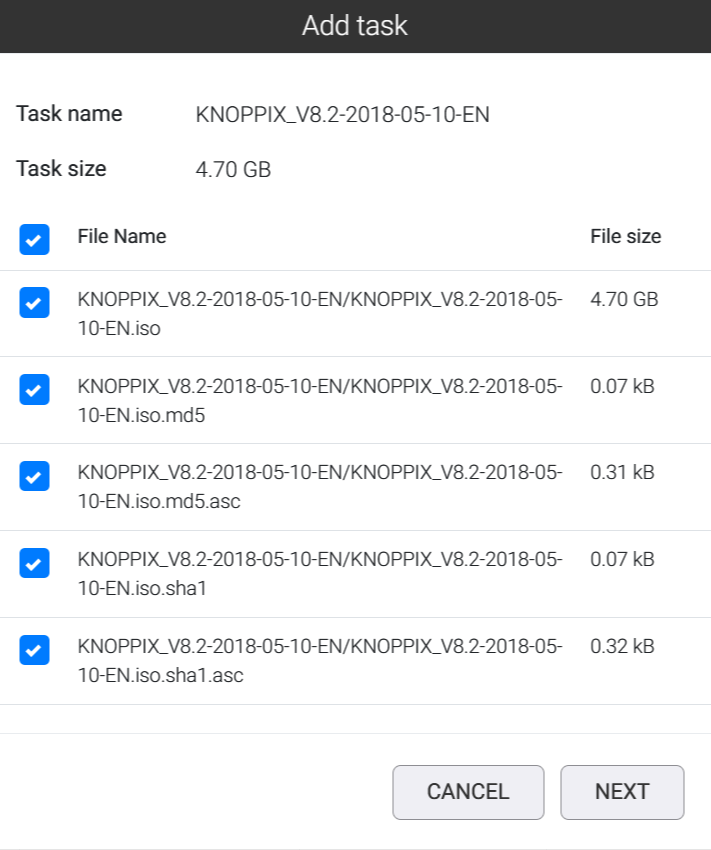
Select the files from the file list which you would like to download, then click NEXT.
-
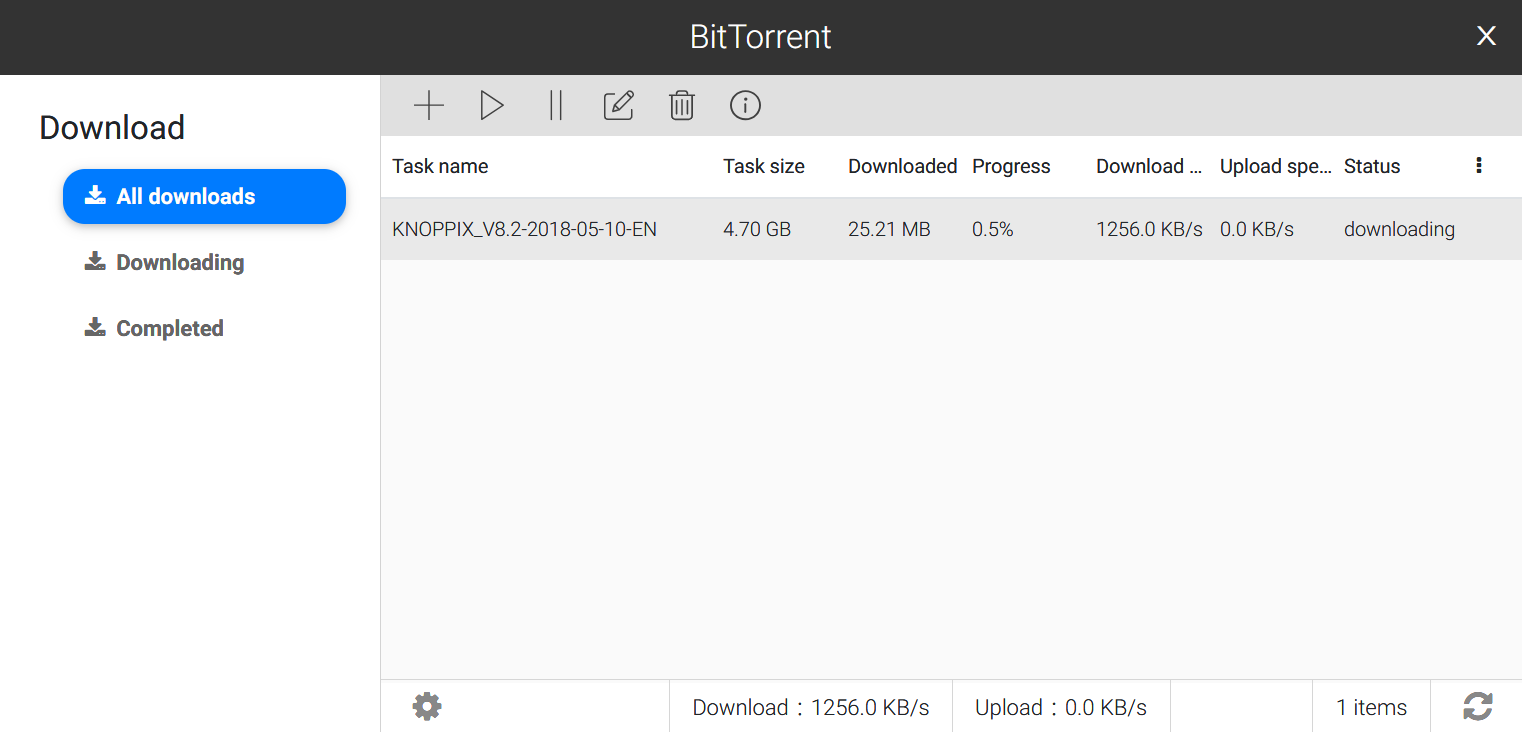
The BitTorrent list page will display your added tasks.
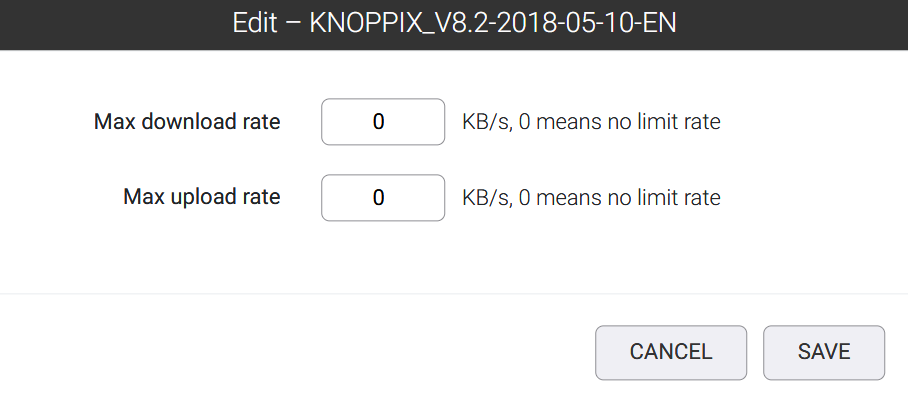
Edit task
-
Click

-
You may revise the settings of a specific BitTorrent task. After you have completed the revision, click SAVE.
Start task
Click ![]() to start a BitTorrent task.
to start a BitTorrent task.
Stop task
Click ![]() to stop a BitTorrent task.
to stop a BitTorrent task.
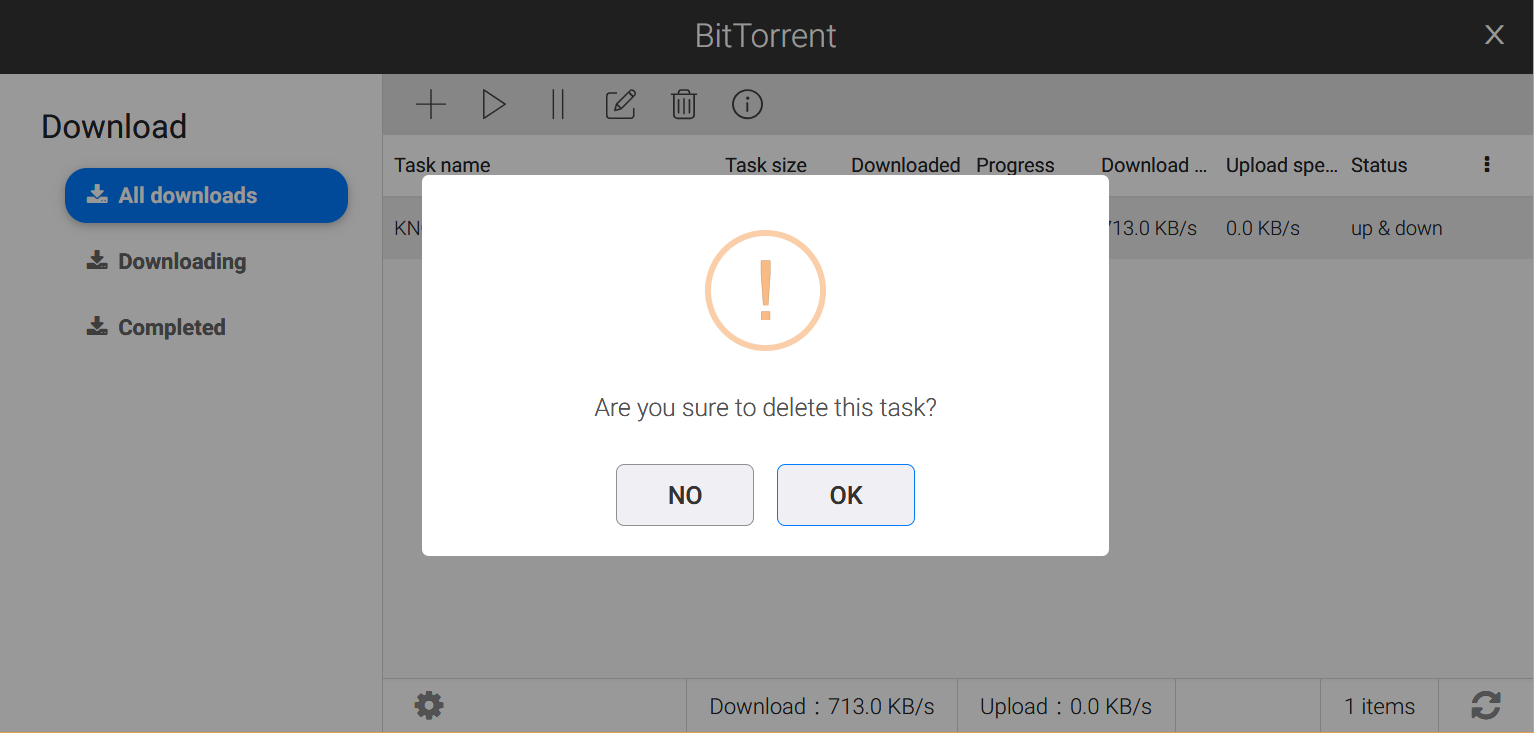
Delete task
-
Select a task and click

-
A double confirm dialog will pop up. Click OK, and the selected task will be deleted.
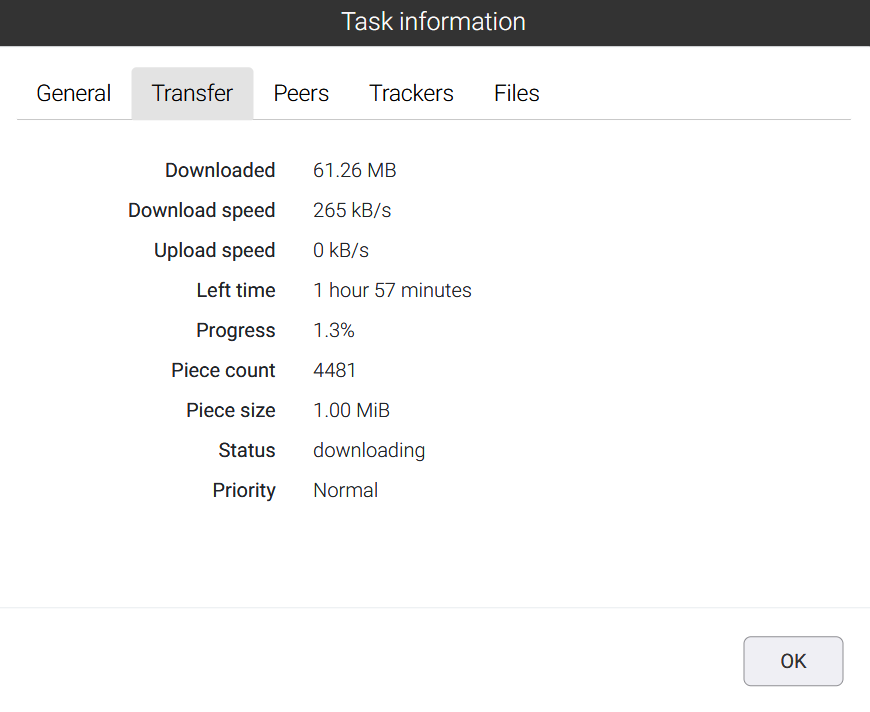
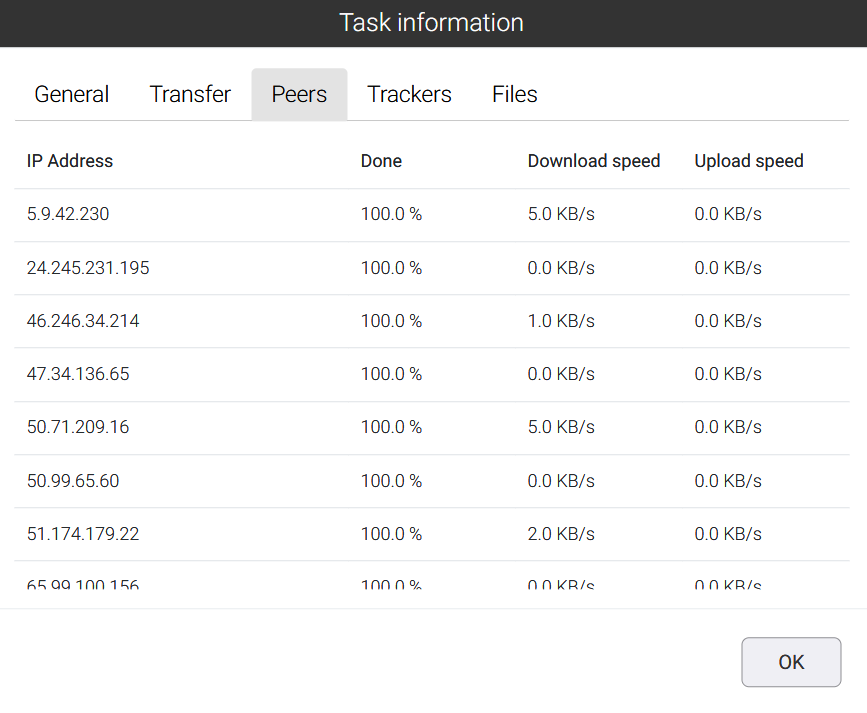
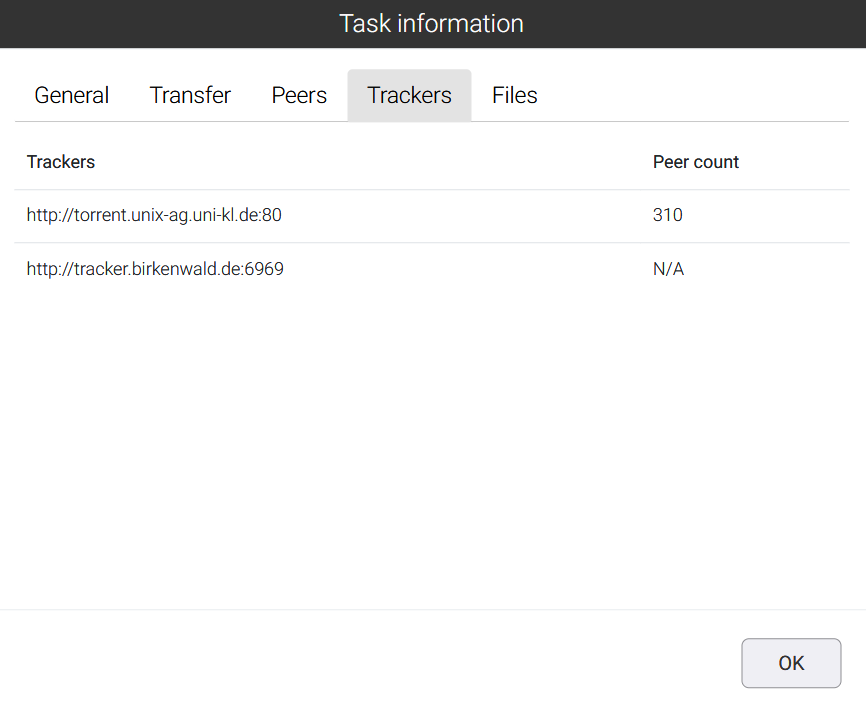
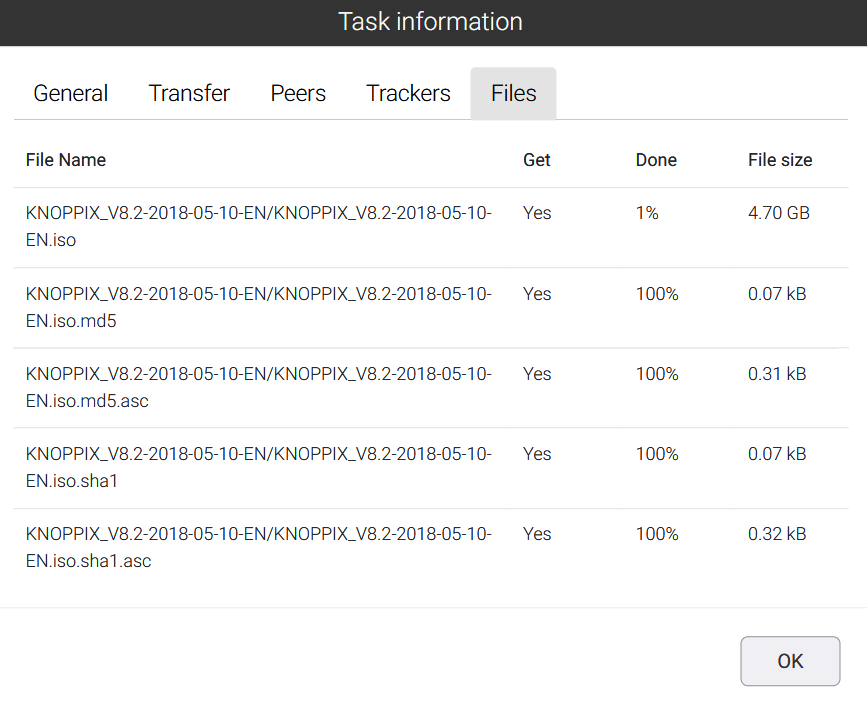
View task information
-
Click

-
Switch between the tabs to read the detailed information of General, Transfer, Peers, Trackers or Files information.

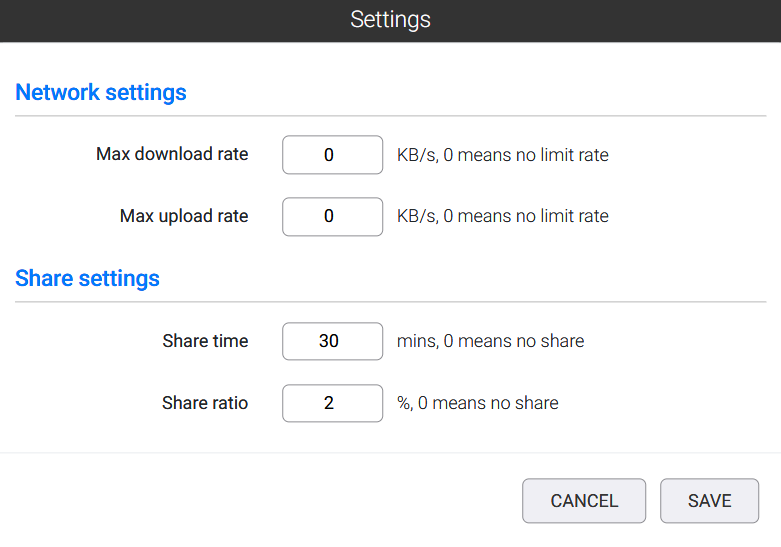
General settings
-
Click

-
- You may revise the general settings for all BiTtorrent tasks. After you have completed the revision, click SAVE.
11. StoreJet Cloud Default Settings
| Type | Enable/Disable |
|---|---|
| CIFS/SAMBA | Enable |
| AFP | Disable |
| FTP | Disable |
| WebDAV | Enable |
| Bonjour | Enable |
| Media server | Enable |
| iTunes | Disable |
| System Sleep mode | Disable |
| Wake-on-lan | Enable |
StoreJet Cloud Services Used Port
| Type | Port | Protocol |
|---|---|---|
| CIFS | smbd: 139 (netbios-ssn)、 445 (microsoft-ds) | TCP/UDP |
| nmbd: 137、138 | UDP | |
| AFP | 548 | TCP |
| FTP | 21 | TCP |
| NFS | 2049 | TCP/UDP |
| WebDAV | 80 (HTTP)、443 (HTTPS) | TCP |
| Media Server (Twonky) | 9000 | TCP |
| lighttpd | 80、8080 | TCP |
| iTunes (DAAP) | 3689 | TCP/UDP |
| Bonjour (mDNS) | 5353 | UDP |
| UPnP | 1900 | UDP |
12. Reset to Default
You can reset the admin password and IP address to default with the red function button. The IP address will only be restored from manual to DHCP. It is enabled by default.
- Power off the StoreJet Cloud.
- Hold down the function button then power on the StoreJet Cloud
- Hold down the function button until the power LED flashes Blue.
- The resetting process will start. Do not power off the StoreJet Cloud while the power LED is flashing.
- When the power LED glows a steady White, the resetting process is completed.
- Connect to StoreJet Cloud and setup a new password.
13. Replacing a Hard Drive (For SJC210 only)
If a drive fails, StoreJet Cloud Settings will show an error message. The hard drive will need to be replaced for the StoreJet Cloud to function properly. After replacing the drive, you will need to rebuild the RAID array.
Notes:
- Recommended Hard Drives.
- The total capacity of system is up to 16TB.
- When the StoreJet Cloud is powered on, never unplug or remove drives without dismounting them first. Always power off the StoreJet Cloud before replacing the drive.
- The new drive should have the same storage capacity as the old drive.
- Backup all data before replacing any drive as all data will be erased.
- To avoid damaging the StoreJet Cloud with static electricity, ground yourself by touching something made of metal before handling any sensitive electronic parts.
- Do not change the order of the hard drives in the StoreJet Cloud. For example, pulling out drive 1 and replacing it with drive 2 may cause data to be corrupted or lost.
-
Power off the StoreJet Cloud and remove all cables.
-
Open the front panel by pulling it from left and right sides.

-
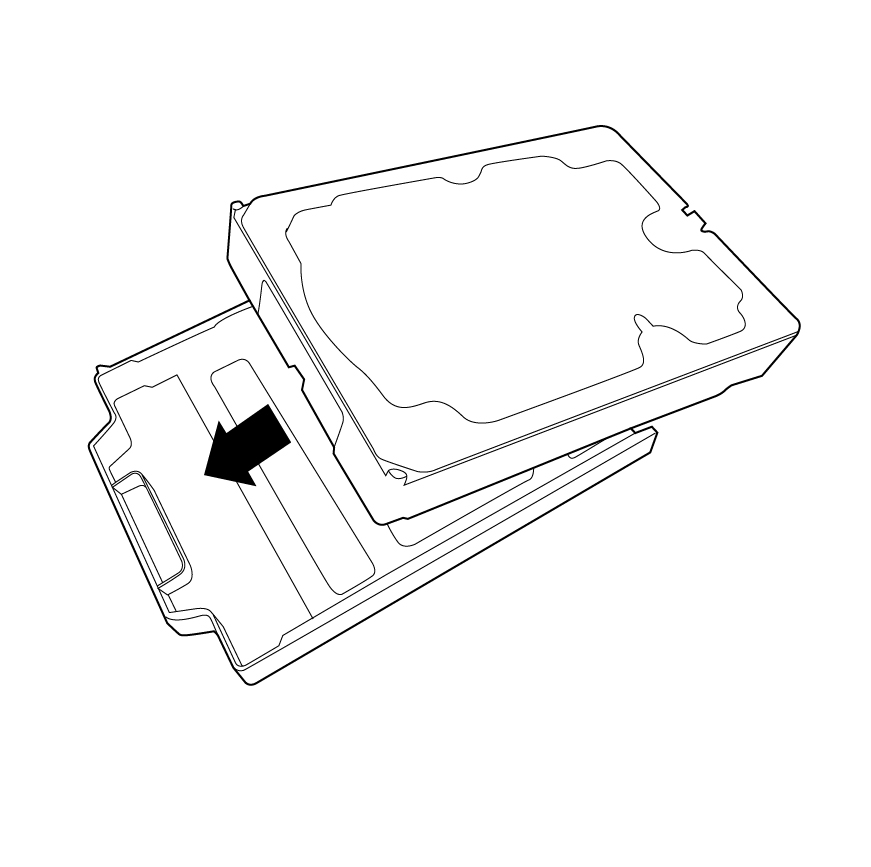
Pull out the failed drive's tray from the StoreJet Cloud. Notes: Do not press hard on top of the StoreJet Cloud.
-
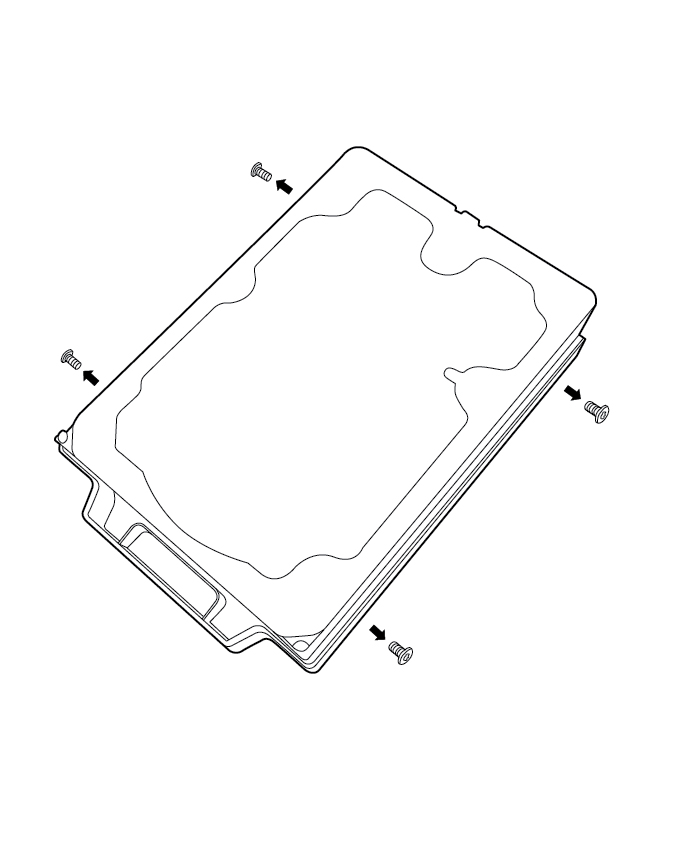
Remove the 4 screws and the drive from the tray.
-
Install a new drive(recommended the same capacity) in the tray.
-
Replace the four screws.
-
Insert the new drive into the original empty drive slot.
-
Close the front panel.
-
Reconnect all cables, then power on the StoreJet Cloud.
14. Recommended Hard Drives (For SJC210 only)
-
Seagate
Model Name Capacity Note ST4000VN008 4TB IronWolf ST4000VN000 4TB NAS HDD STBD4000100 4TB NAS HDD ST8000VN0022 8TB IronWolf -
WD
Model Name Capacity Note WD40EFRX 4TB WD RED WD40EZRZ 4TB WD BLUE WD80EFAX 8TB WD RED WD80EFZX 8TB WD RED -
Toshiba
Model Name Capacity Note HDWQ140AZSTA 4TB NAS HDD MD04ABA400V 4TB Surveillance HDD MD04ACA400 4TB Desktop HDD MN04ACA400 4TB NAS HDD MN05ACA800 8TB NAS HDD